How to jump start a car with cables: Easy guide
You've probably turned the key, heard that awful slow clicking sound, and immediately wondered: is this going to cost me a tow truck? Most of the time, the answer is no. How to jump start a car with cables is one of those car skills that looks intimidating the first time and takes about ten minutes once you've done it right.
The trick is knowing the right order, the right connection points, and what to skip when your battery looks a little different than expected.
A standard 12-volt automotive battery sits at around 12.6 volts when fully charged and drops below 11.8 volts when it's too weak to crank the engine, which is the voltage window most jumper cables are designed for. Per Battery Council International group sizing standards, batteries are matched to engine size, which is why a V8 or diesel often needs heavier 4-gauge cables while a small four-cylinder can get by with 6-gauge. As of 2026, the procedure itself hasn't changed, even though cars are loaded with more electronics than ever.
Let's start with figuring out what your battery is actually telling you.
Quick Answer
How to jump start a car with cables: park a donor vehicle close, turn both ignitions off, and connect red to the dead battery's positive terminal. Then red to the donor positive, black to the donor negative, and black to an unpainted metal ground on the dead car. Rev the donor to about 2000 RPM for two to five minutes.
Start the dead car. Disconnect in reverse order.
Why Jump Starting Matters and When It Works
Jump starting matters because dead batteries are still the single most common roadside breakdown in North America. AAA roadside data consistently lists dead batteries at the top of call reasons, ahead of flat tires and lockouts. If you've got a working set of jumper cables and a second car, you can bypass most of that wait.
It works when the failure is the battery itself, meaning the battery is simply discharged rather than internally shorted. A battery that lost its charge from leaving the headlights on, sitting through a cold snap, or going weeks without driving will usually accept a jump. A battery that won't hold a charge even after a 30-minute recharge has likely failed internally, and a jump will just get you to the parts store.
It does not work when the real problem is the alternator, the starter motor, or a wiring fault. If the dash lights come on bright but nothing happens at the key, you're probably looking at a starter. If the car runs after a jump but dies again within minutes, the alternator isn't charging the battery.
In both situations, you've got a repair, not a recharge.
It's also worth noting that modern cars with start-stop systems often use AGM or EFB batteries, which require the same connection order but benefit from a donor vehicle that supplies clean, stable voltage. These batteries recover better from a slow, steady charge than from the kind of high-amp spike you sometimes get from a weak donor.
First, Figure Out What's Wrong With the Battery
Before you grab the cables, spend thirty seconds on diagnosis. It saves you from jumping a battery that's actually fine, or worse, trying to jump a battery that's dangerous to touch.
Look at the battery's resting voltage
A healthy resting battery reads 12.6 volts. If you have a multimeter, anything between 12.4 and 12.6 is fine, around 12.2 is roughly 50 percent charged, and below 11.8 means a jump is a reasonable next step. Most drivers don't carry a multimeter, so use the symptoms instead.
If the engine cranks slowly and the dash lights dim heavily when you turn the key, the battery is weak but probably salvageable. If you get a single click or nothing at all, and the interior lights still work, the battery is deeply discharged. If nothing electrical works at all, you may have a fully dead battery or a disconnected terminal.
Check for corrosion, cracks, and leaks
Pop the hood and look at the terminals. A white, blue, or greenish powdery buildup around the posts is corrosion, and it acts like an insulator between the clamp and the post. A light dusting can be brushed off.
Heavy crusty buildup needs to be cleaned before the cables will make solid contact.
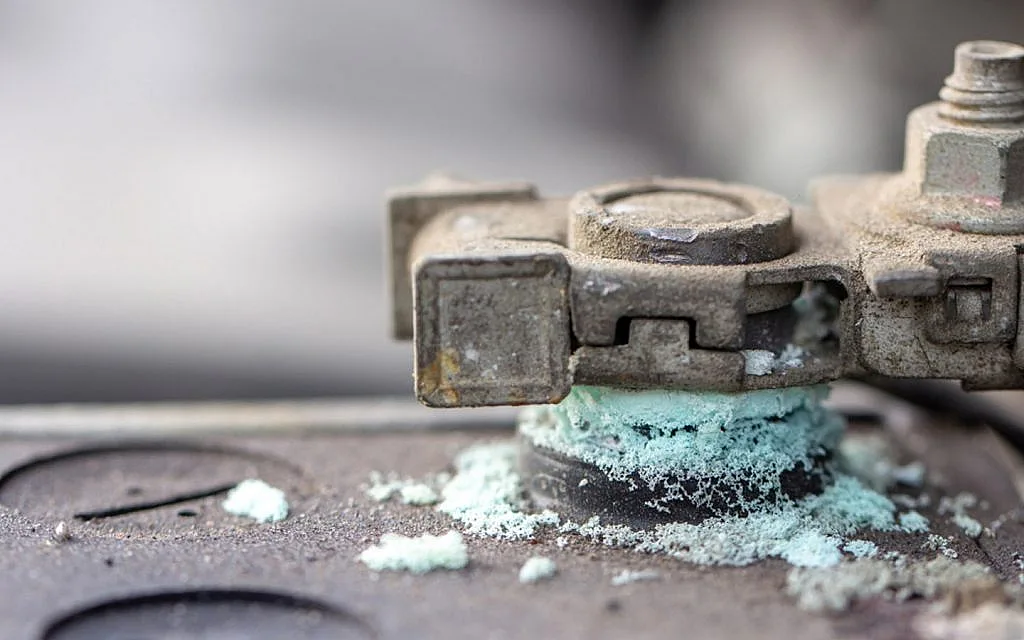
Look at the battery case too. A bulging side, a crack, or any sign of leaking fluid means the battery is done. Jumping a cracked battery can leak sulfuric acid or vent hydrogen gas at higher rates, both of which are bad news.
Replace it instead.
Decide: is this a jump-start job or a tow job?
Use this quick decision branch:
- If the battery is intact, the terminals are reachable, and the car cranks slowly, jump it.
- If the battery is cracked, leaking, or swollen, don't jump it. Call for service.
- If the car has no electrical power at all and the terminals look fine, check for a loose or disconnected terminal before jumping.
- If the engine doesn't crank even with a good jump, the issue is downstream (starter, alternator, or wiring).
What You'll Need Before You Start
You don't need much, but you do need the right stuff. Skimping on any of these is the most common reason a jump fails or causes damage.
Jumper cables sized for your engine
Cable thickness matters more than most people realize. A 10-gauge cable might crank a four-cylinder on a warm afternoon. It will struggle to start a V8 in winter.
Here's the rule of thumb based on engine size and aggregate user reports:
| Engine / Use Case | Recommended Cable Gauge | Typical Length |
|---|---|---|
| 4-cylinder, small sedan | 8 or 6 gauge | 12 to 16 ft |
| V6, most SUVs | 6 gauge | 16 ft |
| V8, light truck | 4 gauge | 16 to 20 ft |
| Diesel, large truck | 4 gauge or 2 gauge | 20 to 25 ft |
Length matters too. Cables that are too short force the cars to nearly touch, which is dangerous if one rolls. Cables that are too long add resistance.
The sweet spot for most sedans is 12 to 16 feet, and 16 to 20 feet for trucks and SUVs.
Safety gear that earns its keep
At minimum, wear ANSI Z87.1 rated safety glasses. Batteries can vent hydrogen gas, and a small spark near the vent can pop the cell like a firecracker. Insulated gloves aren't strictly required, but they keep battery acid off your skin if a clamp slips.
Keep a flashlight handy if it's dark, and have a wire brush or an old toothbrush for cleaning corroded terminals. A pair of pliers helps if a terminal clamp is stuck.
A donor vehicle with a healthy battery
The donor battery should be at or near full charge. A weak donor (one that itself struggles to start) won't transfer enough cranking amps. If both cars have been sitting, jump the smaller engine and run it for ten minutes before trying the larger one.
Optional but useful: a multimeter and a memory saver
A multimeter lets you confirm the donor battery is good (above 12.4 volts) before you start. A memory saver plugged into the cigarette lighter preserves radio presets and ECU learned values during the disconnect, though it adds a step and a small risk if used wrong. For most drivers, it's an optional extra.
Jump Start Decision Tree — Which Path Fits Your Situation
This is where most generic guides fall apart. The right procedure depends on what you're working with. Run through these branches before you connect a single clamp.
Branch A: you have a donor vehicle and standard flooded batteries
This is the textbook case. Both cars use conventional lead-acid batteries, terminals are visible and accessible, and you've got at least 12 feet of 6-gauge cable. Follow the standard four-clamp sequence covered in the next section.
Branch B: you have a donor vehicle but the dead car has an AGM or start-stop battery
Same connection order, but the dead battery is more sensitive to voltage spikes. Run the donor at idle (not high RPM) for the first minute, then bump to 2000 RPM for the bulk charge. Don't crank the dead engine for more than five seconds at a time, with thirty-second rests between attempts.
Branch C: no donor vehicle is available
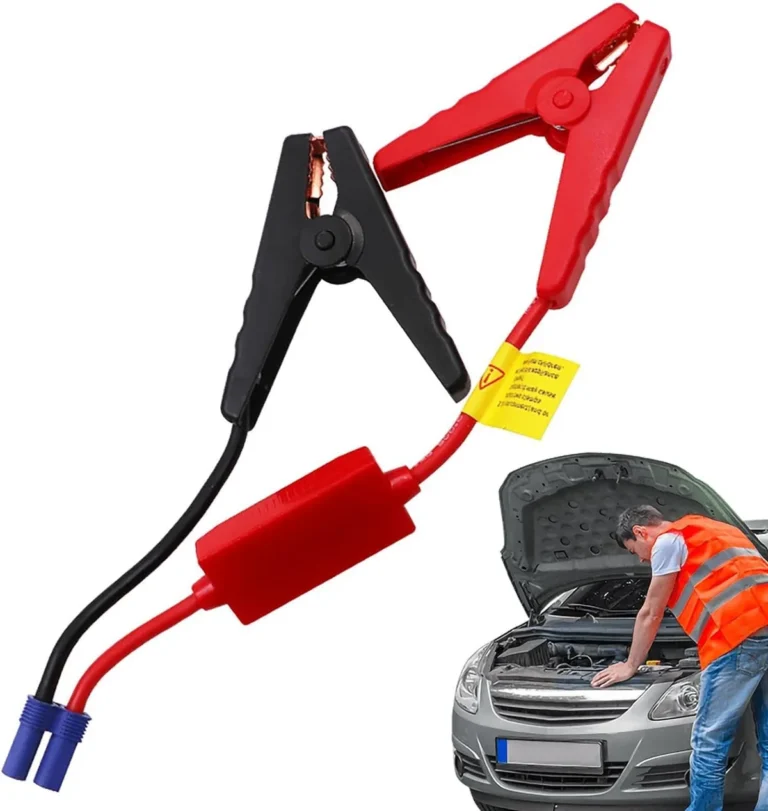
Use a portable lithium jump box instead. Connect red to positive, black to a ground, and crank. Make sure the jump box is charged first.
A jump box won't restart a battery with zero voltage, so if the box doesn't fire, the battery may be too dead to recover without a slow charger.
Branch D: the donor car is also weak or underpowered
Sequence matters here. If the donor is smaller than the dead car, run the donor for five minutes before attempting to crank the dead engine. If the donor is larger, you can usually crank the dead car within two minutes.
Either way, keep the donor running throughout.
Branch E: terminals are hard to find or hidden
Many European cars (BMW, VW, Audi, some Mercedes) put the battery under a cover or in the trunk, with a designated jump-start post in the engine bay. The positive post is usually red and labeled. The negative is a designated grounding lug or a marked bracket.
Check the owner's manual for the exact location. Never connect to random metal in the engine bay if you can't confirm it's a proper ground.
Branch F: it's raining or snowing
The procedure works in wet weather, but the rules tighten up. Don't let the clamps touch each other, the body of either car, or wet painted surfaces. Keep the donor and dead cars from touching.
Voltage will travel through the water on the ground if a clamp slips, so dry the terminal area with a rag before clamping.
Branch G: the battery is frozen
Don't try to jump it. A frozen battery has likely cracked internally even if you can't see it. Thaw it indoors for several hours first.
If it still won't hold a charge, replace it.
Step-by-Step: Jump Starting a Car with Cables (Standard Procedure)
Once you've matched your situation to the right branch, the physical procedure is the same. Move slowly, double-check the clamps, and don't rush the order.
Step 1: Position the cars and prep
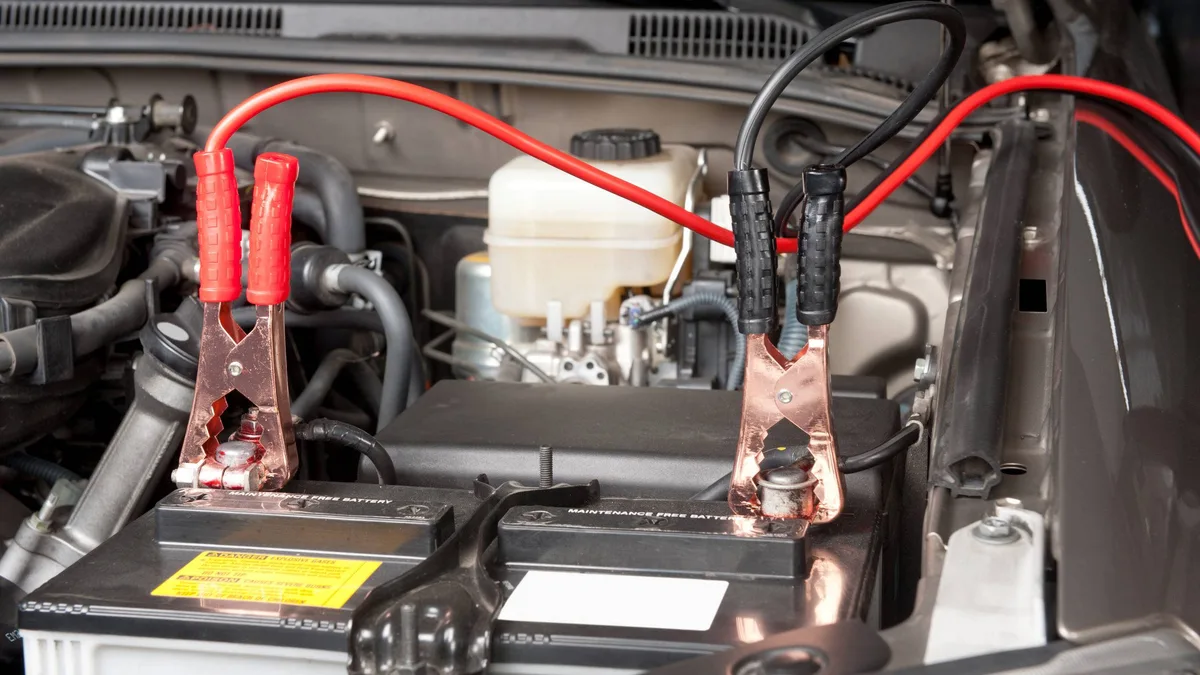
Park the donor vehicle close enough that the cables reach with some slack, but make sure the two cars are not touching. Metal-to-metal contact between the cars creates a direct ground path that can cause electrical issues. Turn off both ignitions, remove the keys, and set the parking brakes.
Pop the hoods and locate the batteries. If terminal covers are present, flip them open. Identify the positive (+) and negative (−) terminals on each battery.
The positive post is usually larger and marked with a red cover or a "+" stamp. If anything looks unusual, stop and consult the owner's manual before connecting anything.
Step 2: Connect the cables in the correct order
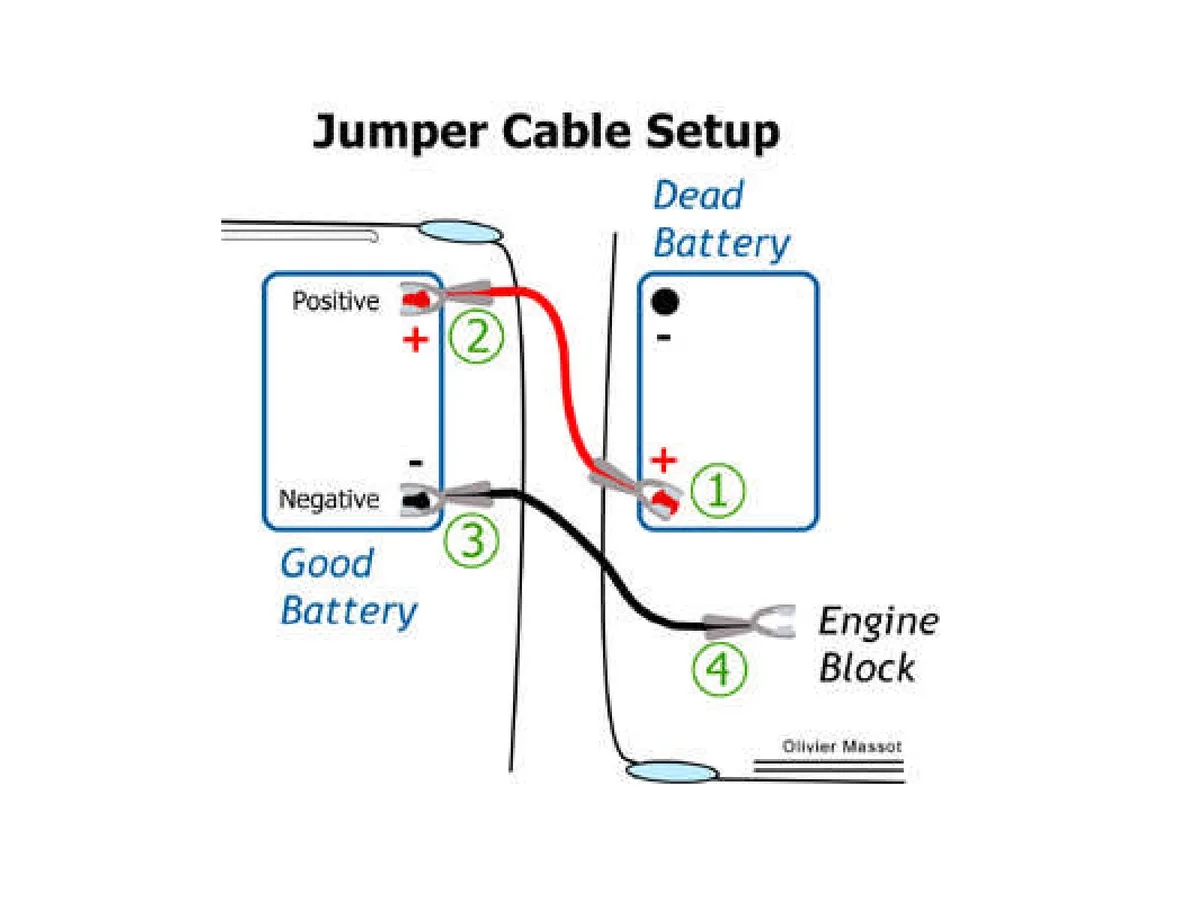
The order matters because each step builds on the previous one. Here's the sequence:
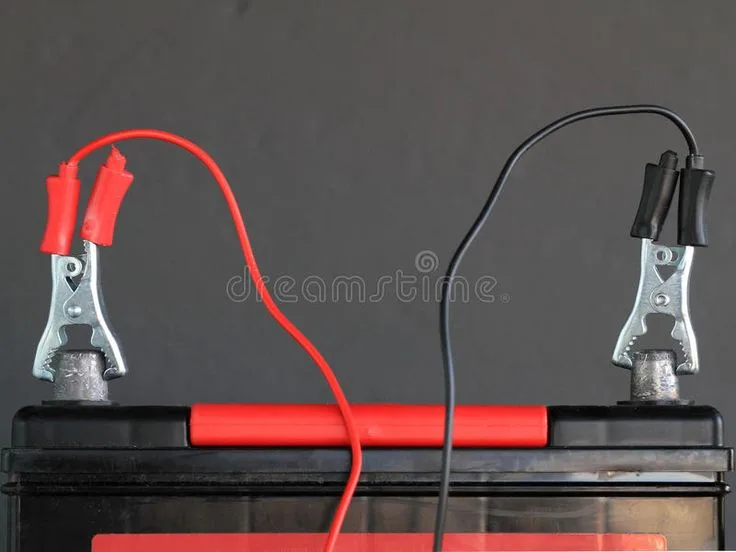
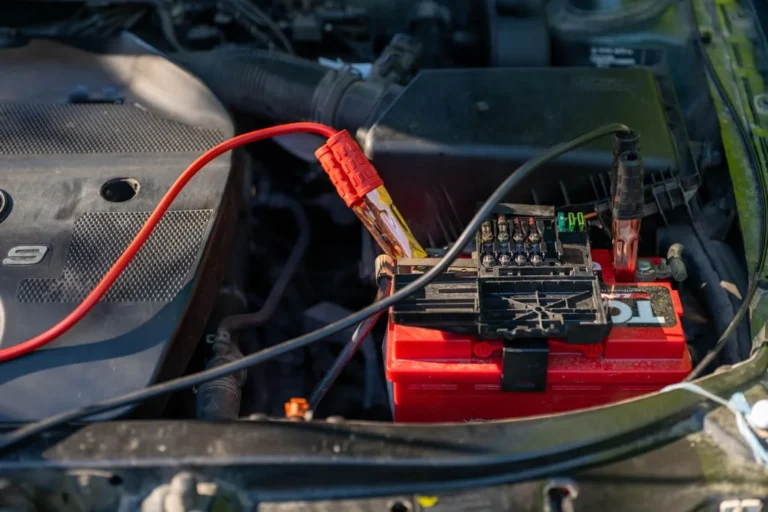
- Red clamp to the positive (+) terminal of the dead battery.
- Red clamp to the positive (+) terminal of the donor battery.
- Black clamp to the negative (−) terminal of the donor battery.
- Black clamp to an unpainted metal ground on the dead car (engine bracket, alternator bracket, or a designated ground lug, never the dead battery's negative post).
Why this order? Connecting the last clamp to a remote ground instead of the dead battery's negative post keeps any spark away from the battery. Batteries off-gas hydrogen, and a spark at the wrong terminal can ignite it.
The remote-ground method is recommended by manufacturer service bulletins across most major brands.
Make sure each clamp has solid metal-to-metal contact. Wiggle it. If it spins on the post, tighten the clamp or clean the corrosion off first.
Step 3: Charge the dead battery from the donor
Start the donor vehicle and let it idle. After a minute, gently rev the engine to around 2000 RPM and hold it there. This pushes higher amperage through the cables.
Let the dead battery absorb the charge for two to five minutes before attempting to start.
If it's cold out, push this to five minutes. Cold batteries accept charge slower than warm ones.
Step 4: Crank the dead engine
Turn the key in the dead car. If it starts, leave it running. If it doesn't, wait thirty seconds and try again.
Don't crank for more than five seconds at a stretch. Long cranks overheat the starter motor and risk welding the contacts.
If the engine still won't fire after three or four attempts, the problem isn't the battery. Move to the troubleshooting section.
Step 5: Disconnect in reverse order
With both engines running, disconnect the cables in the exact reverse order you connected them:
- Black clamp from the ground on the dead car.
- Black clamp from the negative terminal of the donor battery.
- Red clamp from the positive terminal of the donor battery.
- Red clamp from the positive terminal of the dead battery.
Keep the clamps from touching each other or any painted surface as you remove them. Lay the cables aside before doing anything else.
Step 6: Let the jumped car recharge
The jumped car needs 20 to 30 minutes of running or idling to put a meaningful charge back into the battery. Driving is better than idling because the alternator spins faster under load. Don't turn the engine off until you've either driven it for half an hour or you have a battery charger ready.
Cable Connection Order and Why It Matters
The order isn't folklore. It's there because each connection builds on the last to keep sparks away from the battery.
The dead battery's positive post gets the first red clamp because the battery is at its lowest state and the donor side is still isolated. Connecting the donor's positive second lets current begin flowing through the red lead. The donor's negative third completes the donor side.
The dead car's negative is connected last, to a remote ground, because any spark from that final clamp is then far from the battery's vent caps.
Reverse the order and the final spark happens right on the battery, which can ignite hydrogen and pop a cell. That's not theory. Manufacturer service bulletins from Ford, GM, and Toyota all specify the same four-clamp order for the same reason.
Jump Starting Without a Donor Vehicle (Jump Box Method)
If no second car is around, a portable lithium jump box does the same job. Aggregate user reports show that a 1000-amp peak box will crank most four- and six-cylinder engines, and a 2000-amp unit handles V8s and small diesels.
Connect red to positive and black to a metal ground on the dead car. Most jump boxes also work whether you clamp black to the negative post or to a ground, since there's no donor battery to vent. Crank the engine within 30 seconds of connecting.
Remove the black clamp first, then the red. Recharge the box afterward so it's ready for next time.
Common Jump Start Mistakes That Damage Cars
The procedure looks simple, but mistakes are common and the consequences range from annoying to expensive.
Reversing polarity. Red on negative and black on positive sends current backward through both electrical systems. You can blow fuses, fry the ECU, or kill the alternator.
Modern cars with sensitive electronics are especially vulnerable.
Connecting the last black clamp to the dead battery's negative post. That puts the final spark next to the vent caps, exactly where hydrogen collects. Use a remote ground instead.
Letting the clamps touch each other or the car body while connected. A momentary short can weld the clamp to the metal and spark violently.
Cranking for more than five seconds at a time. Long cranks overheat the starter. Three short attempts with thirty-second rests work far better.
Jumping a frozen, cracked, or leaking battery. Replace it instead.
Skipping the donor rev. A donor at idle doesn't push much amperage through the cables. Hold 2000 RPM during the charge phase.
Forgetting to drive afterward. A 30-minute idle session doesn't recharge a deeply discharged battery enough. Take it on the highway.
What to Do If the Jump Doesn't Work
Three or four failed attempts means the battery isn't your problem. Run through this short list before calling for service.
First, recheck the clamps. A loose or partially connected clamp is the most common cause of a failed jump. Wiggle each one and confirm it's biting metal, not just corrosion.
Second, check the ground connection. If you grounded to a painted or greasy bracket, the clamp isn't making contact. Move it to a clean metal surface.
Third, let the donor charge the dead battery longer. Five to ten minutes of donor running at 2000 RPM can rescue a deeply discharged battery that won't crank on a quick charge.
If none of that works, you're likely dealing with a starter, alternator, or parasitic draw. A parts store can diagnose all three quickly. Most will test the battery and alternator for free.
Safety Rules You Can't Ignore (Sparks, Fumes, Frozen Batteries)
Jump starting isn't dangerous if you respect the chemistry happening inside the battery. Lead-acid cells release hydrogen gas continuously, and hydrogen ignites at concentrations as low as 4 percent in air. A single spark near the vent caps is enough to set it off.
That is why the four-clamp order matters and why the last clamp goes to a remote ground instead of the negative post. It is also why you should keep flames, cigarettes, and any spark-producing tool away from the battery.
Per OSHA battery handling guidance, eye protection is required any time you work around a charging or recently charged battery. The vent caps can pop if hydrogen ignites, sending acid mist into the air. A pair of safety glasses and a rag to wipe the terminals are not optional extras.
A frozen battery is the other risk people underestimate. Water expands about 9 percent when it freezes, which is enough to split a battery case from the inside. The crack is often invisible, but acid will seep out when it thaws.
A leaking battery is unsafe to handle and unsafe to jump. Replace it.
If acid splashes on skin or clothing, flush with water for several minutes. Battery acid is dilute sulfuric acid and burns slowly. The longer it sits, the more damage it does.
Baking soda neutralizes acid on metal surfaces, so keep a small box in the garage if you work on cars.
What to Do After the Jump Starts (Driving, Recharging, Replacing)
The jump got the engine running, but the job isn't done. Here's how to know what's next.
Drive it for at least 20 to 30 minutes
Idling charges the battery slowly. Highway driving at a steady 1500 to 2000 RPM charges it much faster. Aim for at least 20 minutes of uninterrupted driving.
Stop-and-go traffic counts, but a steady cruise is more efficient.
Avoid turning the engine off the moment you get home. If the battery was deeply discharged, it needs the full charge cycle. Pull into a shop, let them load-test it, and decide from there.
Test the battery and alternator
Most auto parts stores will load-test the battery for free. A load test applies a simulated cranking load and measures how the battery responds. A healthy battery holds above 9.6 volts under load for 15 seconds.
Below that, it's on its way out.
Per SAE J537 testing standards, a battery that fails a load check is no longer reliable, even if it just successfully jumped the car. Replace it.
While you're there, ask them to check the alternator output. It should read 13.8 to 14.4 volts with the engine running. Higher than 15 volts means a voltage regulator problem.
Lower than 13 volts means the alternator isn't charging, and the car will die again the next time you shut it off.
Decide: replace or keep
If the battery is under three years old and the alternator is good, the jump was probably caused by a one-time drain (left lights on, sat for weeks). Keep it, but get a trickle charger for any vehicle you store.
If the battery is over four years old, it has likely reached the end of its service life. Average lead-acid battery lifespan is three to five years, with hot climates shortening it. Replace it before it strands you again.
Frequently Asked Questions
Which cable do you connect first when jump starting?
Connect red to the dead battery's positive terminal first, then red to the donor's positive. Next, black to the donor's negative, and finally black to an unpainted metal ground on the dead car. Disconnect in reverse order.
This sequence keeps any final spark away from the battery vents.
Can you jump a car in the rain?
Yes, with extra care. Keep the clamps dry, the cars from touching, and disconnect immediately if you see heavy sparking. Voltage will travel through standing water, so wipe down the terminals with a rag before clamping and avoid letting the cables rest in puddles.
How long should you let the donor car run before trying to start the dead one?
Two to five minutes is the standard window. In cold weather, push it to five minutes. The dead battery needs time to absorb enough charge from the cables to crank the engine on its own.
What if the car still won't start after a jump?
Three common reasons. The battery is too dead to hold a surface boost. The cables are too thin or too long to deliver enough amps.
Or the problem isn't the battery at all, it's the alternator, starter, or a parasitic draw. If three or four jump attempts fail, stop and have the system tested.
Do you need to replace a battery after jumping it?
Not always. If the battery is under three years old and holds a charge overnight, keep it. If it is over four years old, fails a load test, or dies again the next morning, replace it.
Average lead-acid lifespan is three to five years, and hot climates shorten that.
Is it safe to jump a car with a frozen battery?
No. A frozen battery has likely cracked internally, and jumping it risks acid leaks or a hydrogen ignition. Thaw it indoors for several hours first.
If it still won't take a charge, replace it rather than try to force a jump.