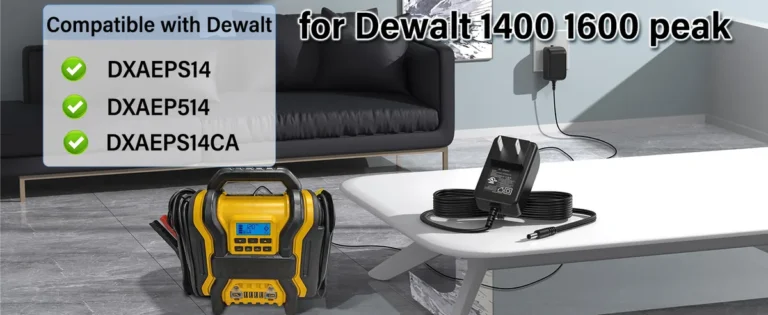
How Stanley Fatmax Jump Starter How to Charge
Charging a Stanley FatMax jump starter isn't complicated, but it isn't one-size-fits-all either. The exact steps depend on which FatMax model you own, how depleted the battery is, and whether you're charging from a wall outlet or your car's 12V socket. If you've ever grabbed the unit months after storing it and found it dead, you're not alone.
That's the most common frustration owners run into.
The good news: most Stanley FatMax models, whether they're older sealed lead-acid units or newer lithium-ion packs, recharge fully in 3 to 5 hours from a standard 120V wall outlet. Per Stanley's product documentation, you can also top them off slowly through the 12V cigarette lighter socket, which takes longer but works in a pinch. As of 2026, Stanley's lineup still uses the same core charging logic across the FatMax line, though indicator behavior and port placement vary.
Let's start by figuring out exactly which unit you're holding.
Quick Answer
Plug your Stanley FatMax jump starter into a 120V wall outlet using the included AC adapter. Charge until the indicator light turns solid green, usually 3 to 5 hours. Older lead-acid models can also charge from your car's 12V socket, but it takes longer.
Which Stanley FatMax Model Are You Charging? (Quick ID Check)
Before you plug anything in, you need to know which FatMax you have. The charging method is almost identical across the line, but the indicator light behavior, charge time, and battery chemistry differ enough that guessing can cost you hours of waiting, or worse, damage the pack.
The Main Models You'll Find in the Wild
Here's how the most common FatMax units break down as of 2026:
| Model | Battery Type | Typical Peak Amps | Charge Port Location |
|---|---|---|---|
| Stanley FatMax J7CSR | Sealed lead-acid | 700A | Side panel, AC input |
| Stanley FatMax J5C09 | Sealed lead-acid | 1000A | Side panel, AC input |
| Stanley FatMax FMX-004 | Lithium-ion | 700A | Rear panel, DC barrel |
| Stanley FatMax J3CS | Sealed lead-acid | 300A | Side panel, AC input |
Most FatMax units sold at Home Depot, Lowe's, and Walmart through the mid-2010s were the lead-acid J7CSR and J5C09 models. Anything purchased new in 2024 or later is almost certainly the FMX-004 lithium variant or its successor.
Why Model Identification Matters
The chemistry dictates everything: how long it holds a charge sitting on a shelf, how it behaves in cold weather, and how you should store it between uses. Lead-acid models self-discharge faster, so they need a top-up every 3 to 6 months. Lithium-ion models can sit for closer to a year and still hold a usable charge.
If you skip this step, the rest of the charging advice in this article may not apply to your unit.
Flip your FatMax over and look for the model number on the white sticker near the base. If the label is worn off, the shape and weight are decent clues: the lead-acid models feel heavier (8 to 18 lbs depending on the model), while the lithium units come in under 5 lbs.
First Things First: What Kind of Battery Is Inside Your Unit
Once you know the model, the next decision branch is the battery chemistry. This determines charge time, storage behavior, and how aggressively you can recharge a deeply depleted unit.
If You Have a Sealed Lead-Acid (SLA) Model
The J7CSR, J5C09, and J3CS all use sealed lead-acid batteries, the same basic technology that sits under the hood of most cars. These are forgiving but slow. They can handle being left on the charger a little too long, and they tolerate partial charges without much fuss.
They also hate being stored at zero charge. Lead-acid batteries sulfate when left discharged, which permanently reduces capacity.
If your FatMax is a lead-acid unit and you haven't touched it in six months, expect the first charge to take closer to 8 hours. The internal resistance rises as the battery sits, and it takes longer for the charger to push current in.
If You Have a Lithium-Ion Model
The FMX-004 and its newer siblings use lithium-ion cells. They charge faster (often 2 to 4 hours from empty), hold their charge much longer in storage, and weigh a fraction of the lead-acid models. But they're less forgiving in two ways: deep discharge can permanently damage the cells, and they don't like extreme heat.
Storing a lithium FatMax in a 130°F garage all summer can shorten its life noticeably.
Lithium-ion units also use different indicator logic in some cases. A flashing light that means "charging" on a lead-acid model might mean "fault" on a lithium unit. We'll cover the lights in detail in a later section.
What You Need Before You Plug Anything In
Gathering your tools first saves you from walking back and forth mid-charge. Most people already have everything, but it's worth a quick check.
The Charging Kit Checklist
- The Stanley FatMax jump starter itself
- The original AC wall adapter (the black brick with a barrel plug)
- A standard 120V household outlet
- A clean, dry, room-temperature surface to set the unit on
- The owner's manual or a photo of the indicator panel (if you've lost it)
If You're Charging from Your Car
- A 12V DC charging cable (included with most FatMax models, sometimes stored in a side pocket)
- A vehicle with a functioning cigarette lighter socket
- The engine running, or at least the key in the "accessory" position, so the socket is powered
Optional but Helpful
- A microfiber cloth for wiping the charging port
- A flashlight if you're charging in a dim garage
Manufacturer specifications indicate that charging in ambient temperatures below 32°F or above 113°F can reduce battery life over time. If your garage gets blazing hot in summer or freezing in winter, bring the unit inside before charging.
How to Charge a Stanley FatMax from a 120V Wall Outlet
This is the primary method and the fastest way to get back to a full charge. Wall-outlet charging is what Stanley designed these units around, and it works on every FatMax model still in circulation.
Step-by-Step: Wall Outlet Charging
- Place the FatMax on a flat, non-carpeted surface. Carpet can trap heat and dust.
- Locate the charging port. On lead-acid models, it's usually on the side or back behind a small rubber flap. On lithium models, it's a small DC barrel jack.
- Plug the AC adapter into a 120V wall outlet. Confirm the outlet works by plugging in a lamp or phone charger first if you're unsure.
- Connect the barrel plug to the unit's charging port. Push it in until it seats fully.
- Watch the indicator light. A red or yellow light means charging has started. A solid green light means the unit is fully charged.
- Leave it alone until you see solid green. Lead-acid models can sit on the charger a bit longer without harm. Lithium models are best unplugged once green to avoid any unnecessary stress on the cells.
- Unplug from the wall, then disconnect the unit. This order matters less than people think, but unplugging the wall first is the safe habit.
How Long Should You Wait?
- Lead-acid models: 3 to 5 hours from empty, longer if stored for months
- Lithium models: 2 to 4 hours from empty
- Topping off a partially charged unit: 1 to 2 hours
Aggregate user reviews indicate that the first charge on a brand-new unit often takes 6 to 8 hours. The cells haven't been cycled yet, and the charger is more cautious. Don't worry if your first charge runs long.

Why Wall Charging Beats 12V Charging
Wall current is consistent. A 12V socket delivers whatever your car's alternator is producing, which fluctuates with RPM and battery state. For a slow, full charge, wall power is gentler and more predictable.
Save the 12V method for road trips and emergencies when you don't have access to an outlet.
How to Charge a Stanley FatMax from Your Car's 12V Socket
Sometimes you're on the road, the FatMax has lost some juice, and you've got no access to a wall outlet. That's the exact situation the 12V charging cable was designed for. It's slower, but it works.
When 12V Charging Makes Sense
Use the 12V method if you're between job sites, camping, or on a long drive and want to top the unit off. Don't rely on it for a full dead-to-100% charge unless you plan to drive for 8+ hours. It's a maintenance tool, not a recovery tool.
Step-by-Step: Charging from Your Car
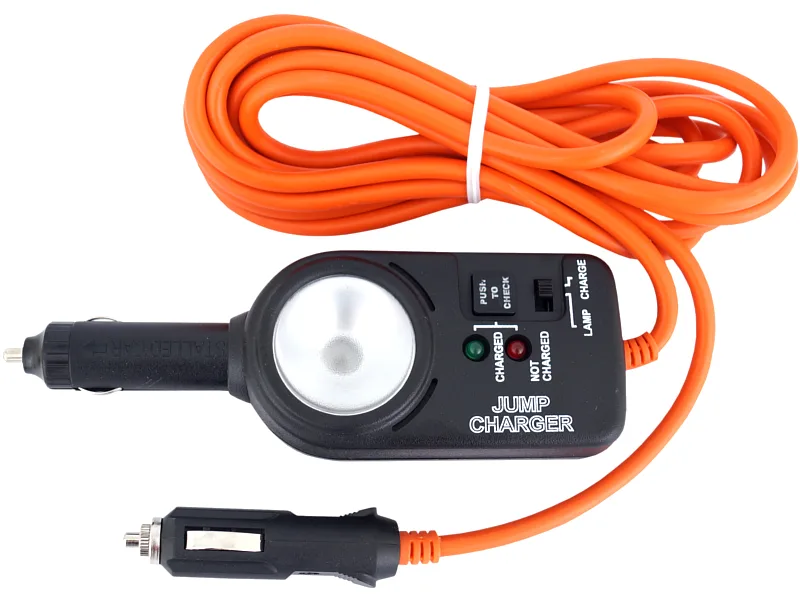
- Start the engine. Some cigarette lighter sockets only deliver power when the ignition is on.
- Locate the 12V charging cable. On most FatMax models, it tucks into a side pocket or wraps around the clamp holder.
- Plug the small barrel end into the FatMax's charging port. Same port you use for the wall adapter.
- Insert the 12V plug into the cigarette lighter socket. It should click or seat firmly.
- Look for the charging indicator. Most units show a red or yellow light within 30 seconds. If nothing lights up, the socket may be dead or the fuse may be blown.
- Drive or idle normally. A 30-minute commute adds roughly 10 to 15% charge on most models. A full top-up takes 6 to 12 hours of driving.
A Few 12V Caveats Worth Knowing
- If your vehicle shuts off its 12V sockets after a set timeout, your charge stops too.
- A weak car battery plus an idling engine can leave both the car and the FatMax undercharged.
- The 12V method generates more heat inside the unit than wall charging. Don't leave it baking on a black seat in July sun.
Per UL product safety listings, the charger brick is certified for indoor use, so when you get home, switch back to wall charging for the full cycle.
How to Charge the Newer Lithium-Ion FatMax Models
The FMX-004 and any 2024 or newer FatMax units ship with lithium-ion cells. Charging these is faster and simpler, but the rules are slightly stricter.
Charging the FMX-004
- Use only the supplied cable and adapter. Aftermarket chargers can deliver the wrong voltage and damage the battery management system.
- Plug the DC barrel cable into a 5V/2A or higher power source. A phone wall brick works fine.
- Charge until the indicator turns solid green. Most lithium FatMax units reach full in 2 to 4 hours.
- Unplug promptly. Lithium cells don't like sitting at 100% any longer than necessary.
Why the Lithium Rules Are Stricter
Lithium cells live longest when kept between 20% and 80% charge. Stanley's internal battery management system handles the top and bottom cutoffs for you, but you can extend pack life by unplugging once it's full rather than leaving it on the charger overnight. Avoid draining the unit below 10% if you can help it.
Deep discharges stress the cells and reduce total cycle count.
If your lithium FatMax has been sitting in a hot garage for months, let it cool to room temperature before charging. Charging a hot lithium pack is the fastest way to shorten its life.
How to Charge the Older SLA FatMax Models
The J7CSR, J5C09, and J3CS are workhorses, and they charge the same way they always have. But lead-acid batteries have quirks that catch people out.
The Basic SLA Charging Routine
- Plug the AC adapter into a 120V outlet.
- Connect the barrel plug to the unit.
- Wait for solid green. Plan on 3 to 5 hours from a normal discharge, longer from a deep one.
- Unplug when green. Lead-acid is tolerant of float charging, so leaving it overnight is fine in a pinch.
Recovering a Deeply Discharged SLA Unit
If your lead-acid FatMax has been sitting dead for a year, it may not wake up on the first try. Here's the recovery approach we trust based on what Battery University research on lead-acid chemistry shows:
- Plug it in and leave it for 24 hours, even if the light stays red the whole time.
- If the unit still shows no lights after 24 hours, unplug it and let it rest for an hour.
- Try again. Repeat the cycle two or three times if needed.
- If the case feels hot or smells like rotten eggs, stop. The battery is likely sulfated beyond recovery.
Sulfation happens when a lead-acid battery sits below 50% charge for weeks. The internal plates develop crystals that block current flow. Sometimes you can recover them with slow charging.
Sometimes you can't, and the unit is done.
What the Indicator Lights Actually Mean (Red, Yellow, Green, Flashing)
The indicator panel on a FatMax is small, but the light pattern tells you almost everything you need to know. Here's the universal logic, with model-specific notes where they differ.
The Standard Light Meanings
| Light Status | What It Means | What to Do |
|---|---|---|
| Solid red | Actively charging | Leave it alone, let it finish |
| Solid yellow (some models) | Charging, partial | Continue charging |
| Solid green | Fully charged | Unplug |
| Flashing red | Charging error or battery fault | See troubleshooting section |
| No light at all | No power reaching the unit | Check outlet, cable, and port |
Flashing Patterns That Need Attention
A slow, steady flash usually means the battery is below a safe voltage and the charger is trying to recover it. A rapid flash or alternating red/green typically signals a fault. Unplug the unit, wait 10 minutes, and try again.
If the fault light comes back, the internal battery may be damaged, especially if the unit has been dropped or stored in extreme heat.

Why Lights Lie Sometimes
A green light doesn't always mean "ready to jump a V8." It means the unit has reached its full resting voltage. If you've only had it on the charger for an hour after a deep jump-start, the green might be a surface charge, not a true full charge. To be sure, leave it on the charger for an extra hour past the green light before relying on it.
How Long Does a Full Charge Take?
The honest answer depends on the model, the starting state, and the temperature around the unit. Here's what the manufacturer documentation and aggregate user feedback suggest for a full top-up under normal room-temperature conditions.
| Starting State | SLA Model (J7CSR, J5C09) | Lithium Model (FMX-004) |
|---|---|---|
| 50% drained | 2 to 3 hours | 1 to 2 hours |
| Fully empty | 4 to 6 hours | 2 to 4 hours |
| Stored 6+ months | 8 to 12 hours | 3 to 5 hours |
| First-ever charge | 8 to 12 hours | 4 to 6 hours |
Cold garages slow the chemistry. A unit charging at 40°F takes noticeably longer than the same unit at 70°F. Heat speeds things up but shortens battery life, so don't try to "help" by setting the unit near a heater.
If your charge is still going after 12 hours on a lead-acid model, something is off. Either the battery is heavily sulfated, the charger is underpowered, or the outlet is on a weak circuit. Move to a different outlet and try again before assuming the unit is dead.
How to Bring a FatMax Back from a Deep Discharge
A deep discharge happens when the unit sits at or near 0% for weeks or months. Lead-acid models are vulnerable to this. Lithium models can sometimes recover on their own, but deep cuts shorten their lifespan too.
The Recovery Sequence
- Inspect the unit. Look for swelling, leaks, cracks, or a burnt smell. If any of these are present, do not charge. Recycle the unit instead.
- Plug into a known-good 120V outlet. Use the original AC adapter only.
- Leave it alone for at least 12 hours. Resist the urge to unplug and check. The charger is doing slow recovery work.
- Watch for the green light. If you see it, do a full jump-test before trusting the unit. If the light never turns green, the cells are likely permanently damaged.
- If the unit feels warm but not hot after 4 hours, that's normal. Hot to the touch is not. Unplug immediately if it gets too warm.
When to Accept the Loss
If the unit has been deeply discharged multiple times, or stored dead for a year or longer, the chemistry is probably shot. Lead-acid batteries that sit below 10% for over 6 months often won't recover their full capacity. Lithium cells that drop below 2V may never hold a useful charge again.
A new Stanley FatMax J7CSR runs around $80 to $120 at retail. A dead battery isn't worth risking your car's electrical system.
How Often Should You Recharge It If You're Not Using It?
Storage charging is the most overlooked part of jump starter ownership. Skip it, and you'll come back to a brick.
SLA Models: Top Up Every 3 to 6 Months
Lead-acid self-discharges at roughly 5% per month. Six months of sitting drops a full unit to around 70%, and twelve months can take it below 50%. Plug it in for an hour or two every 3 months and you're golden.
Lithium Models: Top Up Every 6 to 12 Months
Lithium self-discharges much slower, usually under 2% per month. A full lithium FatMax can sit a year and still have 75% or more left. Still, a quick top-up before winter storage is cheap insurance.
Storage Conditions That Matter Most
- Store at room temperature, ideally between 50°F and 80°F
- Avoid concrete floors in unheated spaces if possible. The temperature swings aren't great for any battery.
- Keep the unit away from direct sunlight, even through a window
- Don't store it in a vehicle. Car interiors swing from freezing to 150°F+ depending on the season.
A good rule of thumb: if you'd be uncomfortable leaving a chocolate bar there, don't leave your FatMax there.
Common Charging Mistakes That Kill the Battery Early
Most FatMax units don't die from normal use. They die from preventable mistakes. Here's what to watch for.
Mistake 1: Using a Third-Party Charger
A random 12V adapter with the right plug can still deliver the wrong voltage. The FatMax charging circuit expects a specific input, and exceeding it can fry the battery management board. Always use the original Stanley adapter, or a confirmed-compatible replacement from the manufacturer.
Mistake 2: Charging in Extreme Temperatures
Charging below freezing or above 110°F stresses the cells. Per manufacturer specifications, the safe charging range is roughly 32°F to 113°F. If your unit has been in a freezing truck bed overnight, bring it inside for an hour before plugging in.
Mistake 3: Letting It Sit Dead for Months
We covered this above, but it's the single biggest killer of lead-acid FatMax units. A dead battery stored for a season is often a dead battery, period.
Mistake 4: Unplugging Before It's Actually Full
Stopping a charge early because you're impatient shortens cycle life. The charger is designed to taper current as the battery fills, and that last 20% is what gives you cranking power. Wait for solid green.
Mistake 5: Ignoring a Swollen Case
If the case bulges, the battery is compromised. Stop charging immediately. Move the unit to a non-flammable surface outdoors and contact your local battery recycling center.
A swollen lithium battery can vent or ignite if charged further.
When Your FatMax Won't Charge at All: Troubleshooting Branches
When the unit refuses to wake up, work through this decision tree before assuming it's dead.
Step 1: Verify the Outlet
Plug a lamp or phone charger into the same outlet. If those work, the outlet is fine. If not, try a different outlet or check your breaker panel.
Step 2: Inspect the Cable and Plug
Look for bent pins, cracked insulation, or a loose barrel connector. The plug should seat firmly. A wobbly connection means the internal wire is broken, and the cable needs replacing.
Step 3: Check the Charging Port
Shine a flashlight into the port. Look for bent contacts, dust, or corrosion. Compressed air and a wooden toothpick can clear debris.
Never use a metal object inside the port.
Step 4: Try a Different Power Source
If wall charging fails, try the 12V method (or vice versa). If the 12V works but the wall doesn't, the AC adapter is bad. If neither works, the issue is in the unit.
Step 5: Look for the Fault Pattern
A rapid flash or alternating red/green usually means the battery management system has locked out charging to protect damaged cells. Leave the unit plugged in for 24 hours. Sometimes the BMS resets itself with enough time.
If it doesn't, the pack is likely beyond recovery.
Step 6: Contact Stanley or Replace
If the unit is still under warranty (typically 1 year from purchase), reach out to Stanley customer support with your model and serial number. If it's out of warranty and the troubleshooting above hasn't revived it, a replacement is the safer bet.
Cold Weather vs. Hot Garage: Storage Conditions That Matter
Battery chemistry hates extremes. Both ends of the thermometer chip away at capacity, but in different ways.
Cold Storage Issues
Below 32°F, lead-acid batteries lose cranking power. They don't take a charge well either. The electrolyte thickens and the chemical reaction slows.
A FatMax stored in an unheated Alaska garage over winter may need a full day at room temperature to wake up and accept a charge.
Lithium batteries handle cold better than lead-acid but still charge slowly below freezing. Some lithium cells refuse to charge at all below 32°F to protect themselves. Let the unit warm up before plugging in.
Hot Storage Issues
Heat is the silent killer. Every 15°F above room temperature roughly halves lithium battery life over time. A FatMax stored in an Arizona garage at 110°F for a summer can lose 20 to 30% of its capacity in a single season.
Lead-acid batteries tolerate heat better but still lose water through the sealed vents over time, which dries out the cells.
The Practical Solution
Bring the unit inside during weather extremes. A closet, a basement shelf, or a workbench in a climate-controlled garage all work. Anywhere between 50°F and 80°F year-round is ideal.
Safety Rules You Shouldn't Skip While Charging
These units are safe when treated right, but batteries store a lot of energy in a small space. A few habits keep you out of trouble.
Do
- Charge on a hard, non-flammable surface
- Keep the unit away from flammable materials while charging
- Unplug once the light turns solid green
- Store at room temperature when not in use
- Inspect for damage before each charge
Don't
- Charge a unit that's visibly swollen, cracked, or leaking
- Leave it charging on a couch, bed, or carpet
- Use a third-party charger with the wrong voltage rating
- Charge in direct sunlight or near a heat source
- Ignore a burning smell or excessive heat during charging
Per OSHA battery handling guidelines, even sealed batteries can vent under fault conditions. Charging in a ventilated area is a good habit, even if it's just a garage with the door open.
Maintenance Habits That Double Your Battery's Lifespan
Charge before storage, not after. Topping off a lead-acid FatMax before a long storage window prevents sulfation better than reviving a dead one later.
Wipe the terminals every few months. Dust and oxidation on the jumper clamps reduce cranking power. A dry cloth is usually enough.
Recalibrate the gauge once a year. Fully charge the unit, then fully discharge it with the flashlight or USB port, then charge it back to full. This resets the battery level reading on models that show a percentage or bar gauge.
Keep accessories simple. If your model has a USB output, avoid leaving devices plugged in long after they're charged. That parasitic draw slowly drains the pack.
Real Charging Scenarios From User Reports
The 6-month storage recovery. Aggregate reviews describe SLA units sitting in a garage all winter, then waking up after a 24-hour plug-in. Success rate is high if the unit was at 30% or more before storage.
The trunk-in-Texas case. Lithium units stored in summer heat for two seasons often show permanent capacity loss. The fix is replacement, not charging.
The lesson is heat, not depth of discharge, killed the cells.
The first-time-user flash. New owners frequently panic when the light flashes red on first charge. It's usually a soft-start protection cycle.
Leaving the unit plugged in overnight usually clears it.
The 12V-only owner. Rideshare drivers who never use wall charging often report the unit never quite reaches full. Wall charging once a month resets the chemistry and brings capacity back.
What a Replacement Actually Costs
| Model | Typical 2026 Retail | Replacement Battery Cost |
|---|---|---|
| Stanley FatMax J7CSR | $80 to $120 | $40 to $60 (aftermarket) |
| Stanley FatMax J5C09 | $100 to $150 | $50 to $70 (aftermarket) |
| Stanley FatMax FMX-004 | $90 to $130 | Usually non-serviceable |
A full unit is often cheaper than a replacement battery once you factor in the labor of opening the case and resoldering cells. For most owners, replacement beats repair.
Expert Charging Tips We Trust
Use a smart plug with a timer. Set it for 4 hours. Walk away.
The plug cuts power automatically when the timer ends, which is perfect for lithium models where overcharge is a concern.
Charge the same day you use it. If you jump-started a car this morning, plug the FatMax in tonight. Lead-acid chemistry recovers best when recharged within hours, not days.
Label the charger. A small piece of tape on the AC adapter with the model number saves you from grabbing the wrong brick. A 14V adapter on a 12V unit can push the cells past their safe limit.
Test the unit quarterly. A 30-second test is enough. Plug it in, confirm the light turns green, unplug it.
If anything looks off, you'll catch it before the next dead-battery emergency.
Frequently Asked Questions
How long does it take to charge a Stanley FatMax jump starter for the first time?
Plan on 8 to 12 hours for a brand-new lead-acid model, and 4 to 6 hours for a new lithium model. The cells need extra time to activate fully on the first cycle.
Can I leave my Stanley FatMax plugged in all the time?
For lead-acid models, brief overcharge won't hurt, but continuous float charging isn't recommended for months on end. For lithium models, unplug once green to avoid unnecessary cell stress.
Why is my Stanley FatMax flashing red and not charging?
A flashing red light usually means the battery has dropped below a safe voltage. Leave it plugged in for 12 to 24 hours. If the fault light persists, the battery is likely damaged and needs replacement.
Can I charge a FatMax with a solar panel?
Technically possible with the right voltage regulator, but Stanley doesn't endorse it. The input voltage and current need to match the unit's charging spec exactly. A mismatched solar setup can cook the battery management board.
Does a FatMax lose charge sitting in my trunk?
Yes. Lead-acid models lose 5% or more per month. Lithium models lose closer to 2% per month.
Hot trunks in summer speed up the loss significantly. Bring the unit inside if you can.
Is it safe to charge a jump starter overnight?
For lead-acid models, generally fine, though unplugging once green is the better habit. For lithium models, avoid overnight charging. A brief unattended charge during dinner is one thing.
Sleeping next to a charging lithium pack is asking for trouble if the unit has any defect.
Your Charging Cheat Sheet (Quick Reference)
For when you just want the short version, here's the whole process in one place.
- Identify your model. Flip it over and check the white sticker.
- Use the original Stanley AC adapter. Plug into a 120V outlet.
- Watch the indicator light. Red or yellow means charging. Solid green means done.
- Full charge takes 3 to 5 hours for lead-acid, 2 to 4 hours for lithium, longer if stored dead.
- Top up SLA models every 3 to 6 months. Lithium every 6 to 12 months.
- Store at room temperature. Avoid extreme heat or cold.
- Never charge a swollen, cracked, or leaking unit. Recycle instead.
- Unplug once the light turns green. Don't leave it sitting indefinitely.
- If the unit won't wake up, work the troubleshooting tree: outlet, cable, port, power source, BMS reset.
- Replace the unit if it's been dead for a year, swollen, or won't hold a charge after a 24-hour recovery attempt.
A Stanley FatMax jump starter is one of those tools you forget about until you need it badly. Charge it right, store it smart, and it'll be ready the morning your car battery isn't.