How to jump start a harley davidson: Best guide
If your Harley-Davidson won't start and you're staring at a dead battery, you're not alone. Cold mornings, long winters, and a forgotten accessory or alarm drain will kill a battery faster than most riders expect. Knowing how to jump start a Harley-Davidson the right way protects your bike's electrical system and gets you rolling in minutes.
Most modern Harleys use a 12V AGM battery, typically rated between 12 and 30 amp-hours depending on model, and the procedure is different from jump-starting a car.
The biggest reason it matters? A Harley ECU is more sensitive to voltage spikes than a car ECU. Reverse polarity or jumping from a running engine can send a surge above 15V through the harness and fry components that cost more than a battery to replace.
Let's walk through exactly what to do, what to skip, and how to keep this from biting you again. As of 2026, battery technology and stock cable locations haven't changed across the current Sportster, Softail, Touring, and Street lines, but the safe procedure we cover below applies to all of them.
Quick Answer
Yes, you can jump start a Harley-Davidson using jumper cables or a portable jump pack. Turn off the run switch, connect positive to positive, then connect the negative clamp to a clean metal ground on the bike (not the battery). Wait 1 to 2 minutes, then crank.
Disconnect the cables in reverse order and let the bike idle for at least 10 minutes.
What "Dead Battery" Really Means on a Harley
A dead battery feels obvious when you hit the starter and hear nothing. Sometimes it's just a click. Either way, "dead" usually means the resting voltage has dropped below 12.0V, and the battery no longer has enough cranking amps to turn the engine.
Here's what a healthy Harley battery looks like on a multimeter:
| State | Resting Voltage | What It Means |
|---|---|---|
| Fully charged | 12.6 to 12.8V | Normal operation |
| Partially discharged | 12.1 to 12.5V | Charge before storage |
| Dead (needs jump) | Below 12.0V | Won't reliably crank |
| Damaged or failed | Below 10.5V after charge | Replace the battery |
If your voltmeter reads under 12.0V after the bike has been sitting overnight, the battery is the problem. If the battery reads fine but the bike still won't crank, you have a starter, relay, or wiring issue. Jumping won't fix that.
The most common culprits we see in our research:
- Left the key in the ACC position overnight
- Forgot to flip the run switch OFF
- Winter storage without a tender
- Old battery past its 3 to 5 year lifespan
- A parasitic draw from an aftermarket accessory (lighthouse, alarm, GPS)
- Loose or corroded battery terminals
Knowing which one fits your situation changes the next step. If the battery is just drained from a forgotten accessory, a jump gets you home. If the battery is four years old and won't hold a charge, you're about to replace it.
Why You Shouldn't Jump a Harley Like a Car
Here's the part most riders get wrong. You can't just hook up cables to a Harley the way you would a Honda Civic.
The first reason is voltage. Car alternators charge at 14.4 to 14.8V. Most modern Harleys regulate between 13.5 and 14.5V.
If the donor car is running when you connect, voltage spikes can pass through the jumper cables straight into your Harley's ECU and voltage regulator. On some bikes, that surge is enough to blow a fuse or worse.
The second reason is where you connect the negative cable. On a car, you clamp directly to the battery's negative terminal. On a Harley, clamp to a clean metal ground point on the frame or engine case, away from the battery.
This avoids sparking near battery gases, which can vent from a sealed AGM but are more common on older lead-acid batteries.
The third reason is cable size. Standard 8-gauge jumper cables work fine for cars. For a motorcycle jump, 4- to 6-gauge is the safe call because the cable runs are shorter but the current flow is more sensitive to resistance.
Same principle, smaller bike, tighter margins.
Find Your Battery's Location (Sportster, Softail, Touring, Street)
Before you connect a single clamp, find the battery. On most bikes it's not under the hood. It's somewhere you'd only know if you'd looked for it once.
Sportster (XL models, 2004 and newer)
The battery sits under the seat. Lift the seat with the ignition key or the small release tab underneath. You'll see the battery cover or the battery directly, depending on year.
Softail (2018 and newer, M8 platform)
Also under the seat, but the layout includes a fuse panel and a small access door. The battery sits on the right side once you remove the seat.
Touring (Street Glide, Road Glide, Electra Glide)
On touring models from 2009 to present, the battery lives under the left side cover. Remove the left saddlebag first on most touring bikes, then pop the side cover off to expose the battery tray.
Tri-Glide and Trike models
Similar to touring. Left side cover, sometimes behind a small panel. Check your owner's manual for the exact panel.
Street (500 and 750, XG models)
The Street line puts the battery under a small cover on the right side of the frame, just below the seat. Two bolts and you're in.
If you're not sure, your owner's manual shows it on the maintenance diagram. The battery is almost always near the fuses, because the fuse box and main battery live together.

Tools You Actually Need
You don't need much, but you do need the right stuff. Skimping here is where most electrical damage happens.
| Tool | Why You Need It | What to Look For |
|---|---|---|
| Jumper cables or jump pack | The actual power source | 4- to 6-gauge cables; lithium jump pack rated for motorcycles |
| Safety glasses | Battery acid splash protection | Any ANSI-rated pair |
| Insulated gloves | Acid and spark protection | Mechanic-style nitrile |
| 10mm wrench | To loosen battery terminals if needed | Standard motorcycle battery terminal size |
| Wire brush or terminal cleaner | Corroded terminals block current | Brass brush works best |
| Multimeter (optional) | To check voltage before and after | Any digital multimeter |
A portable lithium jump pack is honestly the better call for most riders. They're compact, hold a charge for months, and don't require a second vehicle. Brands like Antigravity and NOCO make motorcycle-rated units that deliver the right amperage without overloading the bike's system.
For routine garage work, the Motorcycle Safety Foundation pre-ride inspection checklist is a solid reference for catching battery and electrical issues before they strand you.
If you're using a donor vehicle, leave the donor OFF during the entire procedure. This is the single biggest mistake riders make, and it's the easiest one to avoid.
Jump Start From a Donor Vehicle: Step-by-Step
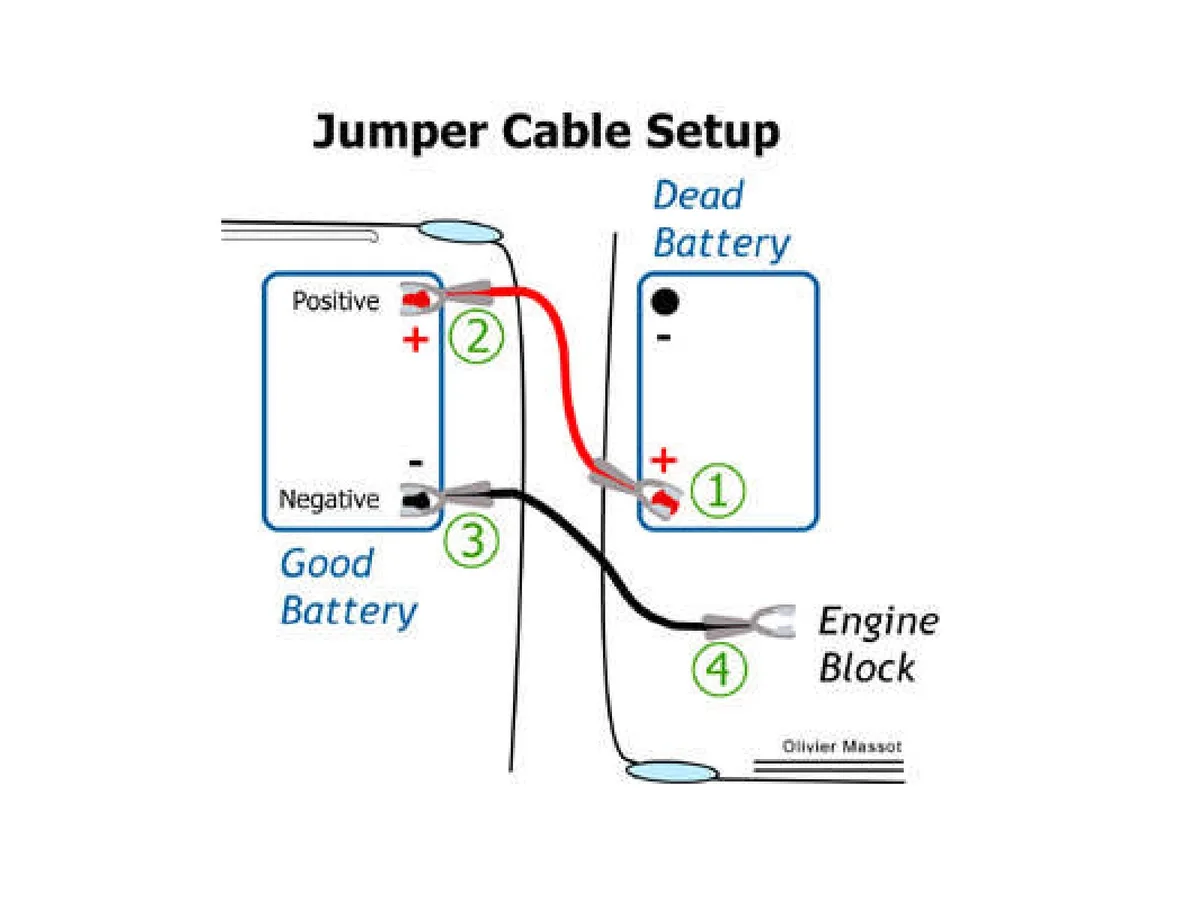
If you're using another vehicle, the order of operations matters. This is the procedure Harley-Davidson service manuals and aftermarket motorcycle wiring guides converge on, because reversing any step risks a spike or a spark in the wrong place.
Before you connect anything
- Move both vehicles close enough that the cables reach comfortably. Don't stretch.
- Confirm both ignitions are OFF and the keys are out.
- Set the Harley's run switch to OFF. This isolates the electrical bus from the ignition module.
- Put on your safety glasses. Batteries can vent hydrogen gas, especially if they're old.
Connect in this exact order
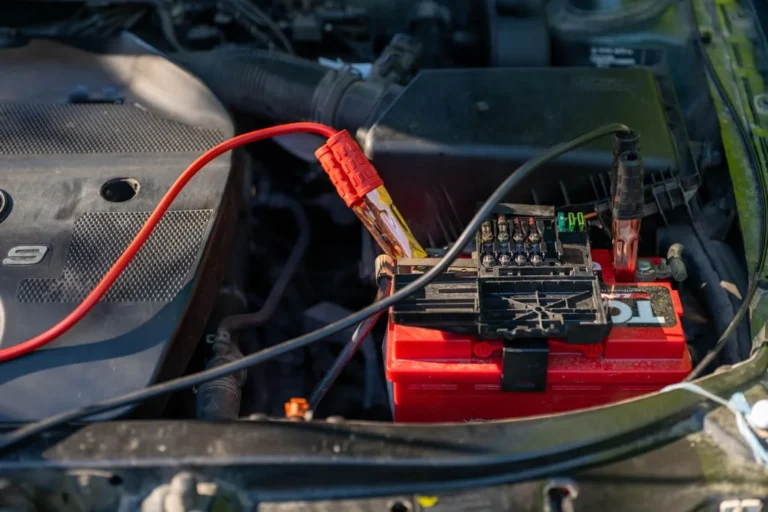
- Red clamp to the dead Harley's positive (+) terminal. The positive post is slightly larger and marked with a + or red cap.
- Red clamp to the donor vehicle's positive (+) terminal.
- Black clamp to the donor vehicle's negative (−) terminal.
- Black clamp to a clean, unpainted metal ground on the Harley. Use an engine bolt, frame tab, or the engine case itself. Never clamp to the dead battery's negative post.
Now start the donor and wait
Let the donor run for 1 to 2 minutes at idle. This sends a small charging current into the dead battery without spiking voltage.
Crank the Harley
- Turn the run switch ON.
- Press the start button. Hold it for no more than 5 seconds.
- If it doesn't catch, wait 30 seconds and try again. Repeat up to 3 times.
- If it still won't start, something else is wrong. Stop jumping.
Disconnect in reverse
Once the bike is running:
- Disconnect the black clamp from the Harley ground.
- Disconnect the black clamp from the donor.
- Disconnect the red clamp from the donor.
- Disconnect the red clamp from the Harley.
Then let the Harley idle for at least 10 minutes. Don't ride off immediately. The charging system needs time to put enough surface charge back on the battery to restart the bike later.
Jump Start With a Portable Pack: Step-by-Step
A portable jump pack is the cleaner option. No second vehicle, no risk of alternator feedback, and most modern lithium packs are sized for motorcycle batteries.
Set up the bike first
- Confirm the run switch is OFF and the key is out.
- Locate the battery using the model guide above.
- Identify the positive and negative terminals.
Connect the jump pack
- Plug the jumper leads into the pack.
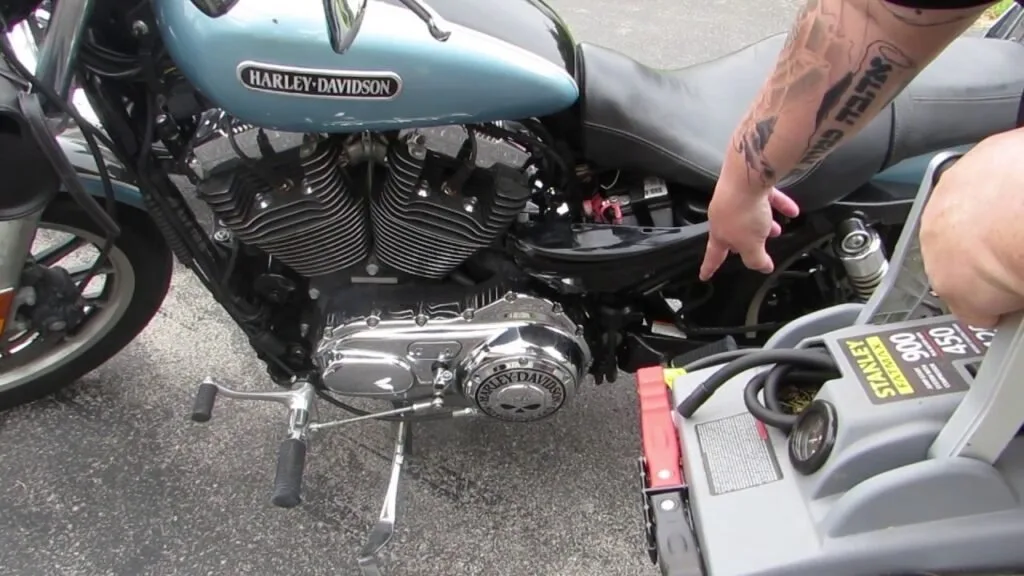
- Red clamp to the Harley battery's positive terminal.
- Black clamp to a clean ground point on the frame or engine case. Not the negative post.
Power up and start
- Turn the jump pack on.
- Wait 30 to 60 seconds for the pack to sense the load.
- Turn the run switch ON.
- Press the start button. Hold for 5 seconds max.
- Wait 30 seconds between attempts.
Disconnect and idle
Once the bike is running:
- Turn the jump pack off.
- Remove the black clamp from the ground.
- Remove the red clamp from the positive terminal.
- Let the bike idle for 10 minutes minimum.
One detail that catches people: some lithium jump packs have a "boost" or "override" button for severely drained batteries. Use it only if the standard mode won't crank the engine. Don't hold it down longer than the manual specifies.
What to Do Right After the Bike Starts
Getting the bike running is half the job. What you do next decides whether you're stranded again tomorrow or riding all week.
Keep it idling
Don't kill the engine right after a jump. The stator needs at least 10 minutes of idle time to push a usable charge back into the battery. Higher RPM helps, so a short 5 to 10 minute ride is even better than idling in place.
Measure the charging voltage
If you have a multimeter:
- With the bike running, probe the battery terminals.
- Healthy charging voltage sits between 13.5 and 14.5V at idle.
- Anything above 15V means the voltage regulator is overcharging. Stop riding and check it.
- Anything below 13.0V at 2000 RPM means the stator or regulator isn't doing its job.
This one check tells you whether the problem was just a drained battery or something deeper.
Decide: charge or replace
After the bike has run for 20 minutes:
- Turn it off.
- Wait 10 minutes.
- Check the resting voltage.
If it sits above 12.4V, the battery is healthy and just needed a charge. If it drops below 12.0V in 10 minutes, the battery is sulfated or worn out. Replace it before the next ride.
Can You Push-Start a Harley Instead?
Yes, with caveats. Most Harley big-twin engines from 2000 onward will push-start in second gear with the clutch pulled in.
- Turn the key ON.
- Set the run switch to RUN.
- Put the bike in second gear.
- Pull the clutch in.
- Push the bike to a fast walking pace or get a running start downhill.
- Release the clutch smoothly while jumping on.
- The rear wheel drives the engine through the transmission.
It only works if the battery has enough charge to run the EFI system and fuel pump. If the battery is completely dead (under 10V), the fuel pump won't prime and the engine won't fire no matter how fast you push.
Push-starting works best on Sportsters, Softails, and Dynas because they're lighter. Touring bikes are heavy enough that you'll need a downhill slope or two helpers. Trikes generally can't be push-started at all.
Push-starting doesn't recharge the battery. You'll still need to idle the bike for 10+ minutes or hook up a charger afterward.
Mistakes That Fry the ECU or Blow a Fuse
These are the failures we see over and over in shop reports and rider forums. Each one is avoidable.
Connecting the donor vehicle while it's running
The single biggest mistake. A running car alternator pushes 14.4 to 14.8V. A jump through that voltage into a 12V motorcycle system can spike the regulator and ECU.
Always turn the donor OFF.
Clamping the negative cable to the dead battery
Spark risk and potential for reverse polarity if you slip. Always ground to the frame or engine case, not the dead battery's negative post.
Reverse polarity
Red on negative, black on positive. If you do this and turn the key, you'll pop the main fuse immediately. Check twice before you clamp.
Cranking for 20+ seconds straight
Overheating the starter and draining the donor's battery. Five seconds on, thirty seconds off. Repeat.
Riding off immediately after the jump
The bike needs idle time to recharge. Revving the engine or riding hard right away doesn't help, the regulator limits charge current. Idle or gentle cruise only.
Touching the positive clamp to the frame
Grounding out the positive terminal by accident. Same result as reverse polarity: blown fuse, possibly more.
Ignoring a cracked or swollen battery
If the battery case is bloated, cracked, or smells like rotten eggs, do not jump it. Replace it. The risk of acid leak or thermal runaway isn't worth it.
Leaving the run switch ON during the jump
Some models backfeed current through the ignition circuit when the run switch is ON. Set it to OFF before clamping anything.
Why the Battery Died in the First Place
A jump fixes the symptom, not the cause. If you don't figure out what drained the battery, it'll happen again within a week or two.
| Cause | How to Confirm | Fix |
|---|---|---|
| Old battery past lifespan | Voltage drops below 12.0V after sitting 24 hours | Replace battery |
| Accessory left on (lighthouse, alarm) | Rider memory plus low voltage after sit | Charge, then install a battery tender |
| Parasitic draw | Multimeter shows more than 50mA draw with key off | Find and disconnect the offending accessory |
| Faulty voltage regulator | Charging voltage above 15V or below 13V | Replace regulator |
| Loose or corroded terminals | Visual inspection of terminals | Clean and tighten |
| Stator failure | Charging voltage below 13V at any RPM | Replace stator |
| Infrequent riding | Bike sits for weeks at a time | Use a tender or ride weekly |
If your bike is a daily rider and the battery just died once, it's usually age or a forgotten switch. If you're a weekend rider storing the bike between rides, a tender fixes 90% of repeat dead batteries.
When a Jump Won't Work (And What to Check Next)
Sometimes you do everything right and the bike still won't start. The jump wasn't the fix because the battery wasn't the problem.
Click but no crank
Starter relay, starter motor, or battery cable issue. Check:
- Battery terminal tightness
- Main fuse (usually 40A on Harleys)
- Starter solenoid click
- Ground strap from battery to frame
Cranks but doesn't start
Fuel or spark issue. The battery isn't the problem. Check:
- Fuel pump priming (you should hear it whine for 2 seconds with key on)
- Run switch position
- Kill switch (separate from run on some models)
- Spark at the plugs
Cranks slowly and barely turns over
The battery is too dead to take a jump, or the jump source is too weak. Try a different jump pack rated for higher cranking amps, or remove the battery and put it on a 1 to 2 amp trickle charger for 4 hours before reinstalling.
Nothing happens at all
Possible main fuse blown, ignition switch failure, or completely dead battery under 9V. Check:
- 40A main fuse near the battery
- All visible fuses in the fuse box
- Battery voltage under load (multimeter while pressing start)
If you've gone through this list and the bike still won't start, it's time to tow it to a shop.
How to Keep the Battery Healthy So This Never Happens Again
A Harley battery lasts 3 to 5 years with proper care. Most of the failures we see come from neglect, not bad luck.
Ride it weekly
The minimum for battery health is one ride per week, at least 20 minutes. The stator needs regular load to keep the battery topped up.
Use a battery tender for storage
If the bike sits longer than two weeks, plug in a tender. The Harley-Davidson Battery Tender is OEM-spec, but any AGM-compatible tender works. A $30 to $100 tender saves a $150 battery every time.
Check terminals twice a year
Corrosion creeps in slow. Pop the terminal covers, look for white or green fuzz, brush it off, and tighten the bolts. 10 minutes of work prevents a no-start on a cold morning.
Test voltage monthly
A $20 multimeter and 30 seconds per month tells you the resting voltage. Anything under 12.4V means it's time to charge or replace.
Turn the run switch OFF every time
This is free. It cuts the parasitic draw on most Harleys down to almost nothing. Get in the habit.
Disconnect the battery for long storage
If you're storing the bike for more than a month and don't have a tender, pull the negative terminal off. The battery will hold its charge for months.
Frequently Asked Questions
Can you jump start a Harley with a car?
Yes, but the car must be OFF. A running car alternator can spike above 15V and damage the Harley's ECU or voltage regulator. Clamp the cables in the right order, ground the negative to the frame, and crank the Harley.
Where is the battery on a Harley-Davidson?
It depends on the model. Sportsters and Softails hide it under the seat. Touring models tuck it under the left side cover, often behind the saddlebag.
Street bikes put it on the right side of the frame. The owner's manual shows the exact spot.
How long should I let my Harley run after a jump?
At least 10 minutes at idle, or 10 to 20 minutes of gentle riding. The stator needs time to put enough charge back on the battery to restart the bike later.
Can I jump start a Harley with a lithium jump pack?
Yes, and it's safer than using a donor vehicle. Lithium jump packs designed for motorcycles deliver the right amperage without the alternator feedback risk. Match the pack to your engine size, a 1000A pack is plenty for any stock Harley.
Why does my Harley click but not start?
Click usually means the solenoid is firing but the starter isn't getting enough current. It can be a deeply discharged battery, loose terminals, or a failing solenoid. Try a fresh jump source first.
If the click persists, check the main fuse and battery cables.
Can a dead Harley battery be recharged?
Often, yes. A battery that died from sitting will usually take a slow charge over 4 to 8 hours and recover. A battery that died from age or internal short won't hold a charge and needs replacement.
Test the resting voltage 30 minutes after charging to confirm.