How to jump start harley: Easy guide
If your Harley won't crank, the fix is almost always the battery, and knowing how to jump start a Harley the right way saves you from a tow or a walk-in dealership charge. Most riders can get their bike fired up in under 10 minutes with a set of jumper cables or a portable lithium jump pack, a safe ground point, and a clear head.
A healthy Harley-Davidson battery sits at 12.6 to 12.8 volts when fully rested, and anything below 11.8 volts usually won't crank the starter. Per SAE J537 testing and Yuasa's published specs for the OEM Harley battery, a fully discharged AGM unit still takes a slow, controlled jump, not a shot of 14 volts from a revving car. The trick is doing it in the right order with the donor vehicle off, which is where we'll start.
Quick Answer
To jump start a Harley, connect jumper cables in this order: red clamp to the dead battery's positive terminal, red clamp to the donor's positive, black clamp to the donor's negative, and the final black clamp to a clean frame ground on the Harley, not the dead battery. Crank the bike for 3 to 5 seconds, leave the donor off, and let the Harley idle for 10 to 15 minutes before riding.
Why Your Harley Won't Start (And Why It's Almost Always the Battery)
Most no-start problems on a Harley come down to one of three things: a dead battery, a weak charging system, or a parasitic draw that's been silently killing the battery overnight.
A healthy motorcycle battery produces around 12.6 to 12.8 volts at rest. Cranking it dips the voltage briefly, but the battery should recover to its resting range within minutes. When you turn the key and hear a single click, a rapid clicking, or absolutely nothing at all, the battery voltage has usually dropped below 11.8 volts.
Common culprits in our research:
- An accessory left on (heated gear, a USB charger, an accessory fuse that stayed hot).
- A regulator/rectifier that quit charging while you were riding.
- A battery that's past its 3 to 5 year service life.
- A bike stored for weeks without a tender.
- Cold weather, which saps cranking amps faster than any other factor.
If your lights are dim and the horn sounds weak, the battery is your culprit. If the headlight is bright and you still get nothing, you're probably looking at a starter, relay, or ignition switch issue instead, and jumping won't help.
Find Your Harley's Battery Location Before You Touch Anything
Before you do anything with cables, you need to know where the battery is. Harley hides it in different places depending on the frame family, and on most modern bikes you'll also see a remote jump start stud that lets you skip digging around entirely.

Touring Models (Street Glide, Road Glide, Electra Glide)
On 2014 and newer Harleys, the battery lives inside a sealed compartment under the left side cover (sometimes called the "jockey" cover), not under the seat. You'll see a remote positive stud and a frame ground point near the battery for jump purposes. On older Tourings, the battery is under the seat or behind the coolant tank.
Softail Models (Fat Boy, Heritage, Deluxe)
On most Softails, the battery sits under the seat. You'll need the ignition key to release the seat latch, and the negative cable is bolted directly to the frame nearby.
Sportster and Street Models
Sportsters (1988 to 2021) keep the battery under the seat as well, with easy access to both terminals. The Street 500 and 750 hide it under a small front fairing panel near the steering head.
V-Rod, Night Rod, and Specials
V-Rods use a remote positive jump stud mounted on the frame, with the battery tucked under a side cover. The battery itself is a 12V AGM but the jump procedure is essentially the same.
If you're not sure where it lives, your model's owner manual will say in under a minute. As of 2026, Harley still ships new owner manuals with every bike, and they're searchable online by VIN.
Pre-Jump Safety Check You Should Never Skip
Jumping a battery is low-risk if you follow a few hard rules. Skip them, and you can fry the regulator, the ECM, or the ignition module in a single wrong move.
Before connecting anything, run through this checklist:
- Eye protection and gloves. Battery off-gas is hydrogen. A spark near it can crack the case.
- No flames anywhere near the battery. Same reason.
- Inspect the battery. If you see a cracked case, a bulge, or dried white sulfate crust, do not jump it. Replace it.
- Confirm the bike is in neutral and the kill switch is set to "run."
- Confirm the donor vehicle is OFF. This is the single most important rule for a fuel-injected Harley. We'll cover why in a moment.
If the battery is heavily corroded, brush the terminals with a wire brush first. A bad connection looks exactly like a dead battery, and you'll chase your tail for an hour before realizing the clamps never made full contact.
What You Need to Jump a Harley (And What to Leave at Home)
You don't need much. The wrong tool, though, can do real damage.
The essentials:
- A set of jumper cables rated for motorcycles, ideally 4 to 6 AWG gauge. Auto-parts-store "light" cables are too thin to push enough amps reliably.
- Either a donor vehicle (car, truck, or another running motorcycle) or a portable lithium jump pack rated for motorcycle engines.
- Safety glasses and gloves.
- A wire brush or terminal cleaner if the posts are corroded.
- Your owner's manual, if you've never jumped your specific model before.
What to leave at home:
- A high-output jump box designed for V8 truck engines. Modern Harleys have sensitive electronics, and a 1,000-amp spike through the wrong terminal can fry the voltage regulator.
- A car battery charger set to "engine start" mode. It dumps 40 to 60 amps and will overheat your bike's wiring harness.
A typical Harley OEM battery is rated between 270 and 500 cold cranking amps (CCA), depending on the model and year. Per Yuasa's published specs, even the largest touring battery only needs a brief, low-amp boost to recover from a deep discharge. You don't need brute force.
You need a clean connection.
Step-by-Step: How to Jump Start a Harley From a Car
A car battery is the most common donor you'll find in a parking lot. The connection sequence matters, the cable routing matters, and whether the donor is running or off matters even more.
Donor vehicle OFF, every time
Modern Harley-Davidsons run a fuel-injected engine with an electronic control module and a sensitive voltage regulator. If the donor car is running and revving, the alternator can push 14.4 volts or higher through the cables and into your bike's system.
That's hot enough to confuse the ECM and overwork the regulator. Leave the car off. The car battery alone has more than enough cranking amps to fire a Harley.
Connection order
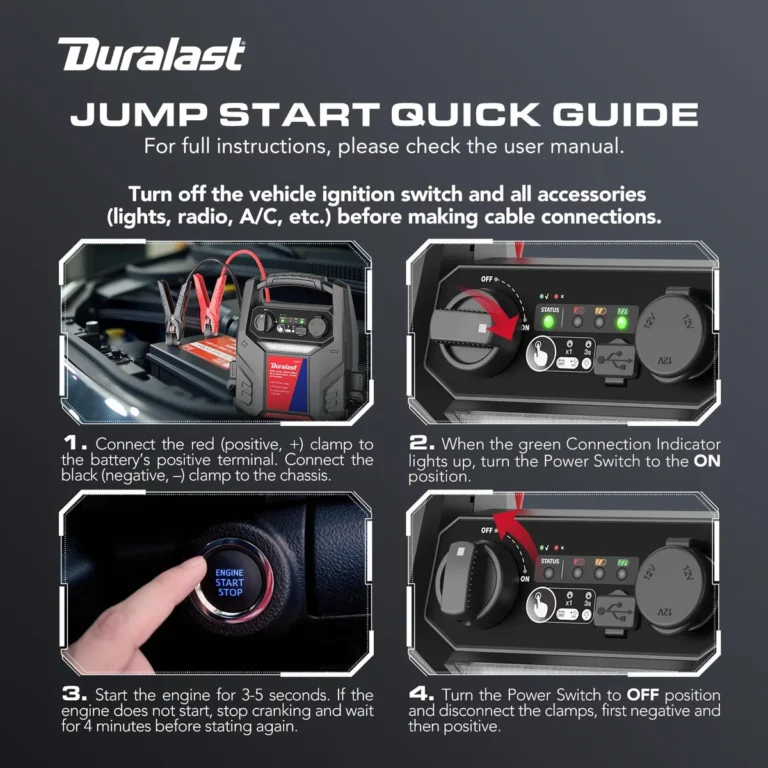
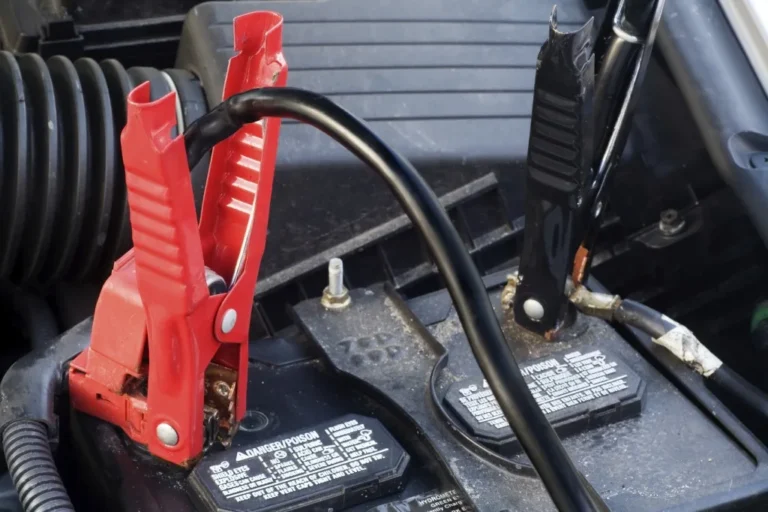
- Red clamp to the dead Harley's positive terminal (or remote positive stud).
- Red clamp to the donor's positive terminal.
- Black clamp to the donor's negative terminal.
- Final black clamp to a clean, unpainted frame ground on the Harley, not the dead battery.
The frame ground point is what most riders get wrong. Always attach the last black clamp to bare metal on the bike, not the negative battery post.
Crank, then disconnect
Turn the key, hit the start switch, and crank for 3 to 5 seconds. If it fires, let it idle. If it doesn't, wait 60 to 90 seconds before trying again.
Three short attempts is the practical limit. After that, the battery is either too weak or there's a deeper issue.
Disconnect in the reverse of how you connected. Black from the frame first, then black from the donor, then red from the donor, then red from the Harley.
Step-by-Step: How to Jump Start a Harley With a Portable Jump Pack
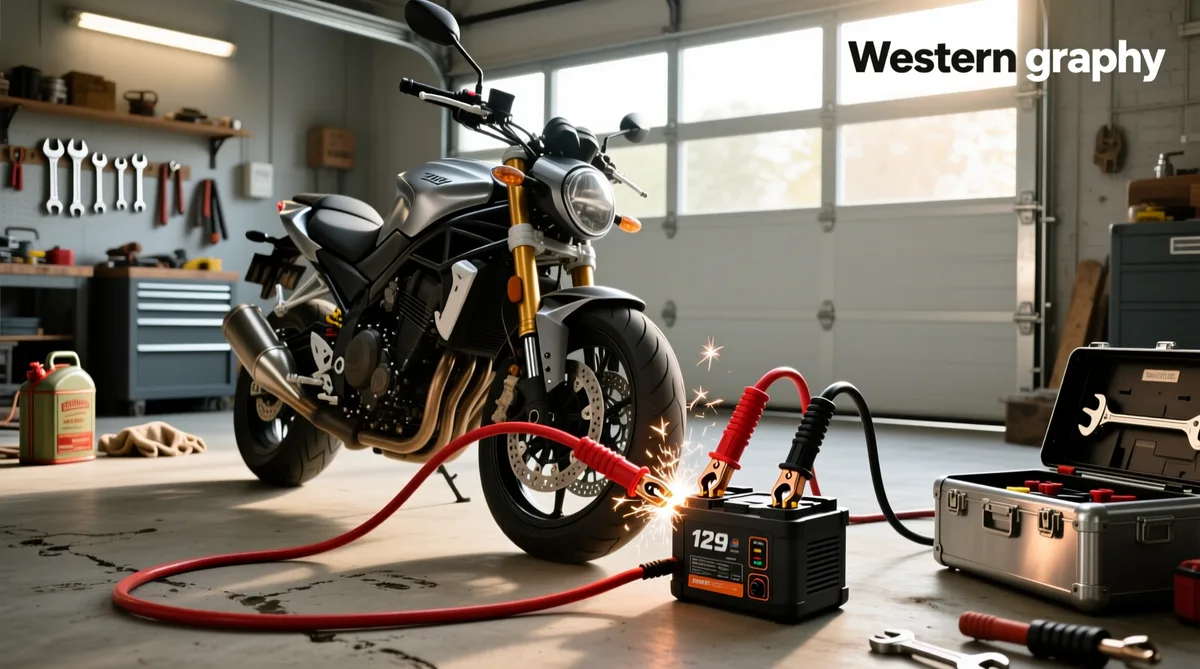
A portable lithium jump pack is the easier option for solo riders. No donor car, no second pair of hands, and no risk of reverse polarity frying your regulator.
Here's the order:
- Confirm the jump pack is charged. A low pack will click and click and never spin the starter.
- Connect red to positive (or the remote jump stud).
- Connect black to a clean frame ground.
- Power on the pack, then crank the bike.
- Once it starts, disconnect black first, then red.
Most quality motorcycle jump packs (Antigravity, NOCO, and similar) include a "smart" cable with reverse polarity protection. If you clamp the leads backwards, the pack simply won't output. If you're using a bare cable without protection, you lose that safety net, so double-check the polarity before you connect.
A lithium jump pack rated between 1,000 and 1,500 peak amps is enough for any stock Harley. The biggest V-Twin touring bikes pull around 250 to 400 cranking amps, well within the pack's range.
The Right Way to Connect Cables — Sequence Matters
Cable sequence is the part that separates a clean jump from a fried regulator. Get the order wrong, and you create sparks next to battery off-gas, push voltage spikes into the bike's wiring harness, or worse.
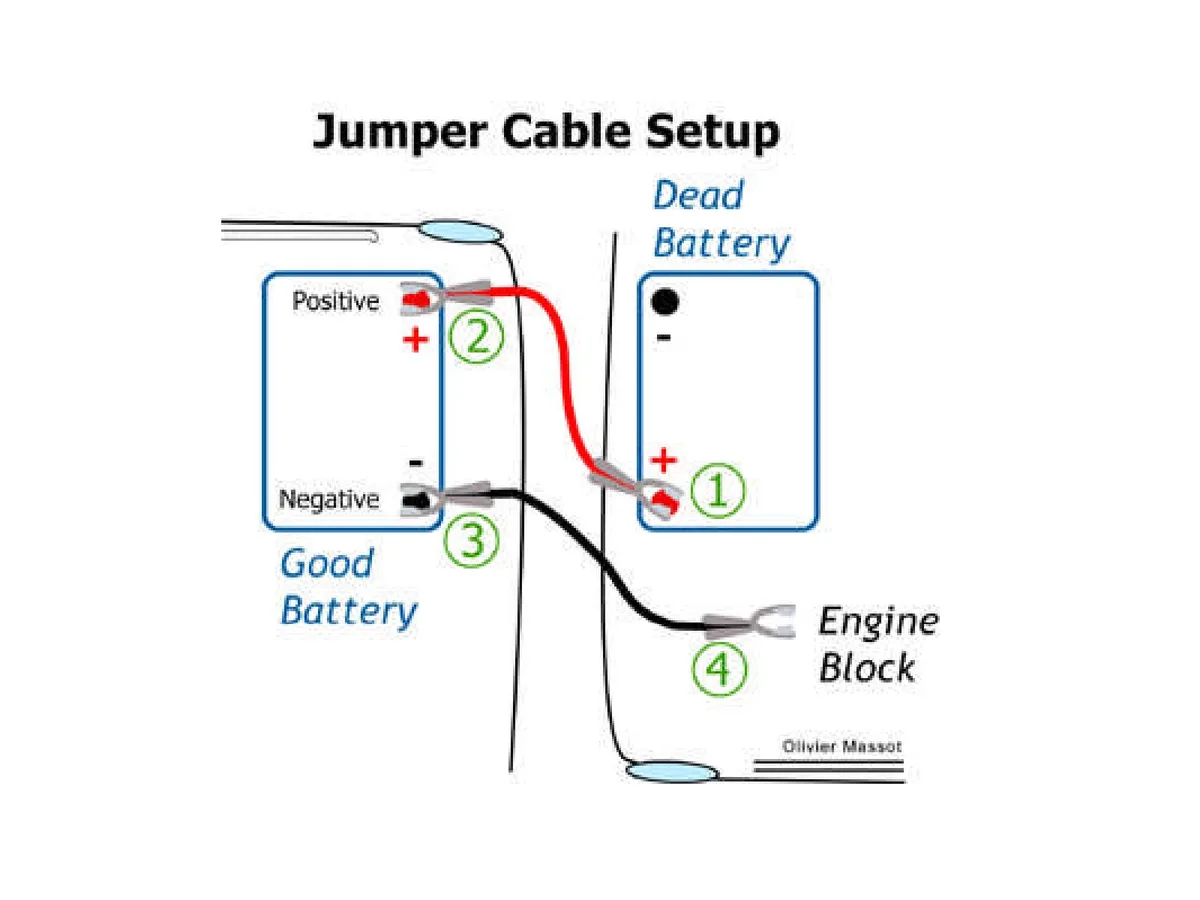
Here's the rule: positive to positive first, negative to donor negative last, with the Harley's negative going to a frame ground, never the dead battery post. This sequence keeps the final spark, which always happens when you connect the last clamp, away from the battery itself.
If you're jumping another rider
The same sequence applies when two bikes help each other. Red to red, black to the donor's negative, black to the receiving bike's frame. Keep both bikes off while you hook up, then crank the dead bike, not the donor.
Why the frame ground matters
Batteries vent hydrogen at the negative post. A small spark there can ignite the gas and crack the case. By moving the final connection to bare frame steel, the spark happens in open air, well away from the off-gas.
If you don't see an obvious ground stud, look behind the engine mount, near the top frame rail, or on the cleanest unpainted bolt you can find. A quick wire-brush pass before clamping removes paint, corrosion, or rust.
Cranking, Idle, and Restart: What to Do Right After the Jump
The jump got the engine running. What you do in the next 15 minutes determines whether the bike stays running or dies at the next stop sign.
Why You Should Never Rev the Donor Vehicle
Revving the donor car floods more voltage into the bike's system through the jumper cables. That extra voltage isn't regulated, so it goes straight to your Harley's electrical system. Even brief spikes can confuse the ECM and stress the regulator.
If the donor is a running vehicle, leave it idling at its normal curb idle (around 700 to 800 RPM). Even then, modern Harleys are happiest when the donor is off entirely.
The Idle Relearn Harley ECMs Need
A fully discharged AGM battery can drop the ECM's learned fuel and idle parameters. After a jump, let the bike idle for 10 to 15 minutes without touching the throttle. Then vary the RPM up and down between 1,500 and 2,500 a few times before riding off.
If the bike idles rough or stalls right after the jump, give it another 5 minutes of warm-up idle. Most modern Harleys self-correct once the battery stabilizes above 12.4 volts.
Riding vs. idling to recharge
A Harley needs 15 to 30 minutes of actual riding (not just idling in the driveway) to put meaningful charge back into a deeply discharged battery. Idle charging is slow because the alternator's output only ramps up above 2,000 RPM.
If the bike stalls again at the first stop sign after your jump, the battery is too weak to hold a charge. Drive straight to a dealer or shop and replace it.
Common Mistakes That Fry the Regulator or ECM
We've covered the sequence and the safety rules. Here are the mistakes we see over and over in rider forums and shop write-ups, the ones that turn a simple jump into a $900 electrical repair.
Mistake 1: Clamping the final black lead to the dead battery
This puts the spark right next to the vented hydrogen. It's not just dangerous, it can also send a voltage spike backward through the battery. Always use a frame ground.
Mistake 2: Revving the donor car
We covered it above. Don't do it. The car battery alone is enough.
Mistake 3: Hooking up backwards
Red to negative, black to positive. A momentary reverse connection can blow fuses, but a sustained reverse can fry the voltage regulator and the ECM in seconds. If your smart pack has a polarity alarm, listen to it.
Mistake 4: Trying to jump a frozen or swollen battery
If the battery case is bulging or there's a sulfur smell, do not jump it. A deeply discharged battery freezes at around -10°F in some conditions, and trying to jump a frozen pack can crack it. Replace the battery instead.
Mistake 5: Skipping the idle relearn
You get the bike running, kill it at the first light, and assume the jump failed. In reality, the ECM just needed a few extra minutes to relearn idle. A 10-minute warm-up idle fixes it 9 times out of 10.
Mistake 6: Leaving the key on while hooking up
Some riders leave the bike in "on" while connecting cables. This sends voltage through every accessory and the headlight at the moment you connect. Turn the key off, hook up, then turn it on to crank.
If you've already made one of these mistakes, check the main fuse (usually 40A on touring models, 30A on Softails) before assuming anything else is wrong. A blown main fuse is the most common symptom of a bad jump.
What If Your Harley Has a Lithium Battery?
Lithium LiFePO4 batteries (like those from Antigravity, Shorai, and EarthX) are a popular Harley upgrade. They're lighter and last longer, but they jump differently than an AGM.
The biggest quirk is the battery management system (BMS). A deeply discharged lithium pack can trip its BMS into protection mode, where the pack refuses to accept or deliver current at all. A standard jump often won't wake it up.
The fix is a slow, controlled charge from a lithium-compatible tender (NOCO Genius or Battery Tender Lithium) for 10 to 30 minutes. Once the BMS resets, the pack usually accepts a normal jump from there.
A few extra rules:
- Don't use a regular lead-acid charger on a lithium battery. The voltage profile is wrong and can damage the cells.
- Don't push more than 14.6 volts into a lithium pack. Most smart jump packs cap at 14.4, which is fine.
- Don't crank longer than 5 seconds. Lithium packs deliver high amps briefly, then voltage drops fast.
If your lithium battery is more than 6 years old and won't hold a charge, replace it. They don't usually recover from deep discharge the way an AGM does.
Jump Starting vs. Charging Overnight vs. Replacing the Battery
A jump is the emergency move. Slow charging and replacement are the long-term moves. Here's how to choose.
| Option | Best For | Time Required | Cost Range (2026) |
|---|---|---|---|
| Jump start | Stranded rider who has to ride now | 10 to 15 minutes | $0 to $40 portable pack |
| Slow charge on a tender | Bike stored weeks or months | 6 to 24 hours | $30 to $60 for the tender |
| Bench charge (battery removed) | Deeply discharged AGM recovering from parasitic drain | 12 to 24 hours | $40 to $90 smart charger |
| Battery replacement | Battery over 4 years old, or won't hold above 12.4V after charging | 30 to 60 minutes | $90 to $260 OEM AGM |
If the bike died because you left the key on, a jump plus an hour of riding will get you home. If the bike died after sitting all winter, slow-charge it on a tender overnight. If it's been jump-started twice in a month, the cells are dead, and replacement is the only fix.
How to Tell When It's Time to Stop Jumping and Buy a New Battery
A healthy battery holds a charge. A dying one doesn't. Here's the test.
Charge the battery fully (or jump it and ride 30 minutes). Turn the bike off. Wait 4 hours.
Measure voltage at the battery with a multimeter. Above 12.6V is healthy. Below 12.2V means the battery is sulfated or worn out.
Below 12.0V means it needs replacement.
Other clear signs:
- The engine cranks slower every morning, even after a full charge.
- You jump it once a week or more.
- The battery case looks swollen or smells like rotten sulfur.
- The bike is more than 4 years old and on its original AGM.
Yuasa's OEM Harley battery has a published service life of 3 to 5 years in typical use. Lithium packs push that to 5 to 8 years if kept on a tender. Anything beyond that is borrowed time.
Battery Tender vs. Jump Pack: Which One Belongs in Your Saddlebag?
Different tools for different jobs. Most riders need both, but for different reasons.
A Battery Tender Jr. or NOCO Genius is a maintenance charger. It plugs into a wall outlet and keeps the battery topped off during storage. It does not jump a dead battery.
Its job is to prevent the problem from ever happening.
A portable lithium jump pack is the roadside tool. It fits in a saddlebag or under the seat, holds a charge for months, and fires the bike when the battery has already died. It does not recharge a depleted battery.
If you ride year-round and the bike is always garaged, a tender is enough. If you tour, camp, or leave the bike parked for weeks at a time, carry a jump pack too. Together, they cover every common dead-battery scenario.
Preventing the Next Dead Battery: Storage and Charging Habits
The fix is easier than the jump. A few habits will keep your battery healthy for its full service life.
- Use a tender during storage. A Battery Tender Jr. plugged in once a month adds years to an AGM battery.
- Ride at least once a week. Short 15-minute rides are fine, but the bike needs to reach 2,000 RPM regularly to keep the battery topped.
- Check parasitic draw once a year. Anything over 50 milliamps with the key off is too much.
- Clean the terminals twice a year. A wire brush and a spritz of terminal protector prevent most no-start confusion.
- Test the charging system yearly. At 2,000 RPM, the bike should put out 13.8 to 14.4 volts at the battery. Below that, the regulator or stator is going.
Per SAE International battery standards, an AGM battery kept on a float charger and never deeply discharged can easily outlast its warranty. Deep cycles are what kill batteries. Avoiding them is the single best thing a rider can do.
Quick Reference: Voltage Numbers Every Harley Rider Should Know
Keep these numbers in mind. They're the difference between guessing and knowing what's wrong.
| Reading | Meaning |
|---|---|
| 12.6 to 12.8V | Fully charged, healthy battery |
| 12.4V | About 75% charged, still good |
| 12.2V | About 50%, recharge soon |
| 11.9V or below | Deeply discharged, won't crank reliably |
| 13.8 to 14.4V at 2,000 RPM | Charging system working correctly |
| Above 14.8V at 2,000 RPM | Regulator likely failed, replace it |
If the voltage climbs above 15V while riding, stop the bike. A runaway regulator will cook the battery and the headlight in minutes.
Frequently Asked Questions
Can you jump a Harley from a running car?
Yes, but it's better to leave the car off. A running car can push 14.4V or higher through the cables, which can stress a Harley's voltage regulator. With the car off, the car battery alone has plenty of cranking amps for any motorcycle.
Will jump starting a Harley damage the electronics?
Only if you reverse the polarity, rev the donor, or hook the final clamp to the dead battery. Done in the right order (red to red, black to donor, black to frame ground), jumping a Harley is safe and standard practice.
How long should a Harley idle after a jump?
At least 10 to 15 minutes, with brief RPM blips up to 2,500 every few minutes. This lets the ECM relearn idle parameters and gives the alternator time to put a partial charge back in the battery.
Can you push start a fuel-injected Harley?
Not reliably. Fuel-injected Harleys need the fuel pump primed and the ECM powered before the engine will fire. A push-start works on older carbureted bikes.
On a fuel-injected Harley, use a jump pack instead.
Where is the jump start point on a Harley-Davidson?
It depends on the model. On Touring bikes (2014 and newer), look for a remote positive stud and a frame ground near the battery compartment under the left side cover. On Softails and Sportsters, the jump points are at the terminals under the seat.
Your owner's manual will show the exact location for your VIN.
How often can you jump start a motorcycle battery before it dies?
Two jumps in a single week usually means the battery is at end of life. A healthy battery should hold a charge for weeks without help. If you're jumping more than once a month, replace the battery or fix the underlying charging problem.