How to car jump starter: The complete guide
Your car won't start. Click. Click.
Click. Then silence. That awful moment when the dashboard goes dark is exactly when knowing how to car jump starter work pays for itself.
Most drivers think they need a second vehicle, but a portable lithium jump box does the same job in under two minutes, no donor car required.
The gear has gotten cheaper and safer. As of 2026, mainstream 12V lithium jump starters run 1000 to 3000 peak amps, weigh under three pounds, and carry UL 2743 safety certification. We've put together the actual decision tree for getting back on the road, whether you own a compact sedan or a diesel truck, and we'll cover the branches most guides skip.
Quick Answer
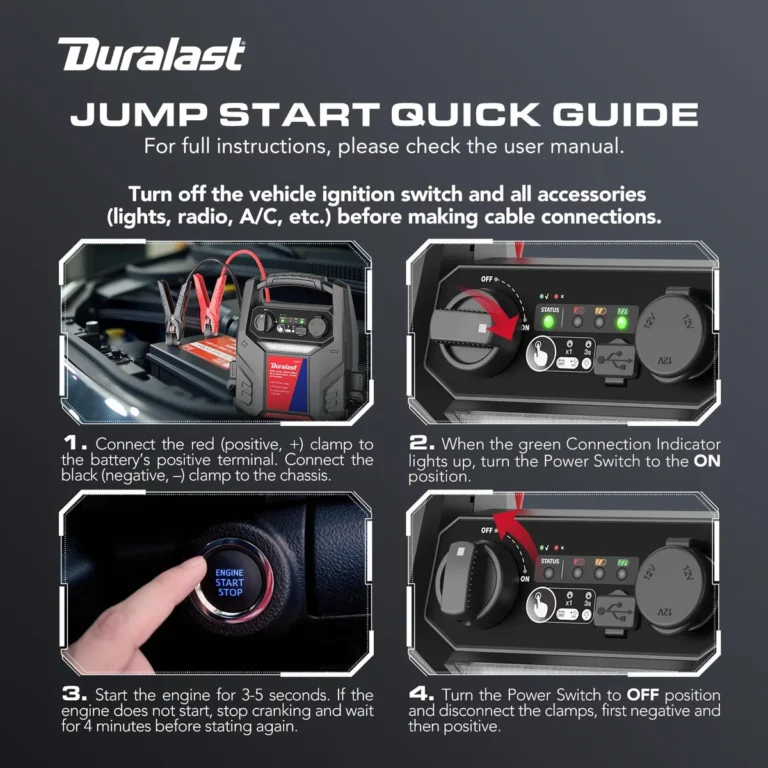
To jump start a car, turn off both ignitions and connect the red clamp to the dead battery's positive (+) terminal. Attach the black clamp to an unpainted metal ground on the engine, not the dead battery's negative post. Power on the jump pack, wait 30 seconds, then crank the engine for 3 to 5 seconds.
Why Your Car Won't Start (And What a Jump Starter Actually Does)
Before you touch anything, figure out if a jump will solve the problem. A jump works when the battery is discharged but still capable of holding a charge. A jump won't fix a dead cell, a broken alternator, or a seized starter.
The Three Failure Modes
When you turn the key and hear nothing, three things are usually to blame:
- Dead or weak 12V battery (most common)
- Failing alternator (battery can't recharge while driving)
- Bad starter motor (clicking but no crank)
A jump starter only addresses the first one. If your battery is more than four years old or the headlights looked orange instead of white before it died, the battery may be toast and a jump just buys you a one-shot restart.
What a Jump Starter Actually Does
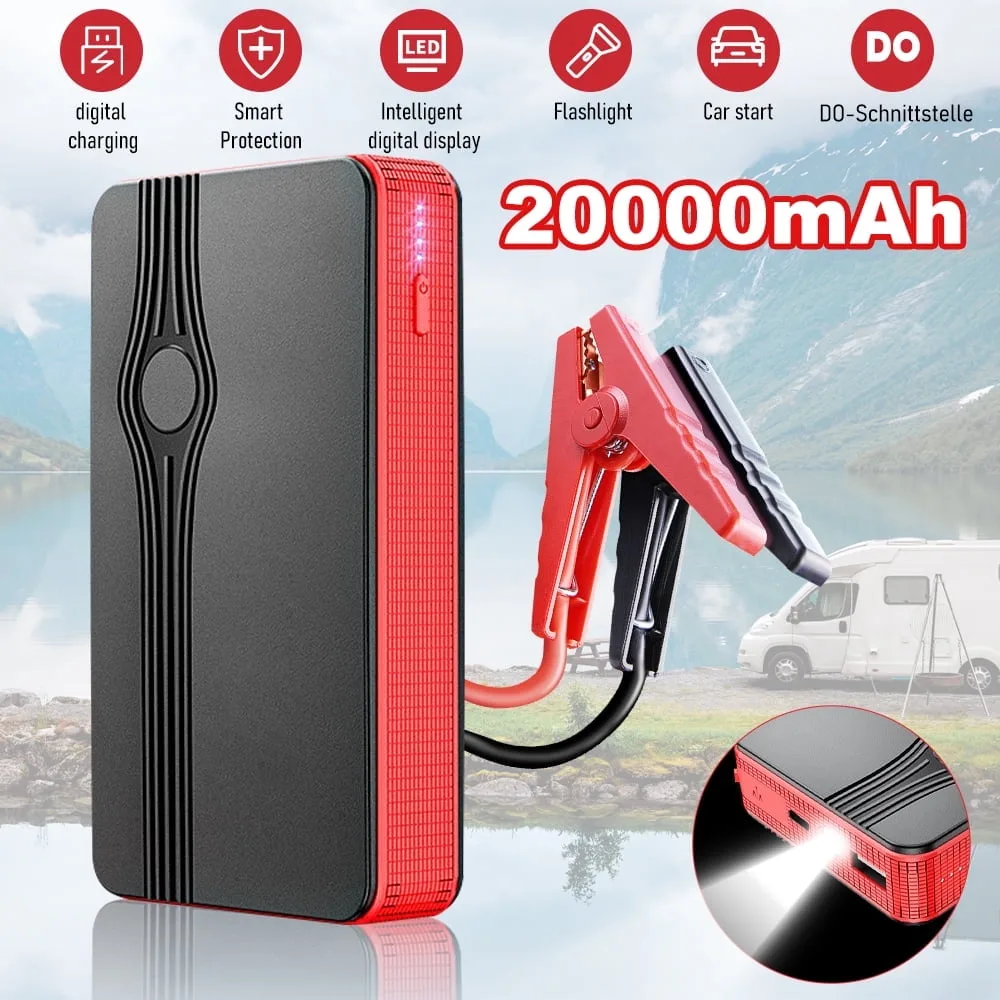
Think of a jump starter as a temporary battery transplant. Inside the pack sits a lithium-ion cell holding 10,000 to 20,000 mAh of capacity. When you press the boost button, it pushes high current through heavy-duty clamps into your car's 12V system, giving the starter motor enough juice to crank.
Once the engine runs, the alternator takes over. The alternator recharges your car's battery and powers the electronics. The jump starter isn't doing anything after that, just sitting there until next time.
Jump Starter vs. Jumper Cables: Which Path Fits Your Situation?
The right tool depends on where you are, what's nearby, and what you drive. Both methods work. Neither is universally better.
Decision Branch: Solo or With a Second Vehicle?
| Situation | Best Method | Why |
|---|---|---|
| Parked alone, no other car around | Portable jump starter | No donor vehicle required |
| Help is right there with a running car | Jumper cables | Faster connection, no waiting for a pack to power on |
| Remote area, low phone signal | Portable jump starter | No dependence on another driver |
| Diesel truck or V8 gas | Cables or heavy-duty pack | Lower amp packs may not crank large engines |
Aggregate reviews of consumer jump starters consistently note that 1000A peak amps handle most 4-cylinder and V6 engines easily. Diesels and big V8s often need 2000A or more, especially in cold weather.
What a Jump Starter Has That Cables Don't
- Built-in flashlight for nighttime emergencies
- USB ports to charge a dead phone
- Spark-proof and reverse-polarity protection
- No need to flag down a stranger for help
What Jumper Cables Have That a Jump Starter Doesn't
- No battery to keep charged
- Unlimited cranking time (you can sit there cranking)
- Cheaper upfront ($20 vs. $60 to $200)
- Reliable in extreme cold where lithium cells struggle
The Battery Council International maintains the BCI group sizing standards that determine which battery fits your vehicle. If your battery is undersized or the wrong group, even the best jump gear may struggle to crank the starter.
What You Need Before You Jump (Quick Pre-Check)
Skipping this step is how people fry ECUs. Two minutes of inspection saves a $1,200 repair.
Visual Battery Inspection
Look at the battery before you connect anything. Walk around to where it's mounted (under the hood in most cars, in the trunk in some BMWs and Audis) and check for:
- Cracked or bulging case (do NOT jump a damaged battery)
- White or blue powdery corrosion on terminals (clean with a wire brush first)
- Sulfur or rotten-egg smell (hydrogen gas leak, ventilate and proceed carefully)
- Wet acid on top of the battery (overfilled or leaking)
If the case is cracked or swollen, stop. Tow it. A jump on a damaged pack can rupture it or ignite hydrogen gas.
Identify Your Battery Type
Most cars use a standard flooded lead-acid 12V battery. Some newer vehicles, especially those with start-stop systems, use AGM (Absorbent Glass Mat) batteries. Both jump the same way, but AGM batteries often sit in tight engine bays with restricted access to terminals.
If you see "AGM" or "EFB" printed on the battery label, the procedure is identical. Just be more careful about not sparking near the vents.
Confirm Voltage Compatibility
Standard automotive electrical systems are 12V. Heavy-duty trucks, commercial vans, and some diesel pickups run 24V systems. A 12V jump starter on a 24V system won't work and may damage the pack.
Check your owner's manual if you're unsure. Most consumer jump starters are 12V only and labeled clearly on the unit.
Tools and Materials
| Item | Purpose |
|---|---|
| Portable jump starter or jumper cables | The actual power source |
| Safety glasses | Battery acid is corrosive |
| Mechanic gloves | Avoid skin contact with terminals |
| Wire brush or terminal cleaner | Scrape off corrosion for solid contact |
| Owner's manual | Confirm battery location and voltage |
Gear Up Before You Connect
Park on flat ground, engage the parking brake, and turn off both vehicles. Remove the key from the ignition. Pop the hood and locate the battery.
Turn off any accessories (radio, lights, climate control) so all available current goes to the starter.
The Right Way to Jump Start With a Portable Jump Starter (Step-by-Step)
This is the most common path as of 2026 because portable packs have become affordable and reliable. Follow the order. Reversing it is the most common cause of fried alternators and ECU damage.
Step 1: Confirm the Jump Pack Is Charged
Most units show a charge level with 3 to 4 LED bars or a digital display. If it's under 75%, top it off before relying on it in the cold. Lithium cells lose usable capacity below freezing, so a "full" pack at -10°C may only deliver 60% of its rated output.
Step 2: Power On the Jump Pack
Press and hold the power button for 2 to 3 seconds. The LED indicators light up. Some models require you to press a separate "boost" button after connecting, which sends maximum current.
Check your unit's manual.
Step 3: Connect the Red Clamp to Positive (+)
The red clamp goes on the positive terminal first. Positive is marked with a "+" symbol and usually has a red plastic cover or red cable attached. Wiggle the clamp to make sure it's biting solid metal, not just the plastic terminal cover.
Step 4: Connect the Black Clamp to a Metal Ground Point
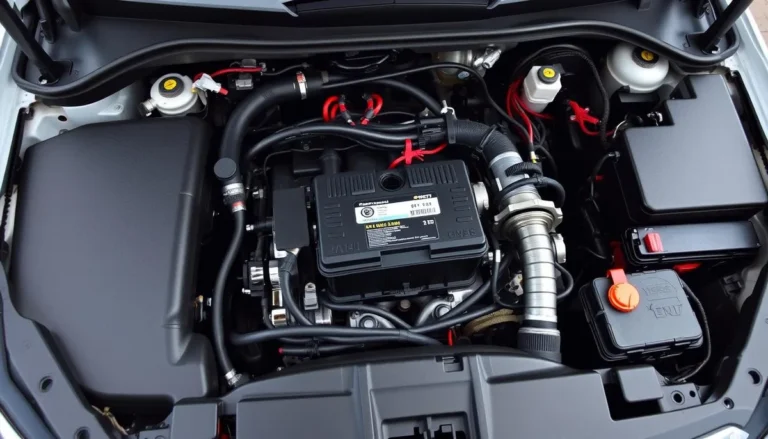
This is where most mistakes happen. The black clamp does NOT go on the dead battery's negative post in modern vehicles. It goes on an unpainted metal surface on the engine block, a bolt on the chassis, or the alternator bracket.
At least 12 inches away from the battery.
This grounds the circuit away from the battery, where hydrogen gas can pool. A spark at the battery post can ignite that gas.
Step 5: Wait 30 to 60 Seconds
Let the jump starter pre-charge the dead battery. Some modern units have a "force start" or "override" mode that bypasses voltage detection, useful when the battery is below 2V and the pack refuses to engage. Refer to your manual.
Step 6: Crank the Engine
Turn the key or press the start button. Crank for 3 to 5 seconds max. If it doesn't fire, wait 60 seconds and try again.
More than three consecutive cranks in a row can overheat the jump starter's internal circuitry.
Step 7: Disconnect in Reverse Order
Once the engine is running, disconnect the black clamp first, then the red clamp. Keep the clamps from touching each other or any metal surface while the other is still connected.
Step 8: Let the Engine Idle
Keep it running for at least 10 minutes, or drive for 30 minutes. The alternator needs time to put meaningful charge back into the battery. A short idle in the driveway may not recharge enough to start again the next morning.
What If It Still Won't Start?
Three cranks and nothing means the battery may be too far gone, or the issue isn't the battery at all. Check:
- All clamp connections are tight and on bare metal
- Battery terminals aren't covered in corrosion
- The jump pack has enough remaining charge
- No clicking means the starter motor may be bad
- Rapid clicking means the battery has some charge but not enough to crank
If all four look right and it still won't fire, stop cranking. You risk overheating the jump pack or damaging the starter motor. Call for a tow.
The Right Way to Jump Start With Another Car (Step-by-Step)
Cables work the same way as a jump pack, but you've got a live donor vehicle pushing current into your dead battery. Done right, it's safe and quick. Done wrong, it fries both cars.

Park and Position
Pull the donor vehicle nose-to-nose or side-by-side so the batteries are close, but never let the cars touch. A metal-to-metal contact can bridge the electrical systems and cause a short. Make sure both vehicles are in Park or Neutral with parking brakes set.
Connect in This Exact Order
- Red clamp to the dead battery's positive (+) terminal.
- Red clamp to the donor battery's positive (+) terminal.
- Black clamp to the donor battery's negative (−) terminal.
- Black clamp to an unpainted metal ground on the dead car's engine block.
Notice the dead battery's negative post gets skipped entirely. That ground point on the engine block is your fourth connection, at least a foot away from the dead battery.
Start the Donor Engine
Run it at 1500 to 2000 RPM for 2 to 3 minutes. This sends a steady charge into your dead battery before you try to crank. Aggregate field reports from roadside assistance crews suggest this pre-charge step improves first-crank success rates noticeably in cold weather.
Crank the Dead Engine
Now try starting the disabled vehicle. Crank for 3 to 5 seconds, then release. If it doesn't fire, wait a full minute and try again.
Revving the donor a bit while you crank helps push more current across.
Disconnect in Reverse Order
Once the dead car is running, disconnect the black clamp from the engine ground first. Then black from the donor negative. Then red from the donor positive.
Finally red from the jumped positive. Keep the clamps from touching each other or any shiny metal.
Key Decision Branches: Gas vs. Diesel, AGM vs. Lithium, 12V vs. 24V
The basic procedure stays the same, but the numbers change. Knowing where your vehicle falls in these branches prevents you from under-buying or frying something.
Gasoline vs. Diesel
Diesel engines need higher cranking amps to fire because compression ratios are roughly twice that of gas. A 4-cylinder diesel can demand 400A on a warm day and 700A+ below freezing.
| Engine Type | Typical Cranking Amp Need | Recommended Peak Amp Rating |
|---|---|---|
| 4-cyl gas | 150 to 300A | 1000A pack minimum |
| V6 gas | 250 to 400A | 1500A pack minimum |
| V8 gas | 400 to 600A | 2000A pack minimum |
| Diesel (any size) | 600 to 1000A+ | 2000A+ pack required |
If your jump starter is rated below your engine's cranking demand, the pack may refuse to engage or trigger an overload error.
AGM vs. Flooded Lead-Acid
AGM (Absorbent Glass Mat) batteries show up in most cars with start-stop technology and a lot of newer luxury models. The jump procedure is identical, but AGM holds voltage differently. You'll often see 12.4V or higher even when the battery is too weak to crank, which tricks cheaper jump packs into "battery not detected" errors.
Many modern jump packs include a "force start" or "manual override" button for exactly this scenario. Read your manual.
12V vs. 24V Systems
Standard consumer jump starters are 12V. Commercial trucks, some heavy-duty pickups, and many diesel cab-and-body configurations run 24V. Using a 12V pack on a 24V system won't harm the pack, but it won't crank the engine either.
If your vehicle runs 24V, you need a 24V-rated jump starter or a dual-voltage unit. Most consumer-grade packs sold online are 12V only, so double-check before assuming.
Where to Connect the Black Clamp (Ground Point Matters More Than You Think)
This single decision is the most common cause of jump-start accidents. Get the ground wrong and you can ignite hydrogen gas, weld your clamp to the chassis, or fry a sensor.

Why Ground Away From the Battery
Lead-acid batteries vent hydrogen gas during charging and heavy discharge. One spark on the wrong terminal can ignite that invisible cloud. Connecting the negative clamp to a chassis ground at least 12 inches away routes any spark far from the battery.
Good Ground Points
- Engine block bolt (unpainted, clean metal)
- Alternator bracket
- Engine lift hook
- Strut tower bolt
- Chassis ground strap (usually a heavy wire bolted to the frame)
Bad Ground Points
- The dead battery's negative post
- Fuel lines or fuel rail
- Throttle body or intake manifold
- Painted or rusty surfaces
- Moving belts or pulleys
If the only nearby bolt is painted, scrape it down to bare metal with a screwdriver before clamping. Paint insulates and you'll get a poor connection.
Common Mistakes That Fry Electronics (Reverse Polarity, Wrong Order, Running Engine)
Three mistakes account for most jump-start damage claims. Once you know them, they become automatic to avoid.
Reversed Clamp Polarity
Red on positive and black on negative sounds simple, but in dim light, with corrosion, or when terminals are unlabeled, it happens. Most quality jump packs have reverse-polarity alarms that beep or flash. Cheap cables have no protection.
A reverse connection sends current backward through the ECU, infotainment, and alternator diodes. Repair bills often run $800 to $2,500.
Connecting Last Clamp to the Dead Battery
Old instructions often said "black to negative on the dead battery." That advice assumed batteries were vented externally and far from electronics. Modern engine bays put the battery within inches of sensitive modules. Always ground away from the battery, full stop.
Cranking a Running Engine
Never crank the donor vehicle while the dead car's engine is running. The voltage spike can blow fuses and diodes in both cars. Disconnect everything first if you need to move either vehicle.
Leaving Accessories On
Heated seats, headlights, climate control, and the radio all draw current the moment you connect. Turn everything off before you crank. Headlights left on during a jump can blow their filaments from the voltage spike when you disconnect.
Using Damaged or Undersized Cables
Cheap 8-gauge cables over 12 feet long lose too much current to resistance. Stick to 6-gauge or 4-gauge copper cable, and keep the run under 20 feet if possible. Aluminum cables don't belong on 12V jumpers.
Too much voltage drop.
When a Jump Won't Work: Deeper Battery, Alternator, or Starter Issues
Sometimes you do everything right and the engine still won't turn over. The jump pack isn't broken and your procedure is correct. The problem is somewhere else.
Symptoms and What They Mean
- Rapid clicking, lights stay bright. The battery has some charge but not enough to crank. Either deeply discharged or has a dead cell.
- Single loud click, then nothing. The starter solenoid is engaging but the motor isn't spinning. Bad starter or corroded battery cables.
- No click, no lights, total silence. The battery is at 0V or the main fuse has blown. Try a manual override if your jump pack has one.
- Engine cranks but won't fire. Not a battery problem. Look at fuel delivery, spark, or immobilizer.
Test the Battery After the Jump
If the engine starts but won't restart 30 minutes later, the battery won't hold a charge. Most auto parts stores load-test batteries for free. A healthy 12V battery should hold above 12.4V at rest, 24 hours after the engine shuts off.
Alternator Test
With the engine running, voltage at the battery should read 13.7 to 14.7V. Below 13.5V and the alternator isn't charging. Above 15V and the voltage regulator is overcharging, which cooks batteries over weeks.
Starter Draw
A bad starter can pull 200A+ and still not crank. If your jump pack works fine on another vehicle but can't crank yours, suspect the starter. Tow it to a shop.
Specs That Actually Matter: Peak Amps, CCA, mAh, and Cable Gauge
Marketing numbers get thrown around without context. Here's what really matters when choosing or evaluating a jump starter.
Peak Amps vs. Cranking Amps
Peak amps is the maximum surge for a few seconds. Cranking amps (CA) and cold cranking amps (CCA) measure sustained delivery over 30 seconds at 32°F (CCA is at 0°F). For jump-starting, peak amps is the headline number, but CA/CCA tells you how well the pack holds up under continuous draw.
Capacity (mAh and Wh)
mAh measures the battery's energy storage, but watt-hours (Wh) is the honest number. A 15,000 mAh pack at 3.7V is 55.5 Wh. That's the figure that matters for both runtime and airline transport limits.
Cable Gauge
Lower gauge numbers mean thicker wire. For jumper cables, 6 AWG is the minimum for full-size cars. 4 AWG handles trucks and diesels better. 8 AWG works for small engines only.
What to Skip
- "Super Capacitor" jump boxes with no battery (need a donor car to charge up)
- "12,000A peak" claims on packs weighing under 2 lbs (math doesn't work)
- Non-certified chargers missing UL or ETL marks
The UL 2743 standard covers portable lithium jump starter safety, including overcharge, short circuit, and reverse polarity protection. Look for this certification before buying.
Safety Rules That Keep You Out of the ER
Most jump-start injuries are burns from acid splashes, hydrogen gas ignition, or moving parts. A few habits eliminate almost all risk.
Wear Protection
Safety glasses plus mechanic gloves, every time. Battery acid is dilute sulfuric acid, and it burns skin and eyes fast. Hydrogen gas is invisible and explosive.
No Smoking, No Sparks
Keep flames, cigarettes, and sparking tools away from the battery. Hydrogen accumulates near the vent caps and may pool under the hood.
Ventilate
If you're in an enclosed garage, crack the door or open the hood before connecting. Gas buildup has killed people in closed garages.
Disconnect AC First
If you're charging the jump pack from a wall outlet, unplug it before using it on a car. Plugged-in jump packs on a live AC source have caused electrical faults.
Inspect for Swelling or Damage
Lithium jump packs can develop internal shorts from drops or heat. A swollen pack is a fire risk. Stop using it and recycle it at a battery drop-off.
How to Maintain Your Jump Starter (Charge Cycles, Storage, Shelf Life)
A jump pack that won't hold a charge when you need it is worse than no jump pack at all. Maintenance is minimal but non-negotiable.
Charge Every 3 to 6 Months
Lithium cells self-discharge at roughly 2% to 5% per month. Storing a pack at zero charge for months damages the cells permanently. Most units have a "storage mode" or a recommendation to top off quarterly.
Store at Room Temperature
Heat degrades lithium cells faster than any other factor. Don't leave the pack in a hot trunk all summer. Cold storage is fine, but you'll lose usable power at -20°C.
Recharge After Every Use
Even a successful jump drops the pack to 50% or less. Top it off immediately so it's ready next time. Most packs recharge via USB-C in 3 to 5 hours.
Check the Clamps Monthly
Clamp springs weaken, teeth corrode, and cables fray. A loose clamp makes poor contact and may overheat during cranking. Replace cables if you see exposed copper or melted insulation.
Troubleshooting Quick Reference: Symptoms, Likely Causes, Fix
| Symptom | Likely Cause | Fix |
|---|---|---|
| Click but no crank | Weak battery or bad starter | Try manual override, check cable connections |
| Nothing at all | 0V battery or blown fuse | Force start, check main fuse |
| Jump pack error light | Reverse polarity detected | Swap clamps |
| Cranks slow | Cold-soaked battery, undersized pack | Wait 30s to pre-warm, use 2000A+ pack |
| Engine starts then dies | Alternator not putting out voltage | Drive 30 min, then load-test battery |
| Battery dies again next morning | Parasitic drain or dead cell | Test for parasitic draw, replace if old |
Best Jump Starter Picks by Use Case (Solo Driver, Diesel Truck, Cold Climate, Budget)
Match the Pack to the Job
Solo commuters and rideshare drivers do fine with a 1000A pack rated for up to 6L gas engines. Diesel owners need 2000A+ and should verify the unit explicitly lists diesel compatibility. Cold-climate drivers should oversize by one level, since lithium output drops below freezing.
Budget shoppers get solid performance from mainstream brands in the $60 to $100 range without paying for premium flashlights or air compressor attachments.
FAQs on Jump Starting a Car
How long does a jump starter take to work?
Most packs crank a dead engine within 30 to 60 seconds of connection. Cranking itself takes 3 to 5 seconds. If it doesn't fire within three attempts, the battery may be too far gone.
Can you jump a car in the rain?
Yes, 12V systems are safe in wet conditions. The voltage is too low to pose a shock risk. Just keep connectors from sitting in standing water.
Does idling recharge the battery fully?
A 30-minute drive at road speeds recharges more than 30 minutes of idling. Alternators produce full output above 1500 RPM, which idle rarely does.
Is red positive or negative on jumper cables?
Red is positive (+), black is negative (−). Always confirm with the + and − symbols on the battery before connecting.
Can a jump starter start a completely dead battery?
Modern units with manual override can force-start batteries below 2V. Without override, the pack refuses to engage to protect itself.
How often should I replace my jump starter?
Lithium jump packs last 3 to 5 years with proper storage. Replace if the pack won't hold above 50% charge overnight, shows swelling, or fails to crank an engine it previously handled.