How to use a stanley jump starter: Easy guide
You're parked in the cold, turn the key, and nothing happens. Before you wave down a stranger for help, here's how to use a Stanley jump starter to get yourself moving again.
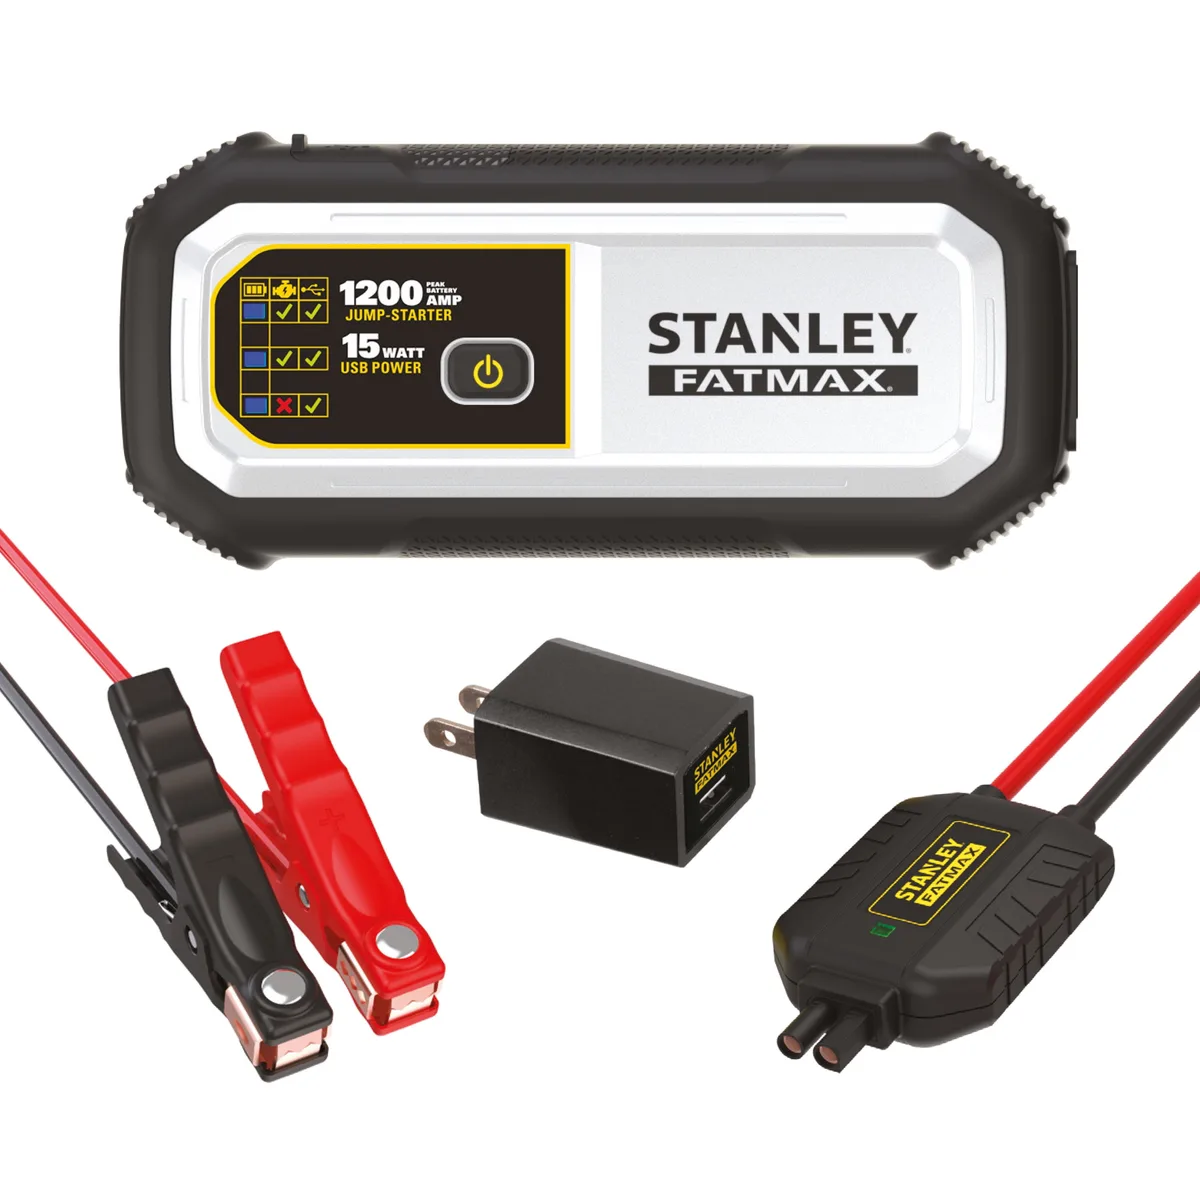
A Stanley jump starter is a self-contained lithium-ion booster that delivers enough current to crank a dead 12V battery in seconds, without needing a second vehicle. Manufacturer specs for the FATMAX line, as of 2026, list 700 peak amps and 350 instant amps, which handles most gas engines up to about 6.0L. The unit also doubles as a power bank and, on some models, a tire inflator, so it's worth keeping charged.
Below, the exact steps to use it safely and avoid the mistakes that damage jump starters and batteries.
Quick Answer
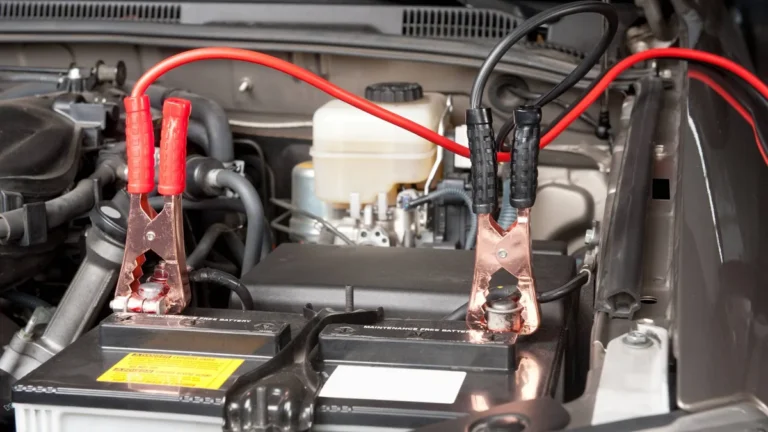
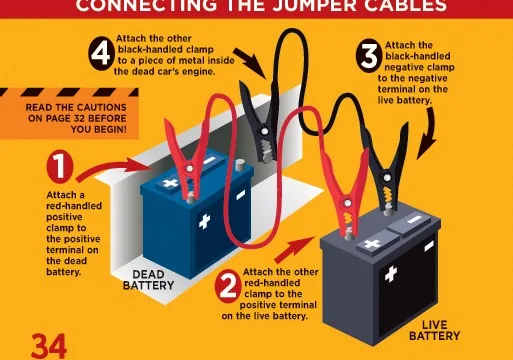
Turn off the car. Connect the red clamp to the dead battery's positive (+) terminal. Connect the black clamp to an unpainted metal ground.
Power on the jump starter. Crank the engine for up to five seconds. Disconnect the black first, then the red, once the engine starts.
Recharge the unit within 24 hours.
The Real Problem: Dead Battery, No Help in Sight
A dead battery doesn't care about your schedule. It happens in grocery store lots, on side roads after dark, and in the worst possible cold snap. Traditional jumper cables solve that only if a second vehicle happens to be nearby.
A portable jump starter puts that second vehicle in your trunk.
But owning the unit isn't the same as knowing how to use it when you're stressed, your fingers are cold, and the engine isn't turning over. The wrong clamp order, a missed safety step, or a unit that's been sitting uncharged for six months can turn a five-minute fix into a tow bill. So before we get to the actual steps, it's worth being clear about what problem a Stanley jump starter solves, and where it falls short.
What a Stanley Jump Starter Actually Solves
It solves the "single driver, no donor vehicle" problem. You connect it, crank, and drive away. It also handles the "dead battery in a remote spot" scenario, where calling roadside assistance means waiting 45 minutes or longer.
Most Stanley models will crank a fully discharged battery anywhere from 10 to 30 times per charge, depending on engine size.
Where It Struggles
Lithium-ion boosters drop output in extreme cold. If your Stanley has been sitting in a freezing trunk overnight, its effective cranking amps can drop by 30% or more. They're also not a substitute for a real battery.
If your battery is dead because it's failed, not just drained, the jump starter will get you going once, but the underlying problem returns. And fully dead batteries, where the resting voltage sits below about 10.5V, may need a manual override feature to crank at all.
What a Stanley Jump Starter Actually Does (And What It Won't)
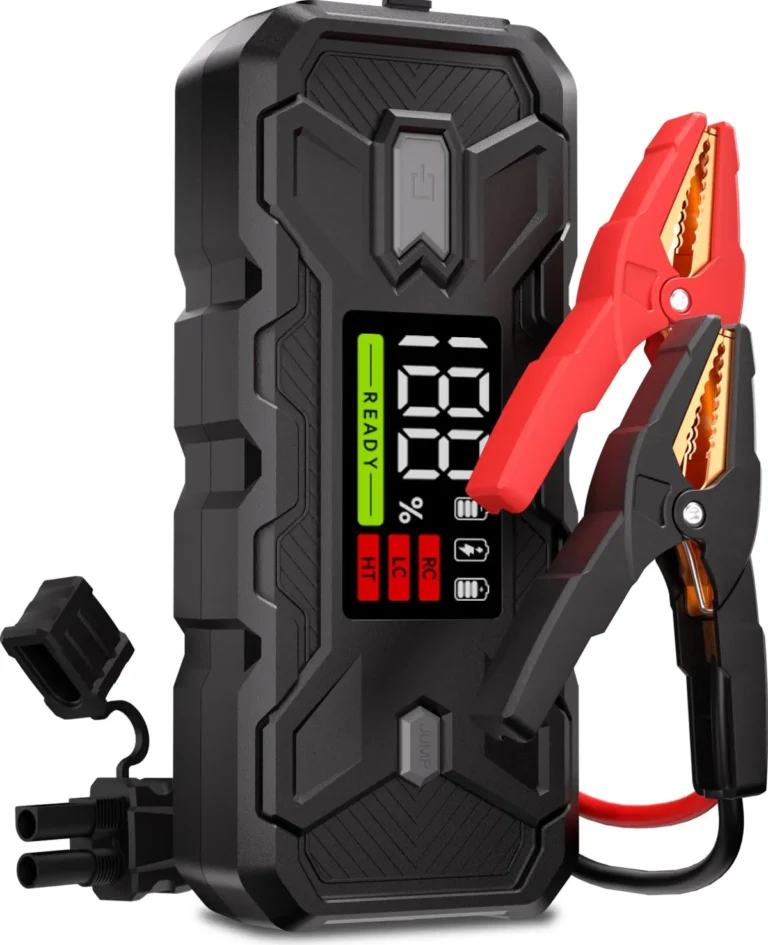
A Stanley jump starter is a high-discharge lithium-ion power pack, a voltage regulator, and a set of heavy-duty clamps built into one tool. Its job is simple: push a burst of current through your battery terminals long enough for the starter motor to turn the engine over.
Core Function Explained
Inside the unit is a lithium-ion battery pack rated in watt-hours or milliamp-hours, paired with copper clamps and a control board that limits voltage spikes. When you power it on, it sends 12V DC through the cables at the stated peak or instant amperage. Peak amps is the short burst rating.
Instant (starting) amps is what actually cranks the engine, and it's the lower number that matters.
Manufacturer specifications confirm the difference. The Stanley FATMAX and J7CSR models are rated at 700 peak amps and 350 instant amps. The J5C09 sits higher at 1000 peak and 500 instant.
For a 4-cylinder sedan, 300 to 400 instant amps is plenty. For a V8 or a small diesel, you want 500 or more.
What It Won't Do
It won't recharge a dead battery. It doesn't have the sustained output of a battery charger. It also won't fix a battery that's internally shorted, frozen, or physically damaged.
If you connect the clamps and the unit's reverse polarity alarm screams, or the jump starter shuts itself off immediately, that's a sign the battery itself is the problem, not just the charge level.
The Features That Actually Matter
A Stanley jump starter typically ships with:
- Reverse polarity alarm with audible beep and LED indicator
- Spark-proof clamps that resist back-arc on connection
- Built-in LED work light with SOS and strobe modes
- USB-A port, plus USB-C on newer models, for charging phones
- 12V DC outlet for small accessories
- Battery level indicator showing remaining charge
- Built-in air compressor on FATMAX and J7CSR models (120 PSI max)
Not every model has every feature. The base FATMAX includes the air compressor. The J5C09 skips the compressor and adds a higher amp rating.
Match the unit to your vehicle and your habits, not just to the lowest price.
The Key Decision: Which Stanley Model Matches Your Vehicle
This is where most buyers go wrong. They grab the cheapest unit, then wonder why it won't crank their truck in January. The right pick comes down to three things: engine size, climate, and how many extra features you actually need.
Match Amperage to Engine Size
A jump starter's instant amp rating is the single most important spec. Use this rough guide:
| Engine Size | Minimum Instant Amps | Recommended Stanley Model |
|---|---|---|
| 4-cylinder / small sedan | 300A | FATMAX (350A) |
| V6 / midsize SUV | 400A | J5C09 (500A) |
| V8 / small diesel (≤3.0L) | 500A | J5C09 or BC15BS |
| Larger diesel (3.0L+) | 700A+ | BC25BS (750A) |
If you're unsure, round up. Extra amps won't hurt. Too few amps will leave you clicking the starter with no crank.
Factor in Your Climate
Cold cuts lithium output. If you live where winter temps regularly drop below freezing, a unit rated for higher instant amps gives you a safety margin. Stanley specs list about 4°F to 140°F operating range for most models, but real-world performance degrades near the bottom of that range.
Store the unit indoors overnight in winter. Don't leave it in the trunk for days before you need it.
Decide on the Compressor
The FATMAX and J7CSR include a built-in air compressor rated up to 120 PSI. If you drive a lot of miles, carry passengers, or live in rural areas with rough roads, the compressor is genuinely useful. If you only need a booster for the occasional dead battery, skip it.
Less weight, lower cost, smaller footprint.
Prep Before You Crank: Charge Level, Safety Gear, and Vehicle Setup
Most jump start mistakes happen before the clamps even touch the battery. A quick prep pass takes 60 seconds and prevents damage to the booster, the vehicle electronics, and you.
Check the Jump Starter's Charge
The single biggest reason a Stanley won't crank a car is that it isn't charged. Manufacturer specs confirm typical standby charge life runs 3 to 6 months. If your unit has been sitting longer than that, plug it in for at least four hours before you trust it.
The battery level indicator should read full or near full. A partial charge can show enough LEDs to fool you, then drop voltage the moment the starter draws current.
Get the Vehicle Ready
Set the parking brake. Shift automatic transmissions to Park, manuals to Neutral. Turn off every accessory: lights, climate control, radio, phone chargers plugged into 12V outlets.
Cold cranking draws the starter's full current. Anything else drawing power reduces what's left for the engine.
Pop the hood. If your vehicle has a plastic cover over the battery, remove it. Locate both terminals.
The positive is larger, marked with a "+" and usually has a red cover. The negative is smaller, marked with a "−" and usually has a black cover. If the terminals are corroded, with white or bluish fuzz, wipe them with a rag before clamping.
Corrosion adds resistance and can prevent the booster from delivering full current.
Eye and Hand Protection
Working near a battery means sulfuric acid residue and the rare chance of a battery off-gassing or even cracking under heavy crank. Safety glasses aren't optional. Insulated gloves are better.
Keep metal jewelry away from the terminals. A wedding ring across both posts will weld itself in place, get red hot, and ruin your day.
Positioning the Jump Starter
Set the unit on a stable, dry surface near the battery. Don't let it dangle from the cables. Don't set it on the engine block where vibration could send it sliding into a belt or fan.
The cable leads are short on most Stanley models, so plan accordingly.
How to Use a Stanley Jump Starter: Step-by-Step
This is the core workflow. Follow it in order, and don't skip the wait times between attempts.
Step 1: Confirm the Unit Is Off
The power switch should be in the OFF position before you connect anything. This prevents a spark the moment the clamps touch the posts, which is the most common cause of clamp damage and user surprise.
Step 2: Connect the Red Clamp to Positive (+)
Attach the red clamp to the dead battery's positive (+) terminal. Make sure the metal teeth bite into the post, not the plastic housing. Wiggle it gently.
If it slides off, reposition.
Step 3: Connect the Black Clamp to Ground
Here's where the decision tree matters. Two options work, and the right one depends on the battery's condition:
- Standard connection: Attach the black clamp to the battery's negative (−) terminal.
- Safer connection (recommended): Attach the black clamp to an unpainted metal surface on the engine block or chassis, away from the battery, belts, and fuel lines.
The chassis ground method reduces the chance of igniting hydrogen gas that some batteries vent. Use it if your battery is old, has been heavily discharged, or shows any swelling.
Step 4: Power On the Jump Starter
Flip the unit's power switch to ON. A green or solid light confirms a good connection. A red light or audible beep means reverse polarity, meaning the red and black clamps are swapped.
Power off immediately, swap them, and try again.
Step 5: Crank the Engine
Turn the ignition key (or press start) and hold for up to 5 seconds. If the engine turns over and starts, great. If it clicks but doesn't crank, wait 30 to 60 seconds and try again.
Do not crank for longer than 5 seconds per attempt. The booster and starter motor both overheat under extended load.
Step 6: Disconnect in Reverse Order
Once the engine is running, leave it idling. Don't disconnect immediately. Wait 30 seconds to let the alternator stabilize voltage.
Then:
- Power off the jump starter.
- Remove the black clamp first.
- Remove the red clamp second.
Never reverse this order. The black clamp going on first and coming off first keeps the system grounded while you break the live positive connection. Reverse it, and you risk a spark at the positive post.
Step 7: Let the Engine Recharge the Battery
Idle the engine for at least 10 minutes, or drive for 20. The alternator's job is to recharge the battery, but alternators are slow chargers. A deeply discharged battery may need 30+ minutes of driving to come back to a usable state.
Don't shut it off too quickly after the jump. If you kill it again before the battery recovers, the jump starter may not have enough charge left for a second attempt.
Step 8: Recharge the Jump Starter
Plug the Stanley into a wall outlet the same day. Most units take 4 to 6 hours from empty. Recharging it right after use means it's ready next time you need it.
Letting it sit discharged for weeks can permanently reduce lithium-ion capacity.
What to Do If Your Battery Is Completely Dead (Manual Override)
A fully dead battery reads below 10.5V at rest. At that level, a Stanley's smart control board may refuse to send current, because it can't confirm the system is safe to crank. That's where the manual override button comes in.
This button, usually labeled "Manual," "Bypass," or "Override," forces the unit to deliver power even when it senses an undervoltage condition.
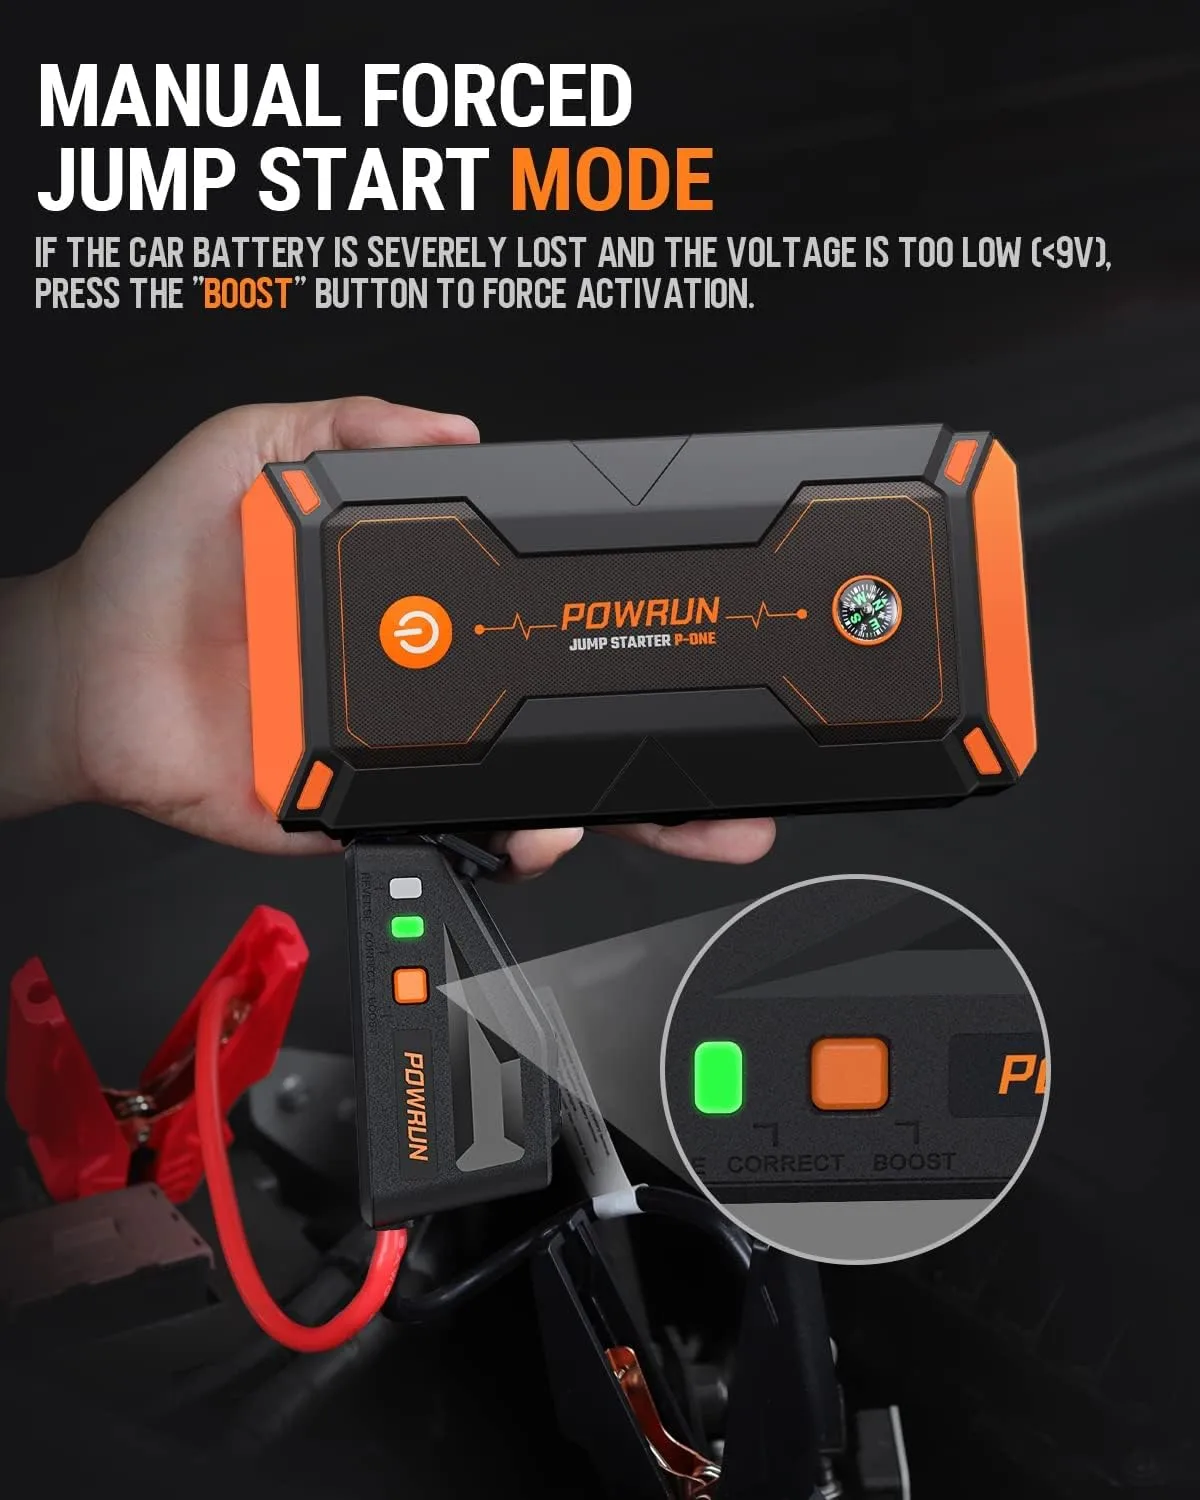
Press and hold the manual override button for 3 to 5 seconds. The status light will typically flash amber or change color to confirm override mode is active. With the override engaged, crank the engine within 10 seconds, before the unit times out and reverts to safe mode.
Use override mode sparingly. Bypass disables the protection circuitry, so any wiring fault or reversed clamp now goes straight to the components without warning. Manufacturer documentation warns to keep the override active only as long as needed for the crank attempt, and never to leave it engaged while the unit sits connected.
When to Use It
Use manual override when the green "ready" light won't come on, even with confirmed clean clamps and a charged booster. It's also the right move if the dead battery is more than a few weeks discharged, since resting voltage drops below the threshold after extended sitting.
When to Skip It
Skip override if any of these are true: the battery case is cracked or swollen, there's a sulfur smell, or you see fluid leaking around the posts. These signal a damaged battery, and forcing current through it can crack the case or worse. Call a professional instead.
Cold Weather Jump Starting: Adjusting for Sub-Zero Conditions
Cold weather does two things at once. It drops your car battery's cranking capacity by 30% to 50%, and it reduces the lithium-ion booster's effective output. Together, those losses can turn a routine jump into a no-start.
Warm the Booster First
If your Stanley has been in a 10°F trunk overnight, bring it inside for 20 to 30 minutes before you try to crank. Even a slight warming, from freezing to room temp, restores measurable capacity. Some owners keep the unit in a small insulated bag for exactly this reason.
Warm the Vehicle Battery (Carefully)
If the engine compartment is accessible and the battery isn't sealed, you can crank the heater (if there's residual charge), turn on the dome light for a minute, or briefly switch on the headlights. These small loads warm the internal chemistry slightly and improve cranking response. Don't overdo it.
A completely dead battery has nothing left to give.
Extend Wait Times Between Crank Attempts
In cold weather, give the booster and starter motor longer rest periods. 60 to 90 seconds between attempts, instead of the 30-second norm. This lets both components recover and prevents thermal cutoff. If your Stanley has a temperature indicator, watch it.
Some models display a warning when internal temps drop below operating range.
Crank in Short Bursts
Five seconds on, ninety seconds off. That rhythm gives the engine a fighting chance without overheating the starter or tripping the booster's protection circuit. Three or four attempts in this pattern will start most healthy engines.
If it still won't catch after four tries, the issue isn't the cold. It's the battery or the starter.
Mistakes That Fry Your Jump Starter or Your Battery
A jump starter is a rugged tool, but it's not indestructible. The most common user errors cause damage that's invisible until the next emergency, the one where it doesn't crank and you really needed it to.
Cranking Too Long
Holding the key for 10, 15, 20 seconds straight overheats both the booster and the starter motor. Five seconds max per attempt. Anything longer risks tripping the booster's over-current protection, which permanently reduces its peak output.
Connecting While Powered On
If you power up the Stanley and then touch the clamps to the terminals, you risk arcing at the moment of contact. Reverse polarity protection helps, but the spark itself damages the clamp teeth and can pit the copper over time. Always confirm the unit is OFF before connecting.
Skipping the Charge After Use
A jump starter that sits discharged for weeks permanently loses capacity. Lithium-ion cells hate sitting at zero. Recharge within 24 hours of use, even if the indicator still shows partial charge.
The indicator doesn't reflect cell health, only surface voltage.
Storing in a Hot Trunk in Summer
The opposite mistake. Trunk temps in direct summer sun exceed 140°F regularly, which can degrade the battery management board and the lithium cells themselves. If your Stanley lives in the car, store it in the cabin or in an insulated bag, not in the trunk, in summer.
Using the Wrong Unit for the Job
Trying to crank a 6.0L diesel with a 350A booster is asking for a fail. Repeated failed cranking trips protection circuits and, in some models, locks the unit out until reset. Match the unit to the engine before you buy, not when you're stuck.
Troubleshooting: Why Your Stanley Won't Start the Engine
Sometimes everything looks right and the engine still won't turn over. Here's how to diagnose it fast.
The Indicator Shows Charge, But Nothing Happens
This usually means a poor clamp connection. The teeth aren't biting into the metal, or corrosion is blocking the contact. Disconnect, clean both posts and clamp teeth with a wire brush or rough rag, and reconnect.
The Unit Beeps or Flashes Red on Power-Up
Reverse polarity, or a clamp short. Power off immediately. Inspect both clamps.
Confirm red is on positive, black is on negative or ground. Confirm the teeth aren't touching each other.
The Engine Clicks But Won't Crank
Either the booster is underpowered for the engine, or the battery is drawing power faster than the booster can deliver. Try manual override mode. If override still won't crank it, the battery is likely shorted internally.
The booster can't fix that.
The Unit Shuts Itself Off Mid-Crank
Thermal or over-current cutoff. Stop trying for at least 5 minutes. Let the booster cool.
Confirm your crank attempts are 5 seconds or less, with proper rest between. If it keeps tripping, your battery may have a dead cell.
The Booster Won't Charge
Check the wall adapter first. Stanley units use specific barrel-jack adapters, and a generic 12V adapter with the wrong polarity can fry the charge port. Confirm the indicator lights up when the adapter is plugged in, even with no battery.
If not, the charge port or adapter is the issue. Contact Stanley support if the unit is still under warranty, since most models ship with a 1-year limited warranty.
Using the Built-In Air Compressor and Extra Features Safely
If your Stanley has the FATMAX or J7CSR compressor, it's tempting to use it for anything with a tire. Resist the urge. The compressor is built for emergency top-offs, not for filling a totally flat tire from zero PSI.
Compressor Use
Inflate only to the pressure listed on your tire's sidewall, typically 30 to 35 PSI for passenger cars. The compressor runs hot. Let it rest for 10 minutes between fills.
Don't run it for more than 8 to 10 minutes continuously, or you'll trip its thermal cutoff and wait 20 minutes for it to reset.
USB Power Bank Use
The USB ports are useful for charging phones during a breakdown. They output standard 5V at 2.1A on most models, so a phone charges at normal speed. Don't try to run high-draw devices like tire inflators or coffee makers off the USB ports.
They'll trip the protection circuit instantly.
LED Light Use
The built-in LED is genuinely bright, 100 to 400 lumens depending on model, with steady, SOS, and strobe modes. Use it to see the engine bay or signal for help. Don't stare into it.
It's bright enough to cause temporary flash blindness at close range.
For questions about safe handling and recycling of lithium-ion packs, the Consumer Product Safety Commission maintains guidance on battery storage, transport, and disposal.
Storage and Long-Term Maintenance to Keep It Ready
A jump starter you forgot to charge is a paperweight when you need it most. Storage habits make the difference between a tool that works on the third try and one that works on the first.
Charge the unit every three months in storage. A full top-off takes 4 to 6 hours from empty, but a brief 1 to 2 hour session keeps the cells healthy between uses. Some Stanley models include an automatic maintenance mode that keeps the battery topped off without overcharging, but check your specific model's manual to confirm.
Store the unit indoors in climate-controlled space whenever possible. Temperatures between 50°F and 80°F are ideal. If the unit lives in your vehicle full-time, keep it in the cabin rather than the trunk, and use an insulated bag for extra protection against temperature swings.
Inspect the clamps and cables every six months. Look for cracked insulation, green corrosion on the copper teeth, or loose connections at the strain relief point. Wipe down the unit with a dry cloth.
Check that the charging port is clean and free of debris.
Test the unit once a year by using it on a known-good battery or by checking the indicator lights and USB ports. A unit that sits for years without use can develop capacity loss even without active discharge cycles.
Stanley vs. the Competition: When to Stick With Stanley and When to Switch
Stanley isn't the only portable jump starter brand. Here's how it stacks up against the most common alternatives, and when each one earns its place in your trunk.
| Brand | Strengths | Best For |
|---|---|---|
| Stanley | Brand availability, lower price, compressor-equipped models | General use, average climate, value-driven buyers |
| NOCO Boost Plus | Better cold-weather performance, compact size | Extreme cold regions, daily carry |
| Hulkman Alpha | High peak amps, fast recharge | Heavy-duty use, frequent jumps |
| Antigravity XP-10 | Lightweight, motorcycle-friendly | Motorcycles, ATVs, weight-sensitive use |
| Clore Jump-N-Carry | Lead-acid reliability, professional-grade | Commercial shops, fleet use |
If you're deciding based on price alone, Stanley wins the budget category. If you need a unit that performs below zero without warming tricks, NOCO and Hulkman take the lead. If weight matters more than capacity, Antigravity has the lightest units on the market.
Clore's lead-acid boosters remain the workhorses for professional garages that need daily reliability and don't mind the extra weight.
Stay with Stanley for general-purpose, value-driven use where you want a compressor built in. Switch to a competitor if you need specialty features: extreme cold tolerance, minimum weight, or shop-grade cycle life.
Specs and Pricing at a Glance
Here's a snapshot of what each Stanley model offers and what you'll typically pay as of 2026.
| Model | Peak Amps | Instant Amps | Air Compressor | Price Range |
|---|---|---|---|---|
| FATMAX | 700A | 350A | Yes (120 PSI) | $80 to $130 |
| J5C09 | 1000A | 500A | No | $90 to $150 |
| J7CSR | 700A | 350A | Yes (120 PSI) | $70 to $120 |
| BC15BS | 1500A | 750A | No | $130 to $180 |
| BC25BS | 2500A | 1250A | No | $180 to $250 |
Budget units under $80 typically cover sub-300A peak, which works for small engines only. Mid-range $80 to $150 covers most consumer vehicles. Professional $150 to $250 covers diesel and fleet use.
Across the lineup, manufacturer specs confirm roughly 500 to 1000 charge cycles before capacity drops to 80% of new. USB output sits at standard 5V / 2.1A. LED output runs 100 to 400 lumens.
Operating temps span about 4°F to 140°F, with reduced performance near the cold end.
Safety Warnings You Shouldn't Ignore
Battery work carries real risk. These warnings aren't legal boilerplate. They're the difference between a clean jump and a trip to the emergency room.
Never jump a frozen, cracked, or leaking battery. A frozen battery can explode under cranking current. A cracked case vents sulfuric acid.
A leaking battery means internal failure that the booster can't fix and may worsen. If any of these apply, replace the battery or call for service.
Wear eye protection every time. Battery acid residue on terminals can splash when clamps connect. Eye injuries from acid contact require immediate medical attention and can cause permanent damage.
Keep sparks and flames away from the battery. Even a "dead" battery off-gases hydrogen, which ignites with the smallest spark. No smoking, no lighters, no arcing tools near the battery.
Don't fly with a lithium jump starter in checked luggage. Lithium-ion batteries are banned from aircraft cargo holds due to fire risk. Carry-on is allowed within TSA watt-hour limits, but always check current rules before flying.
The TSA battery rules page is the authoritative source for current limits.
Disconnect the booster before restarting any crank attempts. If the engine doesn't start on the first try, power off the booster, wait 60 seconds, then power it back on. This resets the protection circuit and prevents overheating.
Quick Reference: Jump Starting Checklist
When the engine won't turn over and you're in a hurry, this is the sequence to follow:
- Confirm the booster shows a strong charge.
- Set parking brake, transmission in Park or Neutral.
- Turn off all accessories: lights, climate, radio.
- Red clamp on positive (+) terminal first.
- Black clamp on a clean ground point or negative (−) terminal second.
- Power on the unit.
- Crank for 5 seconds max.
- If no start, wait 60 seconds and try again. Three attempts max.
- After start, power off, remove black clamp first, then red clamp.
- Let engine idle 10 minutes or drive 20 minutes before shutting down.
- Recharge the booster within 24 hours.
Frequently Asked Questions
How long does a Stanley jump starter hold its charge?
Three to six months in storage. Recharge every 90 days, or top it off after every use, to keep the cells healthy and the unit ready for an emergency.
Can a Stanley jump starter start a completely dead battery?
Yes, with the bypass mode enabled. The override button forces current through batteries sitting below 10.5V, where the unit's normal safety check would otherwise refuse to engage.
Will a Stanley jump starter work in freezing weather?
Yes, but performance drops. Cold reduces lithium-ion output, so bring the unit indoors to warm up for 20 minutes before cranking if it's been in a sub-zero trunk.
How many times can a Stanley jump starter start a car on one charge?
Roughly 10 to 30 starts per charge. Smaller engines draw less current and stretch it. Repeated short cranks with rest periods between them get more out of one charge than a single long cranking attempt.
Is it safe to leave a Stanley jump starter in the car year-round?
Not in a hot trunk. Summer cabin heat can exceed 140°F and degrade lithium cells. Store the unit indoors or in an insulated bag, and bring it into the cabin in winter for consistent readiness.
Can I fly with a Stanley jump starter in my luggage?
Carry-on only, under TSA rules. Lithium-ion jump starters are banned from checked baggage because of fire risk in the cargo hold. Confirm current watt-hour limits with the TSA battery rules before you travel.