How Everstart Jump Starter How to Use
Picture this: your battery is dead in an empty parking lot, no second car in sight, and you've got an EverStart in the trunk. Knowing how to use an EverStart jump starter turns a 45-minute wait for roadside help into a five-minute fix, and once you've done it once, it sticks. It's one of the most useful emergency tools you can own.
The current EverStart lineup (as of 2026) runs from the compact 400-peak-amp lithium units up through heavy-duty 1,500, 1,700 peak-amp lead-acid boxes, with some models throwing in a USB power bank, a flashlight, and even a built-in air compressor. Most are designed around the same core workflow, but the indicator lights, the manual override button, and the clamp order trip up a lot of first-time users. Let's walk through exactly how to use yours, in the right order, without frying anything.
Quick Answer
An EverStart jump starter works like this: power it on, connect the red clamp to the dead battery's positive terminal, then connect the black clamp to a clean metal ground point on the engine block, not the battery. Wait for the green ready light. Crank the engine for no more than 5 seconds.
Disconnect the black clamp first, then the red clamp, then recharge the unit. If your battery is deeply discharged, press the Manual Override (Force Start) button before cranking. Never reverse the clamps, and never let the red and black clamps touch.
What Comes in the Box and What to Check Before You Start
Every EverStart jump starter ships with the same basic kit, but the extras vary by model. Before your first real use, lay everything out and confirm each piece is present and undamaged.
The standard package across the EverStart Maxx, Plus, and Value lines includes:
- The jump starter unit itself (lithium or sealed lead-acid, depending on model)
- A pair of heavy-duty clamps, usually hardwired to a short pigtail cable
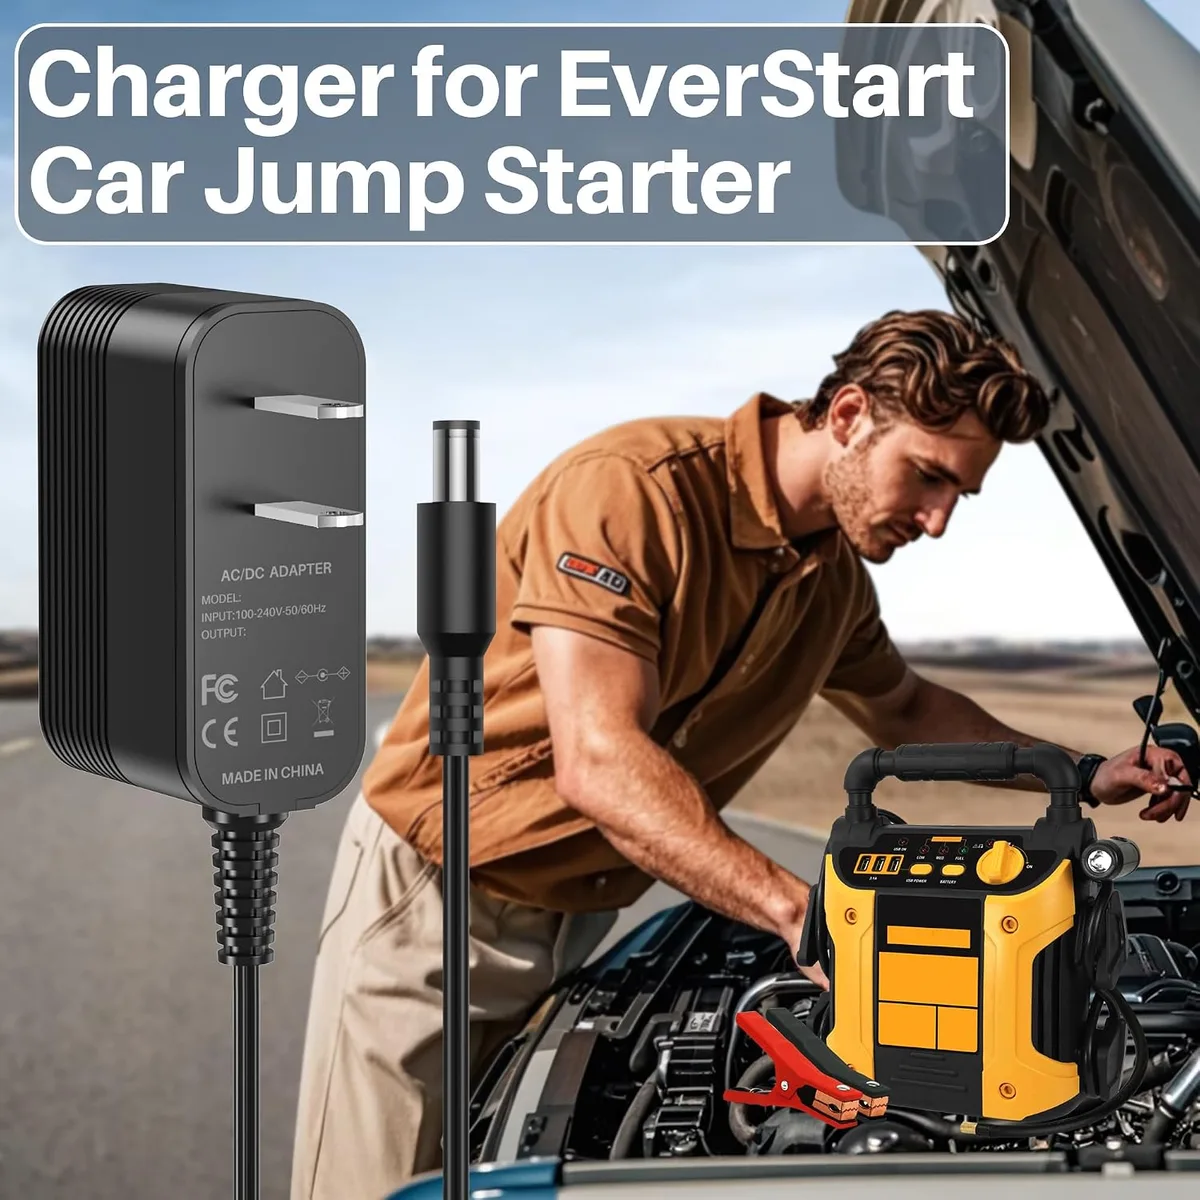
- A wall charger (AC adapter) and/or a 12V DC car charger
- A USB charging cable (micro-USB or USB-C, depending on the model year)
- A user manual with model-specific indicator light guidance
A few models also bundle a 12V cigarette-lighter adapter, a storage case, and, on the compressor-equipped versions, short air-hose attachments for tires, balls, and inflatables.
If your model has a Manual Override or Force Start button (most Maxx units 1,000 peak amps and up do), confirm where it lives on the unit before you ever need it. You don't want to be searching for it in the rain.
A quick pre-use checklist:
- The unit's charge indicator reads at least three bars (or 50%+ on percentage models). A jump starter with no juice is just a paperweight.
- The clamp insulation is intact. No cracks, exposed copper, or melted sections.
- The clamp jaws open and close cleanly and the spring tension feels firm.
- The case isn't swollen, cracked, or leaking. Lithium jump starters especially should never be puffed up or punctured.
- The user manual is in the glove box. You'll want the indicator-light legend specific to your model.
Why a Pre-Use Check Matters
Manufacturer specifications for most EverStart lithium models indicate roughly 6, 12 months of standby charge when stored at room temperature. Aggregate reviews consistently report that the #1 reason these units fail in real emergencies is that they sat in a trunk for a year at 30% charge and slowly drained below the threshold needed to crank an engine. A two-minute check today prevents a stranded-car moment next winter.
Know the Parts: Clamps, Indicators, Buttons, and Ports
Once you know the anatomy, the actual jump-start step is muscle memory. Here's what you're looking at when you pick up an EverStart.
The Clamps
Two color-coded clamps come off a short pigtail on the back or top of the housing.
- Red = positive (+)
- Black = negative (−)
Most EverStart clamps are spark-proof and reverse-polarity protected, which means the unit will refuse to output (or will beep loudly) if you try to send current the wrong way. Don't rely on that as a substitute for paying attention, though.
The Control Panel
The face of the unit is where the action happens. You'll find some combination of:
- A power button (sometimes labeled "Start" or with a lightning-bolt icon). On many models you press and hold it for 1, 3 seconds to turn the unit on.
- A battery status indicator. Usually 4 LED bars, but some newer Maxx units show a digital percentage.
- A "Ready" or green light. This is what you wait for after the clamps are connected.
- A reverse-polarity alarm (red flashing light, sometimes paired with a beep).
- A Manual Override / Force Start button. This bypasses the smart-safety check and is meant for severely discharged batteries.
- A flashlight button (steady / SOS / strobe on most models).
The Ports
Along the side or back you'll typically see:
- A charging input port (micro-USB, USB-C, or a round DC jack for the wall adapter, depending on model)
- A USB-A output for charging phones and small electronics
- Sometimes a 12V DC output port for powering car accessories
- A compressor hose recess on air-equipped models
| Port | What It Powers | Common Use |
|---|---|---|
| Charging input | Recharges the jump starter | Wall outlet or car 12V |
| USB-A output | Phones, tablets, small devices | 5V/2.1A or 2.4A |
| 12V DC output | Tire inflators, fans, camping lights | Cigarette-lighter-style accessory plug |
| Compressor port (select models) | Tires, sports balls, inflatables | Up to ~120 PSI on Maxx compressor versions |
A Note on Manual Override
If your EverStart has a Force Start or Manual Override button, treat it with respect. It exists because modern smart clamps will refuse to deliver current to a battery that's so dead the smart circuit can't detect voltage. In normal jump-starting, you never press it.
Pressing it disables a layer of protection, and if the cables are reversed you've now got nothing between you and a short circuit. Per the EverStart user manuals, you should only use Manual Override after confirming the clamps are correctly oriented.
Prep the EverStart Jump Starter Before the First Use
Out of the box, the unit usually has a partial charge, around 30, 50%. Manufacturer specs recommend a full top-up before first use. This takes 3, 6 hours depending on model.
First-Time Charging Steps
- Plug the included wall charger into a standard 120V outlet.
- Connect the charging cable to the matching input port on the jump starter.
- Look for a blinking or solid charging indicator. On 4-bar LED models, all four bars will be lit (or steady, not flashing) when fully charged.
- Unplug once full. Don't leave it plugged in indefinitely, as prolonged overcharging can degrade lithium cells over years.
Pick a Storage Location That Makes Sense
The two most common places people store jump starters are the trunk and the glove box. Both work, but with caveats:
- Trunk: out of the way, but temperature swings are brutal. Trunks hit 130°F+ in summer and well below freezing in winter, both of which shorten battery life.
- Glove box: easier to reach, climate-controlled, but takes up usable space.
- Under-seat storage or cargo-area side compartments are a nice middle ground.
A good rule: store it somewhere inside the cabin if possible, and bring it inside during extreme heat or cold snaps.
Set a Recharge Reminder
Most EverStart lithium units slowly self-discharge at 1, 3% per month. Lead-acid models lose charge faster. As of 2026, manufacturer guidance across the EverStart line suggests topping off every 90 days minimum.
A calendar ping on your phone is the simplest way to keep the unit battle-ready.
How to Jump Start a Car With an EverStart (Step-by-Step)
This is the part you came for. We'll go condition-by-condition, because the right action changes based on what the lights show you.
Step 1: Position and Power On
Park the dead car on level ground with the parking brake engaged. Turn off the ignition, all accessories (fans, lights, radio), and remove the key. Pull out your EverStart and place it on a stable, dry surface near the battery.
Never put it on the engine itself or anywhere it can fall into moving parts.
Press and hold the power button for 1, 3 seconds. You'll see the unit wake up: the battery indicator lights up, and possibly a green or red status light.
Step 2: Identify the Battery Terminals
Pop the hood and find the battery. The positive terminal is marked with a "+" symbol and usually has a red cover or red cable. The negative terminal is marked "−" and has a black cable.
If the battery is hidden under a plastic cover, lift the cover off. If the car has remote jump-start posts under the hood (common on some newer vehicles), use those instead.
Make sure the terminals are clean. If you see heavy white or blue-green corrosion, scrape it off with a key or wrench so the clamps can bite metal directly.
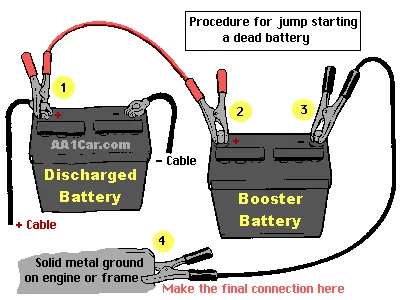
Step 3: Connect the Red (Positive) Clamp
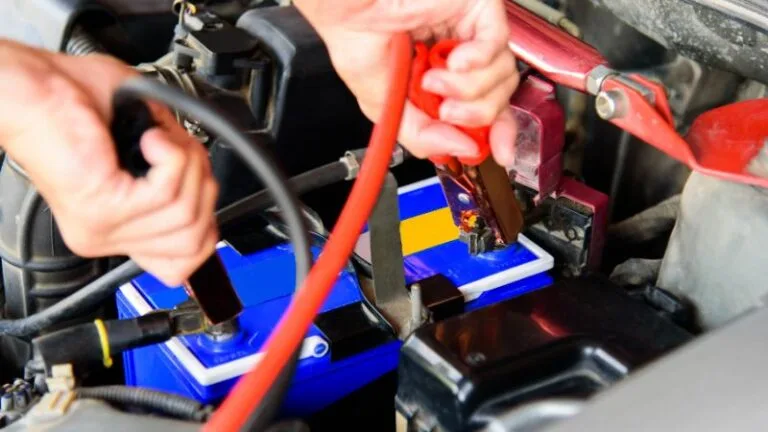
Clip the red clamp firmly onto the positive terminal. Wiggle it a little to make sure it's biting metal, not just sitting on the plastic case.
Step 4: Connect the Black (Negative) Clamp
This is where a lot of guides get it wrong. The EverStart manuals and the Society of Automotive Engineers guidance on jump-starting, summarized in SAE J1498, recommend attaching the black clamp to a clean, unpainted metal ground point on the engine block or chassis, not the negative battery post.
Why? A deeply discharged or failing battery can off-gas hydrogen. The spark from completing the final connection can ignite that gas.
Connecting to a remote ground keeps the spark away from the battery.
Good ground points include:
- A bare metal bracket on the engine block
- An unpainted bolt on the alternator bracket
- A chassis ground strap
Bad ground points: the negative battery post, painted surfaces, fuel lines, and anything that moves when the engine starts.
Step 5: Wait for the Green "Ready" Light
After both clamps are connected, the jump starter will run a quick diagnostic. This takes 2, 10 seconds. On a healthy setup you'll see a solid green light (or the status indicator switch to "Ready").
If you see a red flashing light or hear a beeping, the unit is telling you something's wrong. Most often it's one of these:
- Reverse polarity (clamps swapped)
- Poor clamp contact
- Battery voltage too low to trigger the safety check (use Manual Override, covered in the next section)
Step 6: Crank the Engine
Get in the car, turn the key (or press start), and crank for no more than 5 seconds. Don't hold the starter for 15, 20 seconds at a time. If the engine doesn't catch, wait 30 seconds and try again.
Three to five short attempts is the safe maximum. If it still won't start, the battery may be dead beyond what the jump starter can recover, or you may have a different problem (bad alternator, bad starter, flooded engine, fuel issue).
Step 7: Disconnect in Reverse Order
Once the engine is running:
- Disconnect the black clamp from the engine ground first.
- Disconnect the red clamp from the positive terminal.
- Keep the engine running. Don't shut it off for at least 20, 30 minutes to let the alternator put some charge back into the battery.
If you're on the side of the road and the car needs to be driven home, leave it running and drive gently. A jump-started battery often doesn't have enough surface charge to crank the car a second time if you shut it off too soon.
Quick Reference: Order of Operations
| Step | Action | Notes |
|---|---|---|
| 1 | Power on the EverStart | Hold power button 1–3 seconds |
| 2 | Red clamp to (+) terminal | Wiggle to confirm metal contact |
| 3 | Black clamp to engine block ground | Never the negative battery post |
| 4 | Wait for green Ready light | 2–10 seconds |
| 5 | Crank engine | Max 5 seconds per attempt |
| 6 | Black clamp off first | Then red clamp off |
| 7 | Keep engine running | 20–30 min minimum |
If at any point the clamps spark, the unit beeps continuously, or the cables feel hot, stop. Disconnect both clamps, wait a minute, and re-check the setup. Something is wrong with the connection or the battery.
When the Car Won't Start: Using the Manual Override / Force Start Button
Sometimes the jump starter's safety circuit won't recognize a battery at all. If your battery is sitting below roughly 2 volts, the smart clamps refuse to send current because they can't verify polarity. That's where Manual Override comes in.
If you've confirmed the clamps are correctly placed (red to +, black to engine ground), and the unit is fully charged, but the Ready light never turns green, press and hold the Manual Override button for about 3 seconds. On most Maxx units, the indicator switches from blinking red to a steady amber or green when override is engaged.
Now crank the engine as normal. Use it for the shortest possible time. Once the engine is running, the override automatically disengages, and you follow the standard disconnect procedure from the previous section.
When NOT to Use Manual Override
- You haven't double-checked clamp orientation. If they're reversed and you force it, you'll see sparks and risk damaging the jump starter's circuitry.
- The battery is cracked, swollen, leaking, or frozen. A physically compromised battery is dangerous to jump at all, manual or otherwise.
- The unit is below 25% charge. Manual Override draws more current than a normal jump, and a half-charged unit may not deliver enough to crank.
How to Jump Start a Motorcycle, ATV, or Lawn Tractor
Smaller vehicles draw less current, but they also have smaller batteries that get fried faster by mistakes. The EverStart lithium 400, 600A models handle motorcycles and ATVs without issue. For lawn tractors with small lead-acid batteries, even a compact unit is overkill in the best way.
The process is identical to a car jump, with two differences:
- The positive terminal on a motorcycle is often smaller and partially hidden under a relay or fuse box. A standard EverStart clamp may not fit. Use the included smaller adapters if your model has them, or clamp onto a clean bare-bolt positive junction instead.
- The ground point matters more. Most motorcycles have a dedicated ground lug on the frame. Use it. Chassis ground points on ATVs are sometimes painted, so scrape down to bare metal before clamping.
A 400, 750 peak amp EverStart will crank most motorcycles and ATVs in one or two attempts. Lawn tractors usually fire on the first try.
Quick Tip for Powersport Vehicles
Powersport batteries are often AGM or lithium themselves, with lower voltage tolerances. Crank in 2, 3 second bursts, never continuous. Three to four attempts is the safe maximum before assuming the battery is fully dead and needs replacement.
How to Charge Your Phone or Devices With the EverStart
Most EverStart jump starters double as a power bank. The USB-A output (and on some 2024+ Maxx models, USB-C PD up to 18W) lets you top off phones, tablets, headlamps, and even small laptops in a pinch.
To use it:
- Turn the jump starter on (some models require you to press the power button once to enter "USB mode").
- Plug your device's USB cable into the output.
- Leave the jump starter powered on. Most units auto-shut-off after 30, 60 seconds of no draw to save battery.
A typical 10,000 mAh EverStart unit will recharge a modern smartphone about 2, 3 times before the jump starter is empty. That's also why top-off charging every 90 days matters.
When the USB Ports Are Most Useful
- Power outage at home and the power bank is dead
- Camping or road-trip charging
- Emergency communication during a roadside breakdown
Don't rely on the jump starter as a daily charger, though. Lithium cells in jump starters are optimized for short, high-current bursts, not the slow, sustained draw of a laptop or phone cycle. Doing it occasionally is fine; making it a habit shortens overall battery life.
How to Use the Built-In LED Flashlight (Steady, SOS, Strobe)
Every current EverStart jump starter (as of 2026) has a built-in LED flashlight, and the brightness ranges from about 100 lumens on compact units to 400+ lumens on the Maxx flagships. Most have three settings.
To use it, press and hold the flashlight button for 2, 3 seconds. Each press cycles to the next mode:
- Steady beam: general illumination, walking around at night, looking under the hood
- SOS flash: international distress signal (three short, three long, three short)
- Strobe: high-frequency flashing for visibility or signaling
Hold the button for 2, 3 seconds again to turn the flashlight off.
Real-World Use
The flashlight is more useful than it sounds. It's the difference between fumbling with cables in the dark and getting both clamps right the first time. If you've ever tried to identify positive and negative terminals in a poorly lit parking lot, you'll appreciate it.
SOS mode also doubles as a roadside emergency beacon. Set the unit on the roof of the car with the light pointing outward. Drivers approaching will see you from a much greater distance than with just your four-ways.
How to Use the Air Compressor on EverStart Compressor Models
Several EverStart Maxx and Plus models include a built-in 12V air compressor, typically rated for 100, 150 PSI max. They can inflate a standard passenger car tire from 20 PSI to 30 PSI in about 5, 8 minutes. They're not industrial tools, but they absolutely handle a slow leak.
Step-by-Step
- Make sure the jump starter is at least 50% charged.
- Locate the hose stored in its built-in compartment.
- Remove the valve cap from the tire.
- Press the compressor nozzle firmly onto the valve stem and lock the lever.
- Turn the compressor switch on.
- Watch the analog or digital pressure gauge. Stop when you reach your target PSI.
- Turn off, unlock, and remove the nozzle. The tire may hiss briefly as the hose releases.
A Few Practical Notes
- The compressor draws a lot of current, so don't run it back-to-back. Give the unit 5, 10 minutes between tires.
- It's loud. Plan accordingly.
- If the compressor stops before reaching pressure, the unit is overheating. Let it cool 10, 15 minutes before continuing.
Aggregate reviews report that EverStart compressor models can typically fill 4, 6 passenger tires from a full charge. Beyond that, recharge before more inflating.
EverStart Indicator Lights and Error Codes Explained
The lights on the front of the unit aren't decoration. They're the unit's only way to tell you what's happening, and they vary by model. This is the most common legend across the 2024, 2026 EverStart lineup.
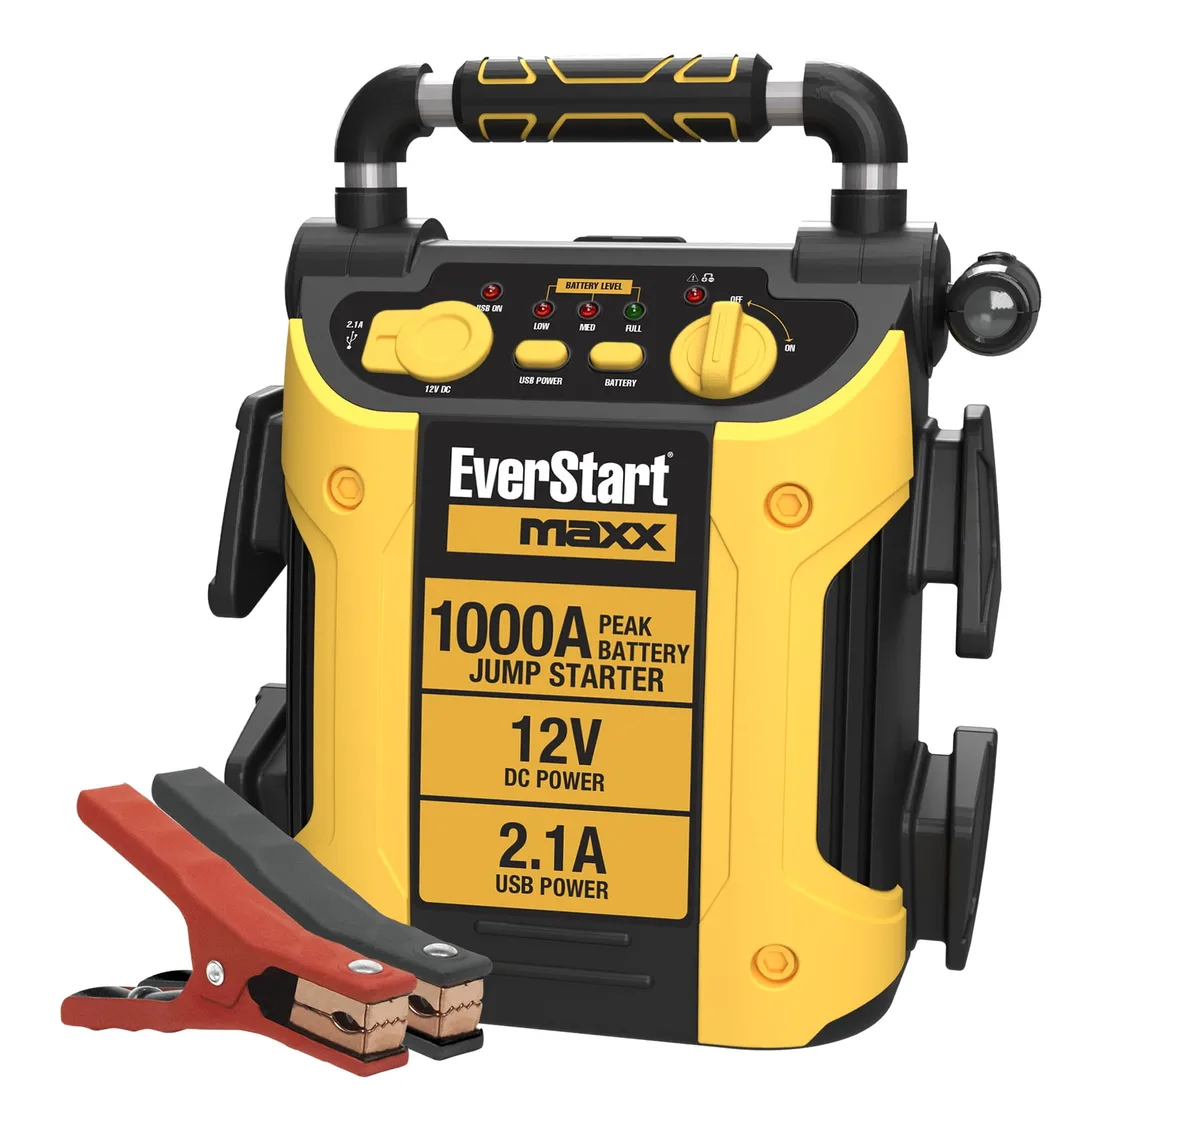
- Solid green (Ready): clamps connected correctly, jump starting is safe.
- Solid amber/orange: clamps connected but voltage is low; use Manual Override.
- Flashing red (with beep): reverse polarity. Swap the clamps immediately.
- Flashing red (no beep, slow): internal fault. Reset by powering off and on.
- Battery bars lit solid: charge level indicator.
- Battery bars blinking: actively charging the internal battery.
If your model shows a percentage instead of bars, anything above 50% is plenty for a single jump. Anything below 25% means recharge first.
Common Mistakes to Avoid When Using an EverStart Jump Starter
Even with clear instructions, a handful of mistakes trip people up over and over:
- Connecting black to the negative battery post. This is the #1 error, and it risks sparking hydrogen gas.
- Touching the red and black clamps together "to test them." They will spark, often violently.
- Cranking for 15+ seconds continuously. You'll overheat the jump starter's internals.
- Pressing Manual Override without verifying clamp orientation first.
- Reconnecting to the same dead battery five times in a row. If the car won't start after three clean attempts, the issue isn't the jump starter.
- Forgetting to recharge the unit afterward. A dead jump starter in the trunk is the same as no jump starter.
Real User Pattern
Aggregate reviews of EverStart jump starters consistently report that the most common reason for failure during a real emergency isn't the unit; it's the user's battery being too far gone for any portable jump starter to recover. If three clean attempts produce no crank, no click, and no relay sounds from the engine bay, you likely need a new battery or a tow to a shop.
Safety Rules: What EverStart Tells You (and What They Don't)
The EverStart manual covers the basics: don't reverse polarity, don't short the clamps, don't submerge the unit, and don't expose it to open flame. Manufacturer documentation across the lineup also warns against operating the unit in standing water or on wet engine surfaces.
A few rules they don't always spell out, but our research confirms matter:
- Eye protection is cheap insurance. Battery acid and off-gassing are real risks on older batteries.
- Remove rings, metal watches, and conductive jewelry before handling clamps near a battery. A dropped ring across a battery post can weld to the terminal and burn you badly.
- Never attempt to jump a battery that is cracked, frozen, or visibly leaking fluid. Per the Occupational Safety and Health Administration's guidance on batteries, a damaged lead-acid battery poses splash and chemical-burn risks that jump-starting amplifies.
- Lithium jump starters that are swollen, punctured, or smelling of sweet/electrolyte odor must not be charged or used. They should go to a certified e-waste facility, often locatable through Call2Recycle.
- Never pack a lithium jump starter in checked airline luggage that exceeds 100 Wh without airline approval. Under that threshold, carry-on is the rule, per current FAA and IATA lithium battery guidance.
Recharging and Storing Your EverStart So It's Ready Next Time
A jump starter that sits dead in a glove box is just dead weight. Manufacturer specs and aggregate reviews both point to the same conclusion: regular top-off cycles are what separate a useful unit from a wasted one.
The simplest routine works well:
- Recharge within 24 hours of every jump start, even if bars look full.
- Top off every 90 days if unused.
- Store between 32°F and 104°F where possible. Trunks in summer are the #1 killer of lithium jump starter longevity.
- Never store at 0% charge. Lithium cells held empty for long stretches develop permanent capacity loss.
A wall outlet charge takes 3, 6 hours on most models. A car 12V charge while driving is slower (often 8, 12 hours) and is mainly useful for keeping the unit topped up on long road trips.
Troubleshooting: When the EverStart Won't Power On or Won't Crank the Car
A jump starter that refuses to wake up usually has one of three issues. Walk through them in order before assuming the unit is dead.
- The unit is below its wake-up threshold. Some EverStart units have a deep-sleep mode that won't let the power button respond if internal voltage is too low. Plug it into the wall charger for 30, 60 minutes, then try again.
- The power button needs a longer hold. On many models, a 1-second tap does nothing. Hold 3, 5 seconds.
- The internal BMS (battery management system) has tripped. This happens after a short circuit, a hard reverse-polarity event, or extreme temperature exposure. Leave the unit on the charger overnight. A slow BMS reset often resolves it.
If the unit powers on but won't crank the car:
- Recheck clamp contact. Corroded or painted surfaces are the usual culprit.
- Try the Manual Override button.
- Confirm the jump starter is above 50% charge. Most units refuse to deliver starting current below that threshold.
- Confirm the battery isn't completely dead at zero volts. Some lithium jump starters cannot recover a battery below roughly 1V. A standard battery charger or replacement may be required.
EverStart Maxx vs Plus vs Value: Which One and When
The three lines target different users, and the right pick depends on what you're driving and how often you want a single unit to do everything.
- EverStart Value (~$40, $60): 400, 600 peak amps, lithium, compact. Best for compact cars and the occasional dead battery. Limited extras, usually just USB output and a flashlight.
- EverStart Plus (~$70, $110): 700, 1,000 peak amps, lithium, more capacity. Best for most sedan and SUV owners. Adds USB-C on some models and a brighter flashlight.
- EverStart Maxx (~$120, $180): 1,000, 1,700 peak amps, larger lithium or lead-acid options. Best for trucks, V8s, and anyone who wants an air compressor built in. Heaviest, most expensive, most capable.
For a typical commuter, the Plus line is the sweet spot. The Value works in a pinch, and the Maxx is for owners of larger vehicles or those who want all-in-one emergency kit functionality.
Best EverStart Jump Starter for Your Vehicle Type
Match the unit to the engine and climate you actually drive in:
- 4-cylinder commuter car: EverStart Value 400, 600 peak amps handles small engines and warm climates easily.
- V6 sedan/SUV: EverStart Plus 750, 1,000 peak amps gives a comfortable margin, especially in cold weather.
- V8 truck or large SUV: EverStart Maxx 1,200+ peak amps, ideally with Manual Override for deeply discharged batteries.
- Diesel pickup: EverStart Maxx 1,500+ peak amps. Diesel glow plugs pull much more current during startup.
- Motorcycle/ATV/lawn tractor: EverStart Value 400 peak amps is plenty.
Cold climates shift every recommendation up one tier. Cold-soaked batteries need 30, 50% more cranking amps than warm ones.
Frequently Asked Questions
How long does an EverStart jump starter hold its charge?
Manufacturer specs indicate roughly 6, 12 months of standby charge for lithium units stored indoors. Top it off every 90 days and you'll never see a dead unit.
Can an EverStart jump starter start a completely dead battery?
Sometimes. If the battery is above roughly 2V and the clamps are clean, yes. Below that threshold, use Manual Override.
Below 1V, most portable jump starters can't help, and a battery charger or replacement is the fix.
Is it safe to jump start a car in the rain?
Light rain is fine. Standing water, a soaked engine bay, or a flooded surface around the battery is not. The risk isn't the jump starter; it's the combination of water and 12V DC across dirty, conductive surfaces.
How many times can an EverStart jump a car on one charge?
Aggregate reviews report 5, 20 jumps per charge depending on engine size, ambient temperature, and battery condition. A full V8 truck in winter is at the lower end of that range.
Can I take an EverStart jump starter on a plane?
Only if it's under 100 Wh (watt-hours) and carried on, never checked. Check the label on the back of your unit. Most EverStart lithium units fall well within FAA/IATA carry-on limits.
Larger lead-acid models usually exceed them and aren't allowed on passenger aircraft.
What's the difference between peak amps and cranking amps?
Peak amps is the brief surge the unit can deliver for a fraction of a second. Cranking amps (or starting amps) is the sustained current it can deliver for the 3, 5 seconds of cranking. Cranking amps is the more honest spec; peak amps is mostly marketing.