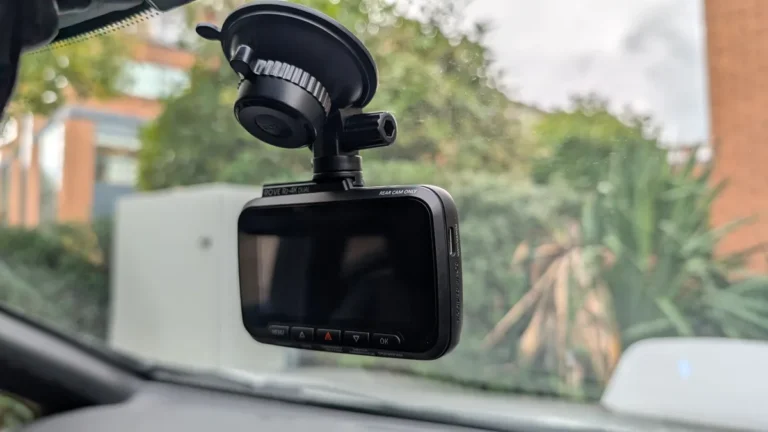
How to install dash cam wire: Easy Guide
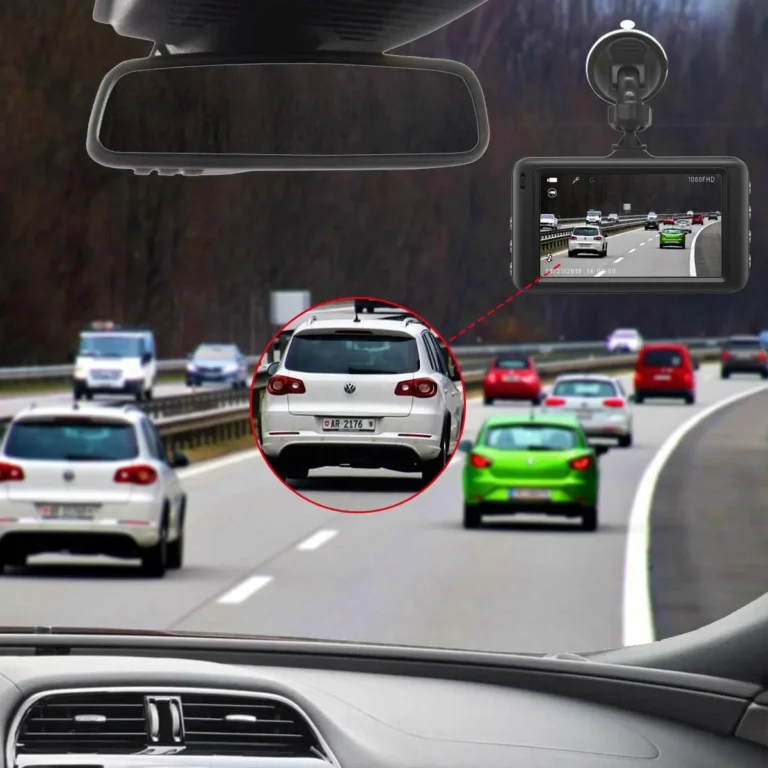
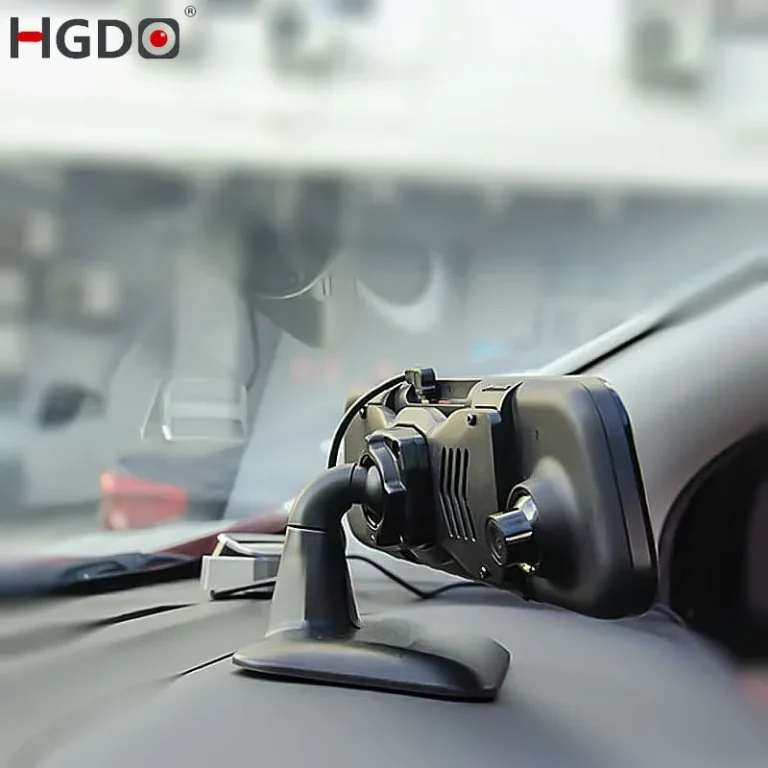
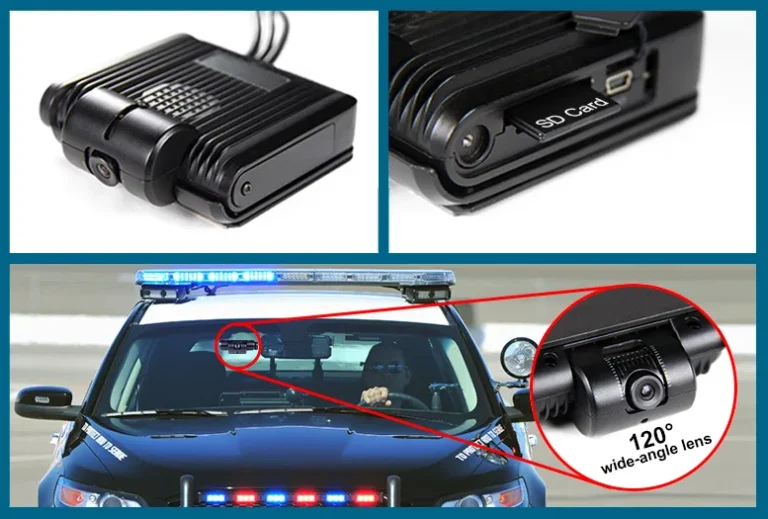
Hardwiring a dash cam means tapping into your car's fuse box so the camera runs off the vehicle's electrical system, not the cigarette lighter socket. If you're searching "how to install dash cam wire," you're probably tired of that dangling cable running across the dashboard and you want parking mode without burning through your battery. The whole job takes 20 to 45 minutes for most first-timers and only requires basic tools.
The good news is that the process is forgiving as long as you respect two things: the airbag curtain hiding behind your A-pillar trim, and the difference between an ignition-switched fuse and a constant battery fuse. Get those right and you'll have a clean, factory-looking install that powers your camera automatically and shuts it off before it drains your battery. According to manufacturer documentation from Garmin, Viofo, and BlackVue, hardwiring is the recommended long-term setup for anyone using parking surveillance features.
Quick Answer
Pick an ignition-switched fuse slot for everyday recording. Tap a constant fuse slot only if you want parking mode. Route the cable behind the headliner, down the A-pillar, and to the fuse box.
Use an add-a-fuse tap, not wire splicing. Ground the black wire to a bare-metal bolt. Most installs finish in 30 minutes.
What You'll Actually Be Doing When You Hardwire a Dash Cam
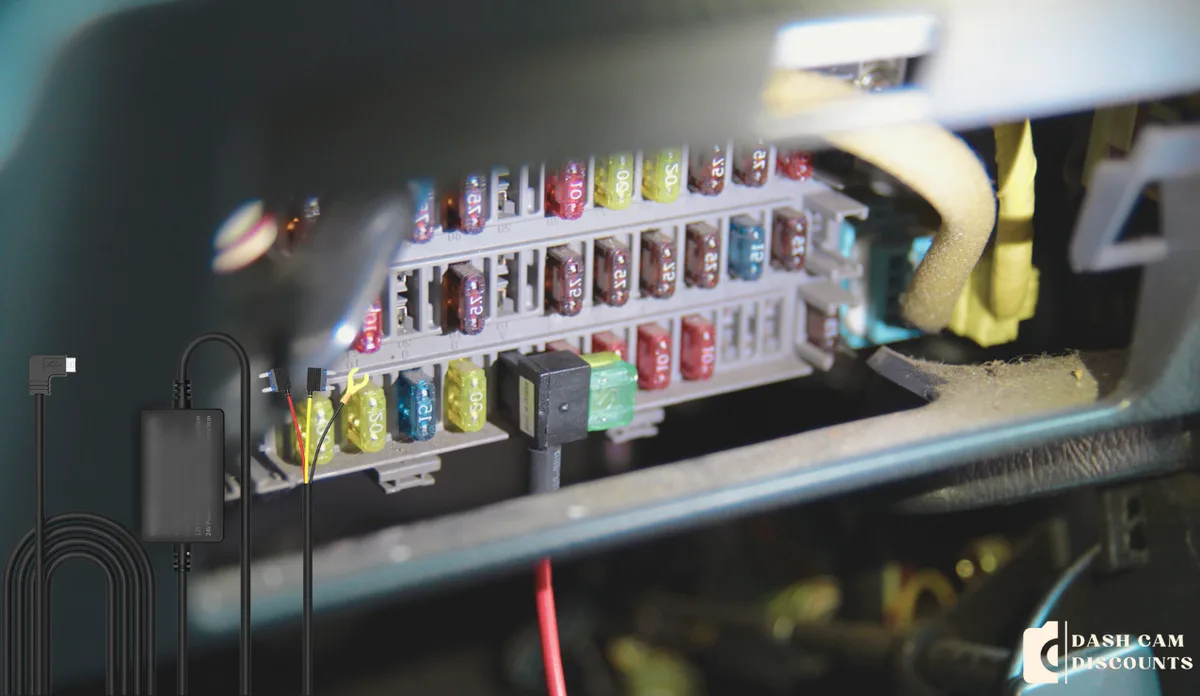
Hardwiring a dash cam is the process of connecting its power cable directly to the vehicle's fuse box instead of the 12V cigarette socket. The cable carries 12V from the fuse panel through a small step-down module that drops it to 5V for the camera.
You're not splicing into factory wiring the way a stereo installer would. You're using an add-a-fuse, a small plastic adapter that slides into an empty fuse slot and gives you a piggyback connection without cutting any original wires. Your dash cam's power cable plugs into that fuse tap, and a separate ground wire bolts to the car's chassis.
The reason people hardwire is parking mode. A cigarette lighter setup powers the camera only when the ignition is on. A hardwired setup can keep it running after you've locked the car and walked away, then shut itself off if your battery voltage drops too low.
Per manufacturer specs from BlackVue and Thinkware, this low-voltage cutoff usually kicks in at 11.8V to 12.2V, depending on whether your car uses a standard lead-acid battery or an AGM.
Here's what the finished setup looks like inside the cabin:
- Power cable runs from the dash cam mount to the headliner.
- Cable tucks behind the headliner padding toward the A-pillar.
- Cable drops down the A-pillar behind the trim panel.
- Cable enters the fuse box area near the driver's footwell.
- Fuse tap lives in an empty or non-critical fuse slot.
- Ground wire attaches to a nearby bare-metal chassis bolt.
Why Hardwiring Beats the Cigarette Lighter Plug
The cigarette lighter socket has one job in most modern cars: charge your phone. It's also usually live only when the ignition is on, so it kills your dash cam the moment you turn off the car. That means no parking surveillance and no recording if someone backs into your bumper in a parking lot.
Hardwiring solves both problems. You get a constant 12V source with proper low-voltage cutoff, so the camera records while you're away. You also free up the cigarette socket for actual phone charging or GPS use.
Manufacturer specs across Viofo, Nextbase, and Garmin confirm that hardwired setups also extend camera lifespan. Constant unplugging from the cigarette socket wears out the camera's power port over time. A hardwired connection sits there permanently and doesn't get touched.
There's also the aesthetic factor. A cigarette lighter cable draped across the dashboard looks like an afterthought. A hardwired cable hides behind the headliner and trim panels, completely invisible from the driver's seat.
| Setup Type | Parking Mode | Phone Charger Free | Cable Visibility | Install Time |
|---|---|---|---|---|
| Cigarette lighter plug | No | No | High | 1 minute |
| OBD-II power adapter | Sometimes | Yes | Medium | 5 minutes |
| Hardwired (ACC fuse only) | No | Yes | None | 25 to 40 minutes |
| Hardwired (constant fuse + cutoff) | Yes | Yes | None | 25 to 45 minutes |
The trade-off is complexity. Hardwiring involves routing cable through trim panels, choosing the right fuse slot, and making a solid ground connection. None of it is hard, but none of it is plug and play either.
The 3 Things That Decide Your Install: Fuse Type, Cable Route, and Power Mode
Every hardwire job comes down to three decisions. Get these right and the rest is just cable management.
Fuse type. You've got constant (always-on) fuse slots and ignition-switched (ACC) slots. Constant slots power things like the horn, interior lights, and alarm system. ACC slots power the radio, cigarette lighter, and accessories that only work with the key on.
Cable route. The cable needs a path from the camera mount to the fuse box. In most vehicles, that means headliner, then A-pillar, then kick panel, then fuse box. The A-pillar step is where people get nervous because of the side airbag, but the rule is simple.
Stay behind the airbag, not in front of it.
Power mode. Do you want the camera to record while driving only, or also while parked? Driving-only setups can tap any ACC fuse. Parking mode setups need a constant fuse plus a low-voltage cutoff, which most quality hardwire kits include built in.
If you're not sure which fuse type to use, here's a quick decision guide:
- Only need driving footage? Tap an ACC fuse. No low-voltage cutoff required.
- Want parking mode but park for short stretches? Tap a constant fuse, set cutoff to 12.2V.
- Park for days at a time at airport or street parking? Tap a constant fuse, set cutoff to 11.8V or 12.0V.
- Worried about voiding battery warranty or live in a cold climate? Stick with ACC only and skip parking mode.
These three choices decide everything else, from which kit you buy to where the cable physically ends up.
Tools and Parts You Actually Need
You don't need a garage full of specialty tools. Aggregate user reviews and manufacturer install guides consistently call for the same handful of items.
| Item | Purpose | Notes |
|---|---|---|
| Dash cam hardwire kit | Provides fuse tap, ground wire, low-voltage cutoff | Match connector to your camera (USB-C, micro-USB, etc.) |
| Add-a-fuse (if not included) | Piggybacks onto existing fuse slot | Match blade type: ATO/ATC, mini, or micro2 |
| Plastic trim pry tools | Removes A-pillar and kick panel clips without scratching | Nylon, not metal |
| Multimeter or 12V test light | Identifies constant vs. ACC fuse slots | A test light is cheaper and works fine |
| Fuse puller | Removes existing fuse from panel | Often included in your car's fuse box cover |
| Wire crimper or stripper | Prepares ground wire if needed | Some kits come with pre-crimped ring terminals |
| Zip ties or cable clips | Secures slack behind the dash | Optional but tidy |
Skip the cheap kits without a built-in voltage cutoff if you're tapping a constant fuse. Per SAE automotive electrical standards, a cutoff is what keeps a hardwired dash cam from killing your battery after a week of sitting. The cutoff module is a small black box about the size of a matchbox that lives inline with the power cable.
It monitors battery voltage and cuts power if it drops below your set threshold.
If your kit includes a voltage cutoff, confirm it has a parking mode switch or timer. Some cheap cutoffs don't, which means the camera runs constantly until the battery drops, then shuts off. Better kits let you set a timer (like 12 hours or 48 hours) or trigger parking mode by voltage drop rather than ignition.
One last thing: confirm your camera's power input. Most modern dash cams use USB-C. Older or budget models may use micro-USB or Mini-USB.
The hardwire kit's output end has to match. Otherwise you'll need an inline adapter, and those are another point of failure.
If you're buying a kit separately, check that the fuse tap matches your vehicle's blade style. Most American and Japanese cars use ATO/ATC or low-profile mini-blade fuses. Many European cars use micro2.
The fuse box cover usually has a legend printed inside that tells you which blade type it takes, or your owner's manual will list it.
Pro tip from installers: get two or three spare add-a-fuse taps in different amp ratings. They're cheap and having options means you don't have to make a second trip to the parts store when the slot you wanted is the wrong size.
Understanding Your Fuse Box Before You Touch Anything
Your fuse box is the nerve center of your car's electrical system. It's usually under the dashboard on the driver's side, sometimes behind a small access panel. Some vehicles have a second fuse box under the hood, but you almost never want that one for a dash cam.
The interior box is closer, easier to work with, and runs off the same battery.
The first thing to do is pull off the fuse box cover. On most cars, it just snaps off with a firm pull. On others, there's a small latch or two screws.
Inside the cover, there's a printed diagram showing what each fuse controls and its amp rating. This is your map. Don't trust memory.
Take a photo of this diagram with your phone before you do anything else.
Next, identify the fuse slots you'll consider using. You're looking for two things: function and rating.
Function. The legend will tell you which slot powers what. Useful candidates for dash cam hardwiring include:
- Cigarette lighter or 12V socket (usually 15A or 20A)
- Radio or audio (usually 10A or 15A)
- Heated seat (if your car has one)
- Power mirrors or windows (often 20A or 25A)
Avoid tapping any fuse that controls safety systems. That means no ABS, airbag, ECU, fuel pump, or transmission fuses. The dash cam doesn't need much power, and these circuits are critical.
If your install somehow shorts, you don't want it to disable your brakes or airbags.
Rating. Each slot is rated for a specific amperage, printed on the fuse. A dash cam typically draws 0.2A to 0.5A in normal recording, around 1.5A peak. Per manufacturer documentation, your add-a-fuse's amp rating should match the slot's original rating, not the dash cam's draw.
So if the slot takes a 10A fuse, your add-a-fuse should also be rated 10A. The dash cam gets its own smaller fuse (usually 2A or 3A) inserted into the second slot on the tap.
A common rookie mistake is grabbing a 30A fuse tap because the slot looks bigger. That's wrong. The fuse protects the wiring, not the device.
Using an oversized fuse means the wire could overdraw and melt before the fuse blows. Stick to the slot's original rating.
Before choosing your slot, also check whether the fuse you want is currently occupied. Most cars have empty slots in the fuse box, which are gold for this job. If your desired slot is already in use, you can piggyback on it.
Just keep both fuses in the add-a-fuse: the original circuit's fuse in the original position, and the dash cam's smaller fuse in the new piggyback slot.
Picking the Right Fuse Slot: ACC vs. Constant Battery
This is the single biggest decision in your install. Get it wrong and you'll either lose parking mode or kill your battery in two days.
ACC (ignition-switched) fuses only have power when the key is on or in accessory mode. When you shut off the car, they go dead. The cigarette lighter, radio, and most climate control fuses fall into this category.
If you tap an ACC slot, your dash cam will:
- Turn on automatically when you start the car
- Turn off automatically when you shut off the car
- Never run in parking mode
- Never drain your battery
This is the right choice for drivers who just want clean cable management and don't care about surveillance while parked.
Constant (always-on) fuses have power 24/7, even when the car is off. The horn, interior dome lights, alarm system, and sometimes the door locks are constant.
If you tap a constant slot, your dash cam will:
- Stay on whenever the cutoff module allows it
- Need a low-voltage cutoff to protect your battery
- Record in parking mode
- Potentially drain your battery if the cutoff fails
This is the right choice if you park in sketchy areas, drive for rideshare, or want full 24/7 coverage.
The practical difference matters more than people think. Park at an airport for a week and a constant-fuse setup without a proper voltage cutoff will kill your battery dead. Same setup at home for 8 hours overnight is usually fine, since most modern car batteries can handle that kind of draw without dropping below cranking voltage.
| Slot Type | Camera On When Parked? | Battery Risk | Best For |
|---|---|---|---|
| ACC only | No | None | Daily drivers, short-term parking |
| Constant + cutoff | Yes, until voltage drops | Low with cutoff | Street parking, rideshare, fleet |
| Constant, no cutoff | Yes, until battery dies | High | Nobody, don't do this |
Most quality hardwire kits include a cutoff module with adjustable thresholds. Viofo's HK3 and BlackVue's Power Magic Pro both let you set cutoff by voltage (11.8V, 12.0V, 12.2V) or by timer (6h, 12h, 24h, 48h). For cold climates or older batteries, 12.0V or higher is safer.
For mild climates with healthy batteries, 11.8V is fine.
One more thing: if your chosen constant fuse is shared with something else (like the dome lights), you're fine. That circuit still has plenty of headroom for a 0.5A dash cam. The fuse protects the whole circuit, so a 10A fuse blowing means something on that circuit is pulling more than 10A, which your dash cam will never approach.
How to Test a Fuse Slot With a Multimeter (or Test Light)
Don't guess which slot is which. Test it. The legend inside your fuse box cover tells you what each fuse controls, but not whether it's constant or ACC.
You need a multimeter or test light to confirm.
Using a multimeter:
- Set the multimeter to DC voltage (20V range).
- Turn the car off completely and remove the key.
- Touch the red probe to one metal blade on top of the fuse (the small exposed metal tab on the fuse's top surface).
- Touch the black probe to a known ground, like a bare metal bolt on the chassis or the negative battery terminal.
- Read the voltage.
If you see 12V or higher with the car off, that's a constant fuse. If you see 0V with the car off and 12V with the key in the on position, that's an ACC fuse.
Test each candidate slot the same way. Write down which are constant and which are ACC. Pick your target before moving forward.
Using a 12V test light:
- Clip the light's ground lead to a bare metal chassis point.
- Touch the probe tip to one of the metal blades on top of the fuse.
- If the light glows with the car off, it's constant.
- If the light glows only with the key on, it's ACC.
A test light is faster and cheaper than a multimeter, and it works perfectly for this job. Per basic automotive electrical testing, either tool gives you a definitive answer within seconds. The point is to confirm before you commit, not after.
Also test the empty fuse slots. Sometimes they're labeled for future accessories and may be either constant or ACC depending on what they were intended for. An empty slot is the cleanest place to install a fuse tap because there's no risk of disturbing an existing circuit.
Routing the Cable: Headliner, A-Pillar, and Kick Panel Walkthrough
The cable route is what separates a clean install from a hack job. The goal is zero visible cable from the driver's seat and zero rattles when you hit a bump.
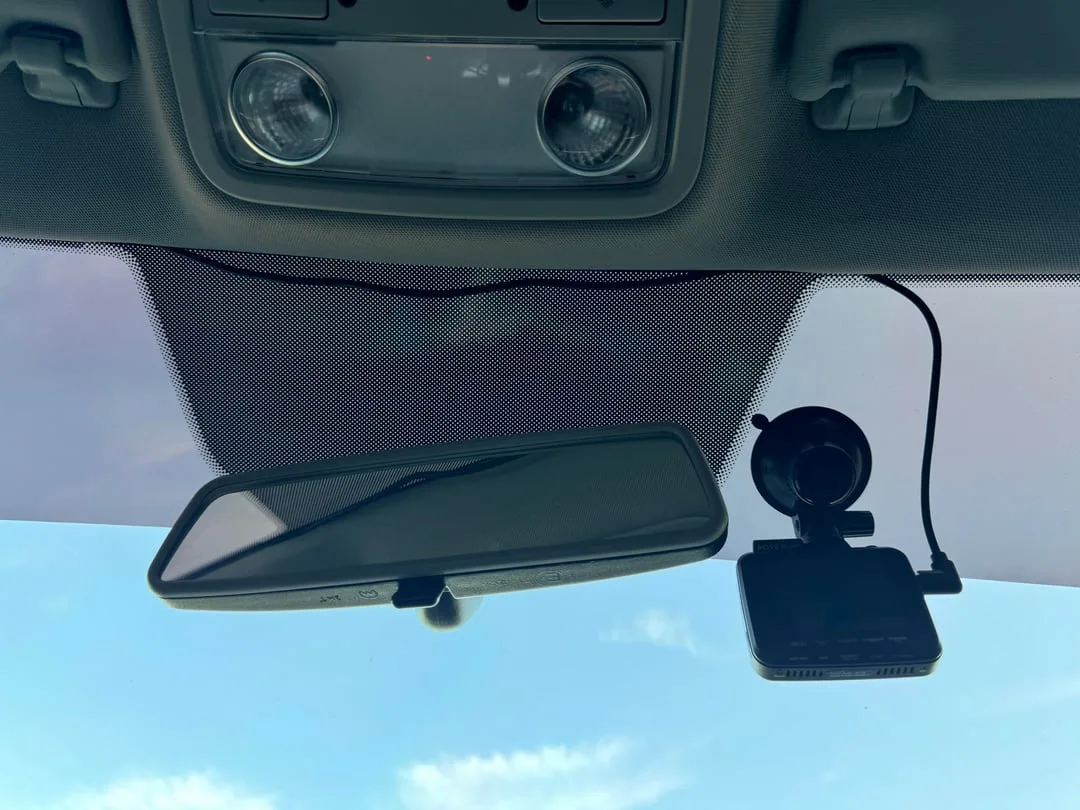
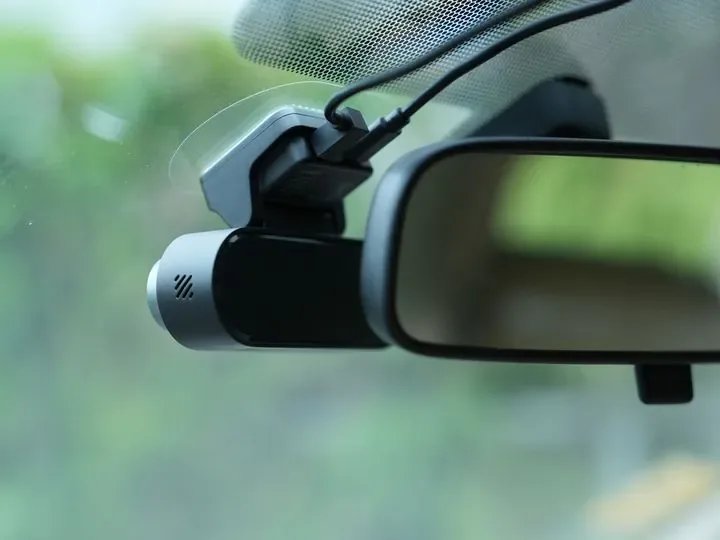
Start at the camera mount. Most cameras mount just behind the rearview mirror, which puts them right at the headliner edge. Tuck the connector end of the cable into the gap between the headliner and the windshield.
Use your fingers or a plastic trim tool to gently push the cable up into the headliner padding.
Work the cable toward the A-pillar by sliding it along the headliner. Most vehicles have a small channel or gap where the headliner meets the windshield trim. The cable lives happily in there, completely hidden.
Push about 12 to 18 inches of cable into this gap before moving on.
When you reach the A-pillar, stop. The next step matters, and it's the part that scares first-timers.
The A-Pillar Rule Every Installer Gets Wrong (Airbag Awareness)
The A-pillar trim panel covers your side curtain airbag. Underneath that trim is a fabric airbag module that inflates downward along the window in a crash. Anything you do in front of the airbag is in its deployment path, which is exactly where you do not want a cable.
The rule is simple: route the cable behind the airbag module, not in front of it. In most vehicles, the airbag sits right against the metal pillar structure with the trim clipping over it. The cable goes into the gap between the airbag and the trim, not between the airbag and the windshield.
Practically, that means:
- Pull the A-pillar trim gently away from the pillar using your trim tool. It usually pops off with one or two clips.
- Look behind the trim. You'll see either the airbag module (a long fabric tube) or empty pillar structure.
- Route the cable down the side that's away from the airbag's inflation path. On most cars, that's tucked against the metal structure, behind the airbag if present.
- Re-clip the trim panel once the cable is in place.
If you can't see the airbag clearly, check your owner's manual. NHTSA vehicle safety guidance consistently warns against routing any wiring through airbag deployment zones. Per federal motor vehicle safety standards, any obstruction in the deployment path can interfere with airbag function and create a projectile hazard.
When in doubt, stay tight against the metal pillar and route downward, not outward toward the window. The cable will end up in the kick panel area near the fuse box either way.
Connecting the Ground Wire the Right Way
Your hardwire kit has three wires: red (12V power), black (ground), and sometimes yellow (constant battery feed for parking mode). The ground wire is just as critical as the power wire. A bad ground is the number one cause of dash cam reboots and random shutdowns after install.
The ground wire needs to attach to bare metal on the vehicle's chassis. Not painted metal, not anodized aluminum, not a bolt with rubber grommets. Just clean, bare steel or aluminum.
Most vehicles have factory ground points near the fuse box. They look like a bare metal bolt or stud with nothing attached, or with a factory wire already on it. These are perfect.
If there's already a wire on the bolt, you can piggyback your ground ring terminal under the existing nut.
To attach the ground wire:
- Loosen the bolt with the right size wrench or socket.
- Slip your ring terminal over the bolt.
- Retighten the bolt firmly. Don't overtighten and strip the threads.
- Give the wire a gentle tug to confirm it's secure.
If there's no factory ground point nearby, you can use any existing bolt that goes into the metal chassis. Seat bolts, door hinge bolts, and dashboard mounting bolts all work. Just confirm the bolt actually threads into metal underneath.
A bolt into plastic or a captive nut won't give you a good ground.
Scrape off any paint under the ring terminal if you have to use a non-factory ground point. A small section of bare metal about the size of a pencil eraser is enough. After tightening, dab a little dielectric grease or touch-up paint over the exposed metal to prevent rust.
Plugging In the Fuse Tap Without Blowing a Fuse
The fuse tap is the final electrical connection, and it's where most first-time mistakes happen. An add-a-fuse has two slots: one for the original circuit's fuse, and one for your new device's fuse. Both fuses need to be in the tap before you insert it.
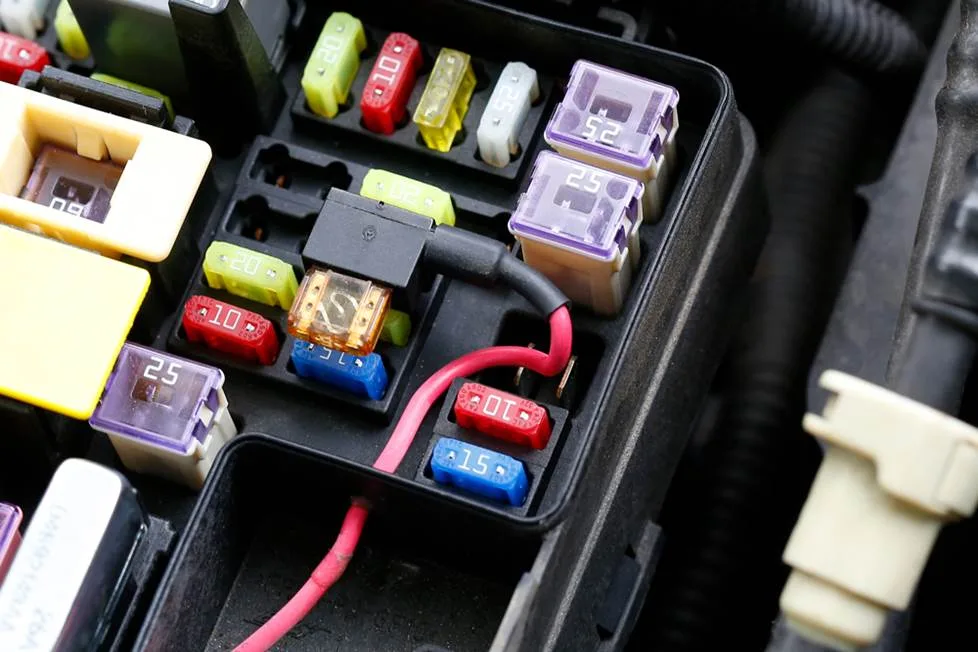
The fuse tap orientation matters. There's a line side and a load side. The line side faces the fuse box's incoming power, the load side faces your device.
Most fuse taps are labeled, but if not, the orientation is usually obvious from the shape. Insert the tap with the wire exit facing downward or toward the fuse box opening, not upward into the fuse box body.
Fuse selection rules per manufacturer documentation:
- Original circuit fuse: same amp rating as the fuse you removed
- Dash cam fuse: 2A or 3A is standard, use what your hardwire kit recommends
If the original slot took a 10A fuse, your tap holds a 10A in one slot and a 3A in the other. The 10A still protects the original circuit, and the 3A protects the dash cam.
Insert the tap into the slot firmly. It should seat flush with the other fuses. If it sticks out, you may have it rotated wrong.
Loose fuse taps cause intermittent power, which makes dash cams reboot randomly.
Once the tap is in, plug the hardwire kit's output connector into your dash cam's power input. Most kits have a USB connector at the camera end. Turn the key to accessory mode and confirm the camera powers on.
If nothing happens:
- Check the fuses in the tap. Are both seated properly?
- Verify the fuse tap orientation. Reverse it and try again.
- Test the slot with your multimeter to confirm power is actually present.
- Check the ground wire. A loose ground often mimics a power issue.
Setting Up Parking Mode and Low-Voltage Cutoff
If you tapped a constant fuse, your camera will try to run forever until the battery dies. The low-voltage cutoff module is what stops that. Most hardwire kits have it built into the inline box on the power cable.
The cutoff module has two settings you usually need to configure: voltage threshold and timer.
Voltage threshold is the battery voltage at which the camera shuts off. Settings are typically:
- 11.8V: Aggressive cutoff. Safe for older batteries or cold climates.
- 12.0V: Standard cutoff. Works for most healthy lead-acid batteries.
- 12.2V: Conservative cutoff. Best for AGM batteries or extreme cold.
Per manufacturer specs from Viofo and BlackVue, the right setting depends on your battery type. Standard flooded lead-acid batteries shouldn't drop below 12.0V in normal use. AGM batteries can handle slightly more, down to 11.8V safely.
Lithium automotive batteries (rare, mostly performance cars) have different thresholds entirely, around 13.0V cutoff.
Timer is a backup cutoff that limits how long the camera runs in parking mode regardless of voltage. Common settings are 6h, 12h, 24h, and 48h. If you know you'll park for a week at the airport, set the timer to 48 hours so the camera can't accidentally drain the battery over five days even if voltage stays up.
After configuring, test parking mode:
- With the camera on, shut off the car and lock it.
- Walk away for 10 minutes.
- Return and check whether the camera is still recording.
- If yes, parking mode is active. If no, your tap is on an ACC fuse by accident.
Also verify the cutoff works. Leave the car parked overnight with the camera running. In the morning, the car should still start without needing a jump.
If it struggles to crank, raise the voltage threshold or shorten the timer.
Common Hardwire Mistakes That Kill Your Battery or Your Camera
Tapping a constant fuse without a cutoff is the classic battery killer. The cutoff module is mandatory, not optional, on any parking mode setup.
Fuse tap orientation flipped backward is the next most common error. The camera won't power on and you'll chase a ground fault that doesn't exist. Reverse the tap and it usually works.
Routing through the airbag deployment zone can turn a simple install into a safety recall. Stay behind the airbag.
Loose fuse taps cause rebooting every time you hit a bump. The camera starts recording, drops power, reboots, drops again. Pull the tap and reseat it.
Painted ground points create resistance that the camera interprets as low voltage. The cutoff module shuts the camera down early or the camera reboots. Scrape to bare metal.
Fixing Dash Cam Problems After the Install
If the camera won't power on, test the fuse slot with a multimeter to confirm it's live. If power is there, check the ground wire and fuse tap orientation.
If the camera reboots randomly, the fuse tap is loose or the ground is poor. Reseat the tap and confirm the ground bolt threads into bare metal.
If parking mode kills your battery overnight, raise the cutoff voltage threshold by 0.2V and shorten the timer to 24 hours.
If the cable rattles against the A-pillar, add a small piece of foam tape or push the cable deeper into the trim gap.
When Hardwiring Isn't the Right Call
If you lease your vehicle, hardwiring may violate your lease terms. Use an OBD-II power adapter or cigarette lighter setup instead.
If you drive an EV with a high-voltage battery pack, low-voltage cutoff thresholds may not apply the same way. Check your owner's manual before tapping any fuse.
If you swap vehicles often or your dash cam moves between cars, a cigarette lighter setup is more portable. Hardwiring is permanent by design.
If your fuse box is in a hard-to-reach location or behind airbag components, professional installation may be the safer choice. Most car audio shops charge $80 to $200 for a dash cam hardwire job, which is worth it if you'd rather not pull trim panels yourself.
Cost Breakdown: DIY vs. Paying a Shop
DIY hardwire kits run $10 to $40 for basic models without cutoff. Kits with low-voltage cutoff run $30 to $80. Add trim tools and a fuse puller if you don't have them, about $10 total.
Professional installation at a car audio or electronics shop runs $80 to $200 depending on vehicle complexity. Rideshare drivers and fleet operators often write this off as a business expense.
For a first-timer, the DIY route saves money but costs 30 to 45 minutes of your day. For anyone unsure about airbag routing or fuse identification, the shop route is cheaper than a mistake.
Pro Tips for a Factory-Grade Finish
Bundle the power cable with any factory wiring harness along the A-pillar. This hides it even better and prevents rattles.
Use velcro or zip ties to secure the cutoff module behind the dashboard. Don't leave it dangling near the pedals.
Leave a small service loop of slack at the camera end. If you ever swap the camera, you don't want to redo the whole cable run.
Label your fuse tap with a small piece of tape. Future you will thank present you when something else in the fuse box needs attention.
Frequently Asked Questions
Will hardwiring a dash cam void my car's warranty?
Generally no. Hardwiring via a fuse tap is a non-invasive install that doesn't modify factory wiring. Some dealerships may flag it during service, but per federal warranty law, manufacturers can't void coverage for aftermarket accessories unless they directly cause the failure.
How long does a hardwire install take?
For first-timers, expect 30 to 45 minutes including routing and testing. Experienced installers finish in 15 to 20 minutes. Plan extra time if you need to remove A-pillar trim carefully.
Can I hardwire a dash cam to any fuse?
No. Avoid any fuse that controls safety systems like airbags, ABS, ECU, fuel pump, or transmission. Stick with accessory circuits like the cigarette lighter, radio, or heated seats.
Do I need a fuse tap with low-voltage cutoff?
Yes, if you tap a constant fuse for parking mode. No, if you tap an ACC fuse and don't need parking mode. The cutoff protects your battery from draining completely.
What amp fuse should I use for the dash cam?
Most dash cams use a 2A or 3A fuse. Match your kit's recommendation and never exceed the rating of the fuse slot you're tapping. A 10A slot with a 10A original fuse and a 3A dash cam fuse is standard.
Will my dash cam drain my battery in cold weather?
Cold reduces battery capacity. If you park in freezing temps with parking mode active, raise your cutoff threshold to 12.0V or higher. Per battery performance standards, cold cranking amps drop with temperature, so a battery that handles parking mode fine in summer may struggle in January.
For more on safe electrical work in vehicles, the NHTSA vehicle equipment safety page covers general guidance on aftermarket modifications.