How to install red tiger dash cam
If you've just unboxed a Redtiger dash cam and you're staring at a tangle of cables, you're not alone. Installing one looks intimidating at first, mostly because every car is wired a little differently. The good news: most Redtiger models (F7N, F7NP, F9, F17) are designed for true DIY installation, and you can get a clean, hidden install in under an hour with basic tools.
Redtiger's official documentation treats this as a 20 to 45 minute job for the cigarette lighter route, and roughly 45 to 90 minutes if you hardwire to the fuse box. As of 2026, the current Redtiger lineup still ships with a suction mount, a 3M adhesive alternative, and a rear camera extension cable in the box. Here's how to get it done right the first time.
Quick Answer
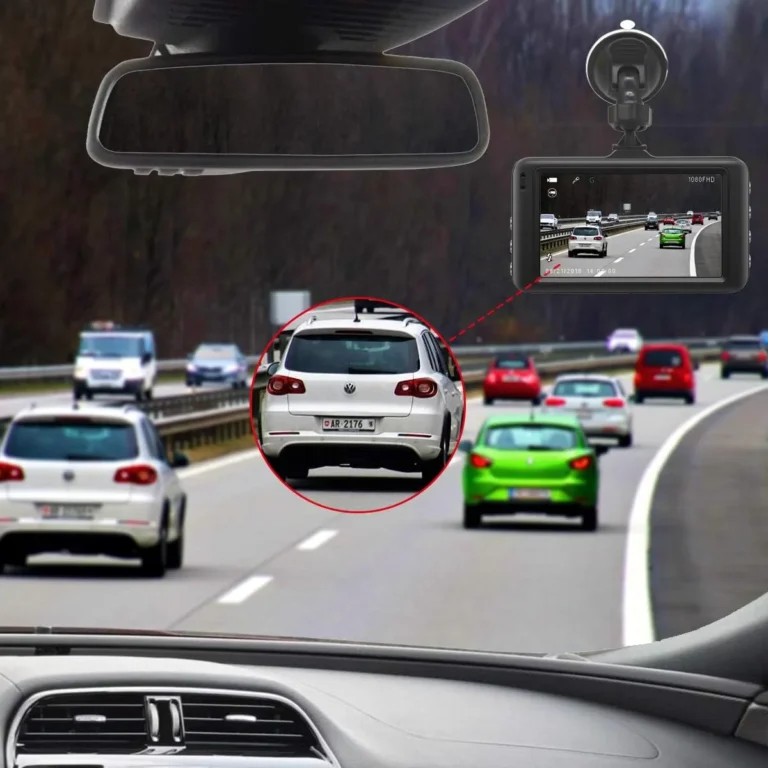
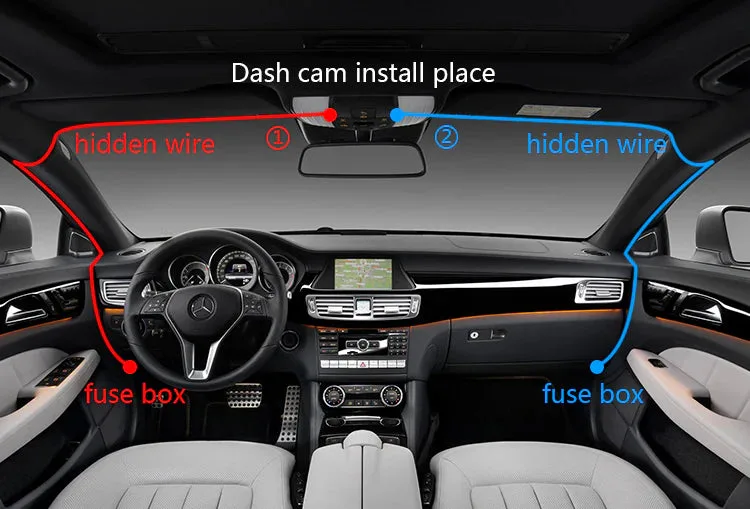
To install a Redtiger dash cam, mount the front unit behind your rearview mirror. Route the power cable along the headliner and down the A-pillar. Plug it into the cigarette lighter for a basic install, or hardwire to the fuse box for hidden power and parking mode.
Format a U3-rated microSD card in the camera before driving. Total time is about 30 minutes for the basic plug-in setup.
What the Redtiger Install Looks Like (and Why Most People Overthink It)
A clean Redtiger install has three parts: the front camera mounted high on the windshield, the rear camera stuck to the back glass, and the power cable hidden in the trim. Nothing about it requires a mechanic. You need a plastic trim tool, the included mounts, and a microSD card.
That's the whole toolkit.
Most of the "difficulty" people imagine actually comes from the hardwire step, which is optional. If you're fine with a wire running to the cigarette lighter, you're looking at a 20-minute job. The hardwire route gives you parking mode and a fully hidden look, but it adds about 30 to 45 minutes and requires you to identify one switched (ACC) fuse in your fuse box.
In our research across owner forums and install guides, the same five questions come up over and over:
- Mount placement (and whether it blocks ADAS sensors)
- Whether to use suction or adhesive
- Cigarette lighter vs. hardwire
- Where to tap the fuse
- Which SD card survives constant recording
We'll walk through each of these below so you know exactly what fits your car and your comfort level.
Pick Your Install Method: Cigarette Lighter vs. Hardwire Kit
Before you touch the mount, decide how the camera will get power. This choice drives everything else, including where the wire ends up and whether parking mode works.
Cigarette Lighter (Plug-and-Go)
The included car charger plugs into any 12V socket. The camera turns on with the ignition and shuts off when you park. No tools beyond a trim pry tool.
Downsides: the wire is visible (unless you tuck it), the 12V socket often stays live even with the key off (which can drain your battery over days), and parking mode is limited to a few minutes on most Redtiger models.
Hardwire Kit (Hidden + Parking Mode)
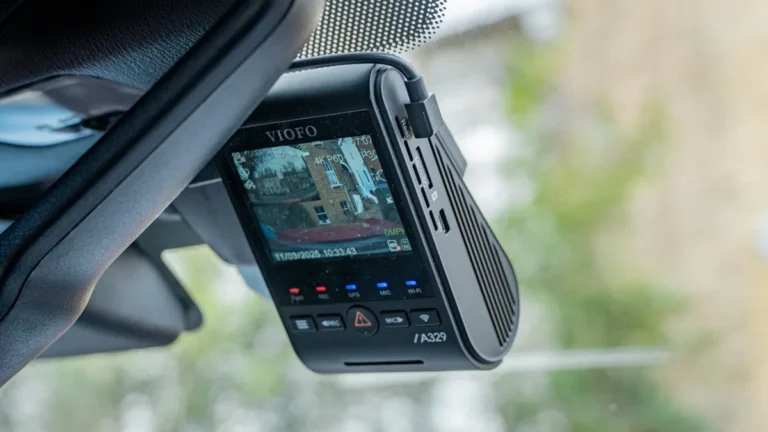
A hardwire kit (Redtiger sells one, third-party kits like Viofo or Garmin also work) connects directly to the fuse box. It uses a fuse tap and draws a tiny amount of current, typically 150 to 300 mA in parking mode, so it won't kill a healthy battery overnight. Parking mode works properly because the kit reads your ignition state through the fuse box.
| Method | Install Time | Tools Needed | Parking Mode | Wire Visibility |
|---|---|---|---|---|
| Cigarette lighter | 20–45 min | Trim tool | Limited | Visible unless tucked |
| Hardwire kit | 45–90 min | Trim tool, fuse tap, multimeter (optional) | Full | Fully hidden |
Pick cigarette lighter if you just want evidence recording and don't care about 24/7 parking surveillance. Pick hardwire if you want parking mode and a clean, wire-free look. Most owners who hardwire say they'd never go back, but it's a more involved job.
Tools, Parts, and What Comes in the Redtiger Box
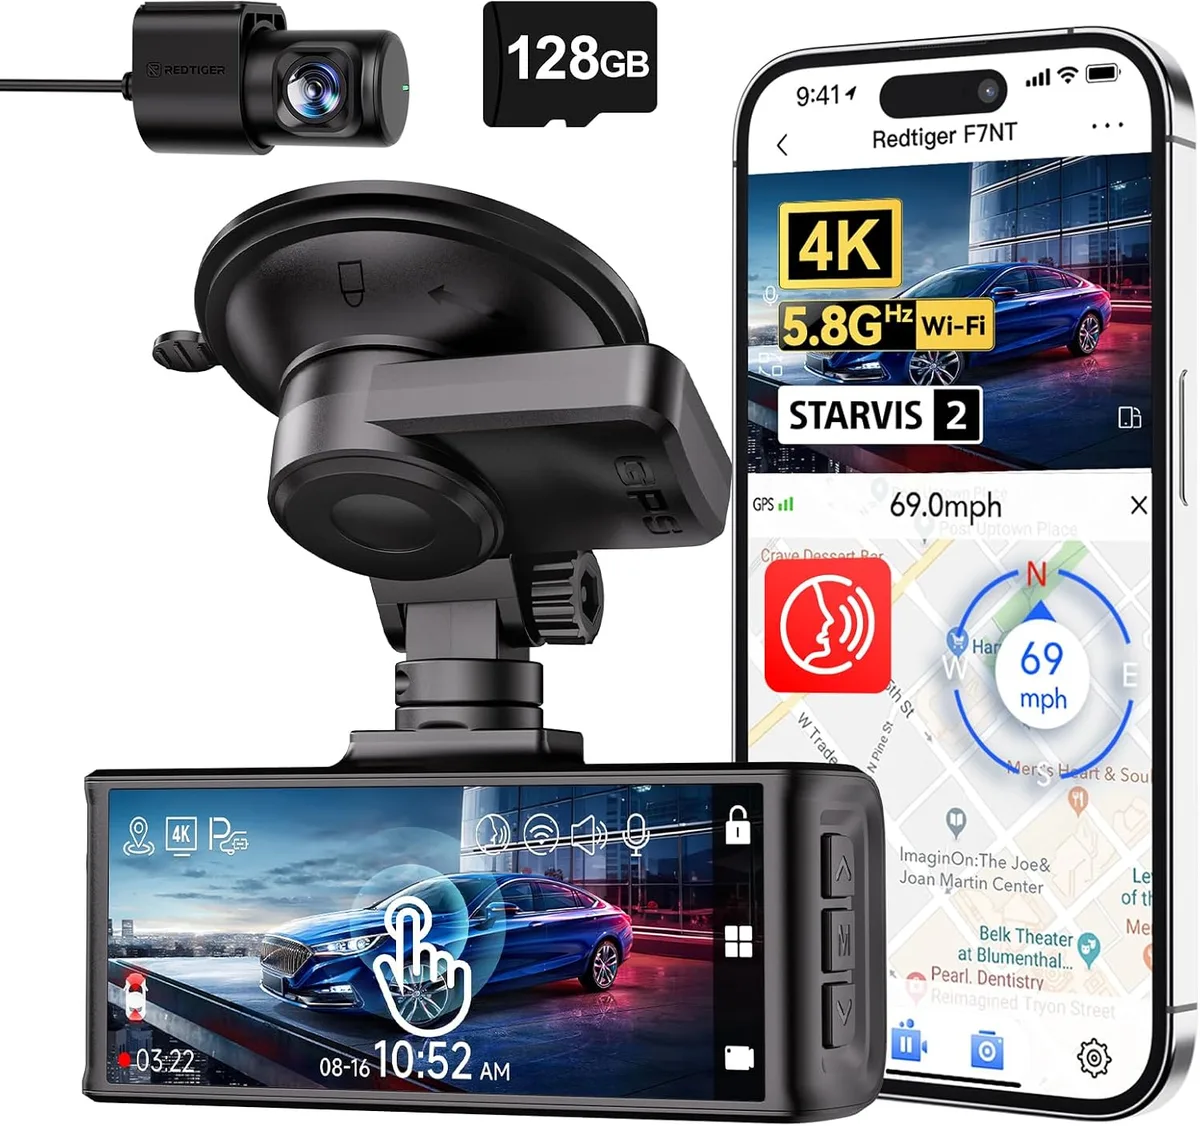
Open the box and lay everything out before you start. Manufacturer specs confirm Redtiger typically includes the following in the standard retail package:
- Front dash cam unit
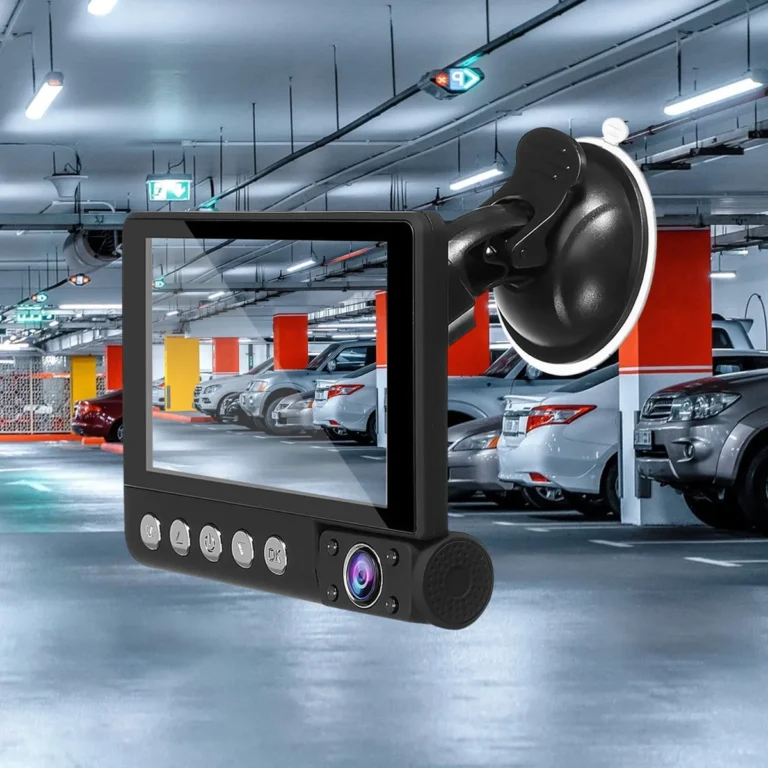
- Suction cup mount (pre-attached in many models)
- 3M adhesive mount (backup or for curved windshields)
- Rear camera with extension cable (dual-channel models)
- Car charger with USB cable (about 10 ft / 3 m)
- Trim pry tool (plastic, to avoid scratching trim)
- Electrostatic stickers (for adhesive mount, helps on tinted glass)
- User manual and quick-start card
You'll need to supply a few things separately:
- A U3 / V30 rated microSD card, 64 GB minimum, 256 GB maximum
- A hardwire kit if you're going that route (plus a fuse tap matched to your fuse type: mini, micro2, or ATO)
- A 10 mm wrench or socket (only if hardwiring to a chassis ground bolt)
Skip cheap SD cards. Constant loop recording writes roughly 10 to 30 GB per day depending on resolution, and consumer-grade cards fail within months under that workload. SanDisk High Endurance and Samsung PRO Endurance are the two names that come up repeatedly in aggregate user feedback as surviving the duty cycle.
Where to Mount the Front Camera (and Where You Must Not)
Mount placement matters more than most people realize. Get this wrong and the camera obstructs your view, interferes with ADAS sensors, or records the wrong angle of the road.
The Sweet Spot
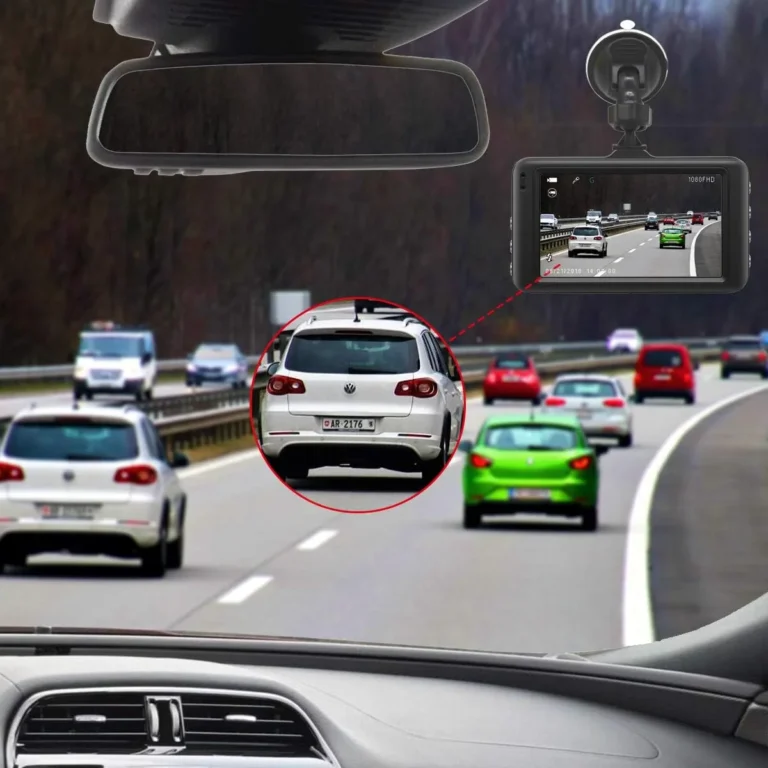
The conventional placement is just behind the rearview mirror, on the passenger side of the mirror housing. This keeps the camera out of your direct line of sight, high enough that it captures a full view of the road ahead, and tucked into the swept area of the windshield wipers so rain doesn't fog the lens.
Where You Must Not Mount
Redtiger's own documentation and most state laws agree on a few no-go zones:
- Inside the airbag deployment zone (the A-pillar area where side curtain airbags deploy)
- Directly in front of the rain/light sensor cluster (usually behind the rearview mirror housing)
- In front of any ADAS forward-facing camera (lane departure, collision avoidance)
- Below the top 4 inches of the windshield in states with placement laws (California, for example, restricts mounted devices to a 5-inch square in the lower corner or a 7-inch square in the upper corner)
Clean the mounting area with isopropyl wipes first. Any dust or grease weakens the adhesive bond. If you're using the suction mount, mist the windshield lightly and the suction cup too, then press and hold for 30 seconds.
Adjusting the Angle
Aim the lens so the horizon sits about one-third from the top of the frame. You want more road than sky. Too much sky and the camera overexposes on bright days.
Too much road and you lose the horizon context that makes footage useful for accident disputes.
Adhesive vs. Suction: Which Mount to Use
The suction mount is removable and reusable. It works fine in moderate climates but loses grip in extreme heat (above roughly 95°F) or cold. The 3M VHB adhesive mount is permanent until you peel it off with heat (a hair dryer works) and it stays put in any temperature.
Aggregate reviews report the adhesive mount rarely falls off once cured. If your windshield is tinted across the top strip, use the electrostatic sticker first so the adhesive doesn't bond directly to the tint film.
Step-by-Step: Installing the Front Redtiger Dash Cam
The first camera is the easier of the two. Here's the workflow most install guides and owner videos follow, in the order that produces the cleanest result.
- Insert and format the SD card with the camera powered off. Redtiger's app guides you through this, but you can also do it from the camera menu.
- Attach the chosen mount to the camera. The suction mount slides into the slot; the adhesive mount usually has a separate plate that sticks to the windshield first.
- Mount the camera behind the rearview mirror on the passenger side.
- Plug the USB cable into the camera before you tuck any wire. This confirms the cable reaches and that the port works.
- Power on the camera with the car charger plugged into the 12V socket. Confirm it boots and records a short clip.
- Adjust the lens angle while watching the live feed through the Redtiger app.
Skip the angle adjustment until the wire is routed. Once the camera is locked into its final position with the wire hanging, you'll see the actual installed angle, and that's when minor tilts become obvious.
Step-by-Step: Routing the Rear Camera Cable
The rear camera cable is the longest part of the install and where most people get sloppy. A good run hides the cable from the front camera, along the headliner, down the B-pillar or C-pillar, across the top of the rear hatch or trunk, and into the rear camera. Plan the path before you stick anything.
Start at the front camera. Route the cable into the headliner gap with your trim tool. Most Redtiger rear cables are about 20 ft long, which is enough for a sedan but tight for SUVs and pickups.
Measure your vehicle before you start. Trucks and long SUVs sometimes need an aftermarket extension.
The Path Most Installers Use
- Tuck the cable into the headliner across the top of the windshield.
- Drop it down the passenger-side A-pillar behind the weatherstripping.
- Run it along the floor edge under the door sill or under the carpet behind the passenger seat.
- Up the C-pillar (the vertical trim behind the rear seat) on the same side as the rear camera mount.
- Across the top of the rear window, tucked under the headliner or the rubber hatch seal.
- Plug it into the rear camera and mount the camera high on the rear glass.
Keep the cable away from the side curtain airbag path. The airbag deployment zones run inside the A-pillar and C-pillar, so route the wire behind the airbag, not in front of it. This is the single most common safety mistake in dash cam installs, and it's the reason trim removal matters.
Pulling the A-pillar panel loose enough to wedge a cable behind it isn't optional, it's the correct path.
Leave a small service loop (about 2 inches of slack) at each bend point. Wires pulled taut eventually fatigue and break at the connector.
How to Hardwire the Redtiger (Fuse Box, ACC vs. Constant, Grounding)
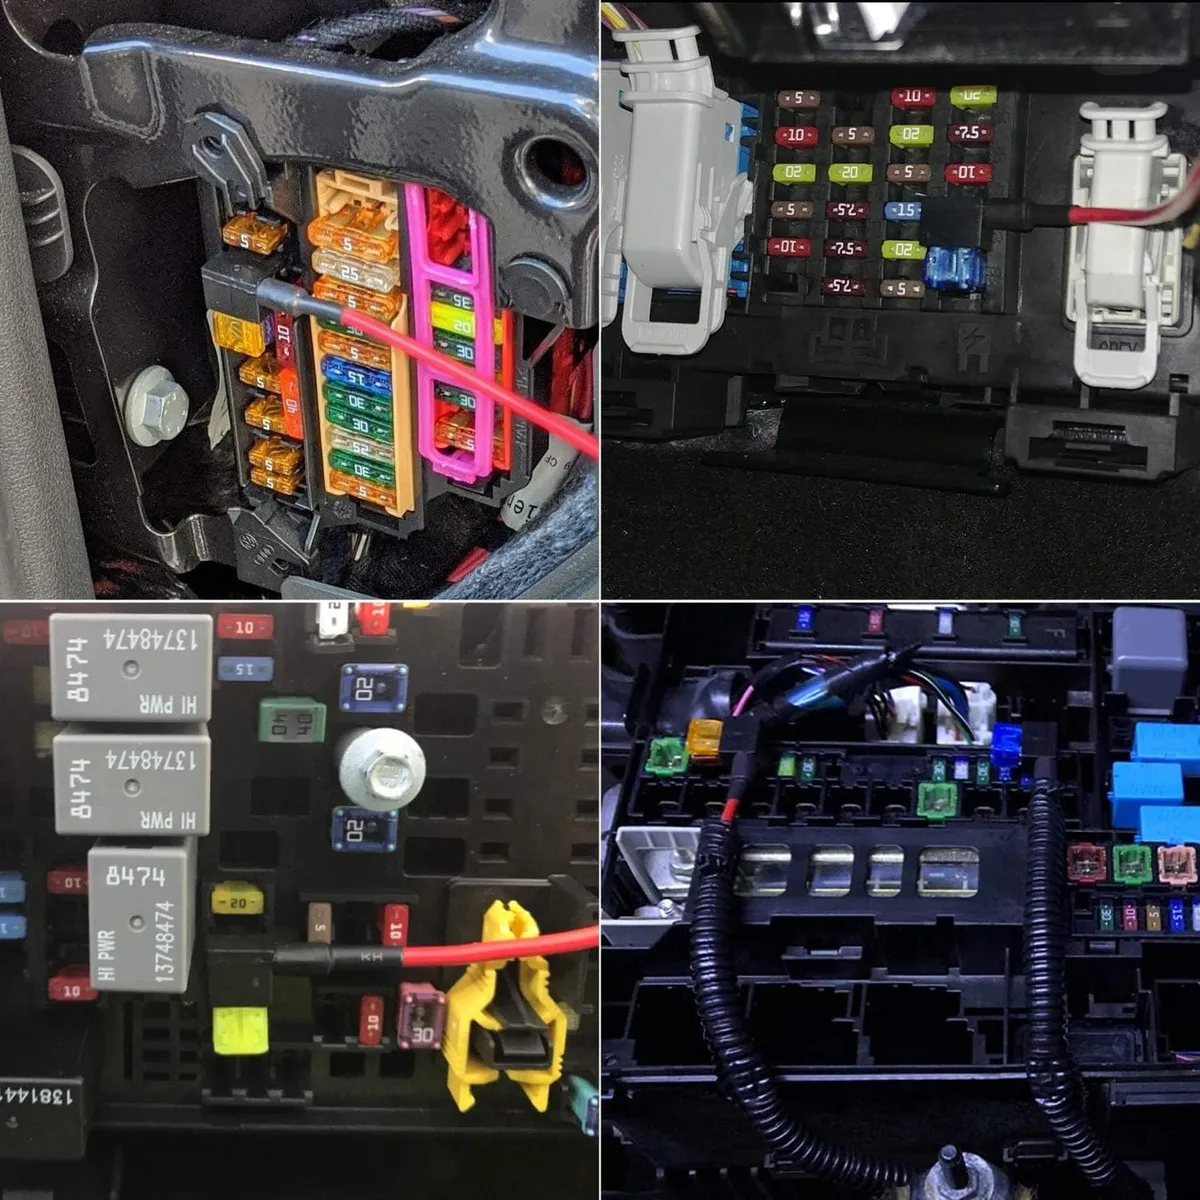
Hardwiring is what turns a dash cam from a recorder into a 24/7 witness. You get parking mode, a fully hidden wire, and no drain on the 12V socket. The kit has three wires: red (ACC switched), yellow (constant battery), and black (ground).
Step 1: Find the Fuse Box
Most cars have two fuse boxes: one under the hood and one inside the cabin (usually under the dash on the driver side or behind a side kick panel). The interior fuse box is the one you want. Your owner's manual lists every fuse by number and amperage.
Redtiger's hardwire kit manual walks you through the same lookup.
Step 2: Identify the ACC and Constant Fuses
You need two fuse slots, or one if your hardwire kit only has one ACC lead:
- ACC (switched): power only when the ignition is on. Cigarette lighter fuses work well here. The camera should record while driving and shut off when you park.
- Constant: always-on battery power. Needed for parking mode. Use a fuse that's only on for non-critical items (radio memory, dome light, alarm).
A test light or fuse tester makes this fast. Probe the fuse with the car off (constant should light up) and again with the car on (ACC should light up). Aggregate install guides recommend fuses rated between 5A and 20A.
Never use a fuse over 30A, and never piggyback onto a fuse that controls safety electronics (ABS, airbags, ECU).
Step 3: Install the Fuse Tap
Pull the original fuse out with the plastic tweezers in your fuse box. Insert the original fuse into the lower slot of the fuse tap (this protects the original circuit). Insert a new, same-amperage fuse into the upper slot (this protects the dash cam circuit).
Push the fuse tap into the empty slot.
Match the fuse tap to your fuse type. Most cars use mini or micro2 blade fuses. The wrong tap won't seat properly and can work loose over time.
Step 4: Ground the Black Wire
Find an unpainted metal bolt attached to the chassis. A bolt near the fuse box usually works (10 mm socket). Loosen it, slide the hardwire kit's ground ring terminal underneath, and retighten.
Sand off any paint under the contact point so you get a clean metal-to-metal connection.
Step 5: Test Before You Tuck the Wire
Plug the hardwire kit into the dash cam. Turn the car on. The camera should boot.
Turn the car off. After about 30 seconds, the camera should switch to parking mode (a small LED change or a notification in the app). If it doesn't, your ACC tap is reversed or your fuses are in the wrong slots.
Connecting the Redtiger App and Adjusting Settings
The Redtiger app (iOS and Android) runs the camera over Wi-Fi. You don't need cell service, but the phone has to be within about 10 ft of the camera while pairing.
First-Time Pairing
- Power the camera. The Wi-Fi network name and password show on the camera screen or in the quick-start card.
- Open your phone's Wi-Fi settings and connect to the camera's SSID.
- Open the Redtiger app. It should auto-detect the camera.
- Set a new Wi-Fi password. The default one is shared by every unit of the same model.
Settings Worth Changing Right Away
- Loop length: 3 minutes is the sweet spot. Long enough to capture any incident context, short enough that files don't go missing if the card corrupts.
- G-sensor sensitivity: medium. High settings trigger on every bump and fill the SD card with locked files.
- Parking mode: motion + impact is the most useful default. Time-lapse mode is gentler on the SD card.
- Date/time and time zone: confirm these before your first drive. Footage without a timestamp is half-useless in a dispute.
- GPS: turn it on if your model has the module. Speed and route overlay is the single most useful feature for insurance claims.
Adjusting the Field of View
Once the camera is mounted and the wire is hidden, watch a live preview through the app. Tilt the lens so the road fills the lower two-thirds of the frame. The horizon line should sit roughly where the road meets the sky in the distance, not where the hood of the car meets the windshield.
Recheck the angle after 24 hours because adhesive mounts can settle.
Redtiger SD Card, Loop Recording, and Parking Mode Setup
A dash cam chews through SD cards. Loop recording overwrites the oldest file once the card fills, but the card itself wears out long before a normal phone card would. Use a high-endurance card rated for continuous write.
The minimum card Redtiger recommends is 64 GB. At 4K front + 1080p rear recording, that gives roughly 6 to 8 hours of footage before the loop kicks in. A 256 GB card pushes that to 24+ hours.
| Resolution | Estimated Storage per Hour | 64 GB Capacity | 256 GB Capacity |
|---|---|---|---|
| 1080p + 1080p | 6 GB | ~10 hours | ~40 hours |
| 4K + 1080p | 12 GB | ~5 hours | ~20 hours |
| 2.5K + 1080p | 9 GB | ~7 hours | ~28 hours |
Format the card inside the camera every 60 to 90 days. This clears locked files the G-sensor accumulates and prevents the slow corruption that ends in "card error" messages. If the camera starts throwing card errors sooner than that, the card is failing and needs replacement.
Parking mode is what makes a hardwire install worth the effort. With motion + impact mode, the camera stays asleep until something moves in front of it or bumps it, then it wakes and records for a few minutes. The hardwire kit's low-voltage cutoff (typically 11.8 V on a 12 V system) protects your battery from deep discharge.
If you park for more than two weeks, the cutoff still matters. Run the engine for 10 minutes before assuming the camera killed your battery.
Common Redtiger Install Mistakes (and How to Fix Them)
Most install problems come from the same handful of mistakes. Recognizing them early saves an afternoon of pulling trim back off.
Suction Mount Falls Off in Heat
The suction cup loses vacuum once the cabin hits the mid-90s. Clean the windshield with isopropyl alcohol before mounting, mist the cup lightly, and press firmly for 30 seconds. If it still won't hold, switch to the 3M adhesive mount.
Heat-related failures are the most common complaint in owner reviews.
Wi-Fi Disconnects Constantly
The phone drops the link when the screen sleeps. Disable aggressive battery optimization for the Redtiger app on Android. Stay within 10 ft of the camera.
Don't try to pair while the car is in motion, as the phone and camera both keep their radios busy during streaming.
Rear Camera Cable Too Short
The 20 ft cable that ships in the box fits most sedans. SUVs, minivans, and pickup trucks often run out of length. The fix is a 16 ft or 26 ft extension cable, which Redtiger and third-party sellers stock.
Measure from the front camera to the rear glass along your planned route before assuming the included cable will reach.
Footage Is Overexposed or Too Dark
This is almost always the angle. The camera is pointing at the sky instead of the road. Re-aim using the live preview in the app.
Most Redtiger models also have HDR or WDR in the settings; turn it on if your area has bright sun and deep shadows in the same scene.
Fuse Tap Blows Immediately
A blown fuse on the first start means the wrong fuse type or the wrong amperage. Confirm the fuse tap matches the original fuse (mini, micro2, ATO). Confirm the replacement fuse in the tap is the same amperage as the original.
A 10A fuse in a 5A slot will blow instantly under load.
Parking Mode Drains the Battery
If the camera runs all night and the car won't start in the morning, the low-voltage cutoff isn't working. Confirm the hardwire kit is the correct one for your camera model. The Redtiger kit has a built-in cutoff, but generic 3-wire kits often don't.
For more on safe accessory wiring in vehicles, the U.S. Department of Transportation's vehicle safety resources cover the relevant federal guidance.
Legal and Safety Notes: Windshield Placement Laws You Need to Check
Dash cams are legal in all 50 US states, but windshield placement isn't. A few states restrict where you can mount anything on the windshield because anything in the driver's sightline is treated as an obstruction.
California is the strictest. The law limits mounting to a 5-inch square in the lower corner of the windshield or a 7-inch square in the upper corner, both on the passenger side. Minnesota and Georgia have similar placement rules.
Most other states follow the general "must not obstruct driver's view" standard, which the behind-mirror location typically satisfies.
UK rules are tighter. The camera must sit outside the swept area of the wipers (the area the wiper blades actually clean) and no more than 40 mm into the windscreen from the top of the steering wheel sweep. Mounting behind the rearview mirror usually complies.
Two more safety notes worth keeping in mind:
- Airbag zones. The side curtain airbag deploys downward and outward from the roof rail. Routing the wire in front of the airbag path can deflect the airbag or snap the wire during deployment, either of which is dangerous. The correct path is behind the A-pillar trim, not across the visible surface.
- ADAS cameras. Many newer cars have forward-facing radar and cameras mounted near the rearview mirror. Don't cover or shadow them. The owner's manual shows their exact location, and the dash cam should sit beside, not in front of, the ADAS cluster.
Quick Troubleshooting: Wi-Fi Drops, Suction Falls Off, No Power
When something doesn't work after install, the fix is usually simple.
No Power At All
- Confirm the car charger or hardwire kit is fully seated.
- Test the 12V socket with another device (phone charger, etc.).
- For hardwired installs, check both fuse taps and the ground bolt.
- Try a different USB cable. The included one is a known weak point in some Redtiger models.
Camera Boots but Doesn't Record
- The SD card is unformatted, full of locked files, or incompatible. Format in-camera. If that doesn't work, try a different card.
- Loop recording is turned off in settings. Turn it on.
- The card is below Class 10 or U3. Replace with a high-endurance U3/V30 card.
Footage Is Choppy or Has Gaps
- The card can't keep up with the bitrate. Use a card rated for 4K recording (V30 minimum).
- The phone is streaming live view at the same time, which competes for processor bandwidth. Stop the live view and let the camera record on its own.
- The mount vibrates. Tighten the suction cup or reapply the adhesive mount with a fresh 3M pad.
Redtiger App Won't Find the Camera
- Forget the Wi-Fi network on the phone and reconnect.
- Confirm the camera's Wi-Fi is broadcasting. The SSID should appear in the phone's Wi-Fi list within 15 ft.
- Update the app. Older versions sometimes lose compatibility with newer firmware.
Real-World Install Times and What to Expect on Your Vehicle
Our research across owner install logs and YouTube walkthroughs shows the time varies a lot by vehicle and method.
| Vehicle Type | Cigarette Lighter Route | Hardwire Route |
|---|---|---|
| Compact sedan (Civic, Corolla) | 20–30 min | 45–60 min |
| Mid-size SUV (RAV4, CR-V) | 30–45 min | 60–80 min |
| Full-size truck or van | 45–60 min | 90–120 min |
| EV with hidden fuse box (Tesla, etc.) | 30–45 min | 90+ min (OBD-II port often easier) |
The variation comes from two things: how accessible the fuse box is, and how much trim you have to remove to hide the wire. Older cars with lots of exposed screws are faster. Newer cars with tight, integrated trim panels take longer because each step is slower.
The first install is always the slowest. By the time you've run the wire once, you understand the path and the second camera (a friend's car, a second vehicle) goes twice as fast.
Maintenance and Long-Term Optimization
A Redtiger dash cam needs almost no maintenance, but a 60-second monthly check keeps it recording reliably. Wipe the lens with a microfiber cloth, confirm the mount is still tight, and skim the latest footage to make sure the angle hasn't drifted.
Format the SD card every 60 to 90 days. Update the firmware through the Redtiger app when prompted. Check that the date and time haven't reset after any battery disconnect, since a wrong timestamp makes footage harder to use in claims.
Redtiger vs. Viofo, Garmin, and Nextbase
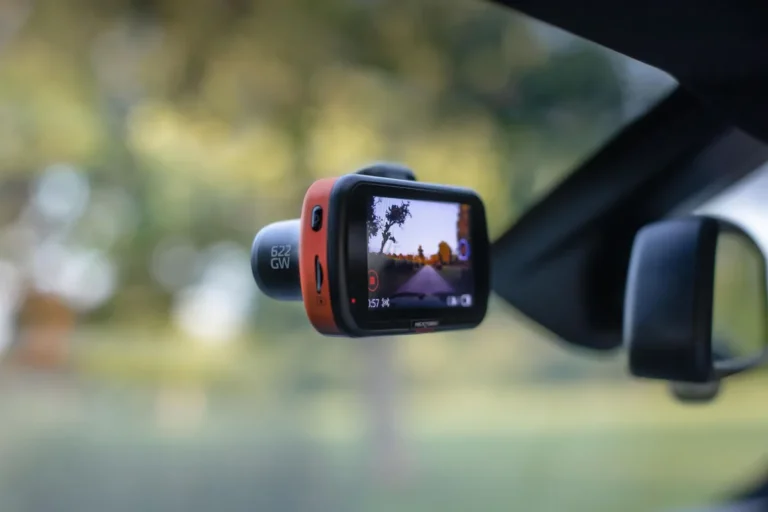
Redtiger sits in the budget-to-mid range. The 4K + 1080p dual-channel setup runs roughly $120 to $180 as of 2026, which is a third of what a comparable Viofo A129 Pro or Nextbase 622GW costs.
The trade-off is software polish. Viofo and BlackVue have more reliable apps, smoother parking mode transitions, and better low-light tuning. Redtiger wins on value and on included accessories, since most models ship with the rear camera, GPS, and a 32 GB card in the box.
If you want set-and-forget reliability, Viofo is the safer pick. If you want dual-channel coverage at the lowest price, Redtiger delivers. Garmin and Nextbase dominate the premium end with driver-assist features, but they cost two to three times more.
Frequently Asked Questions
How long does the install take?
About 20 to 45 minutes for the cigarette lighter route, and 45 to 90 minutes for a hardwired install. Add 15 minutes for the rear camera cable routing.
Do I need to hardwire for parking mode?
Yes. Parking mode relies on a constant power source, and the cigarette lighter shuts off with the ignition on most cars. If you don't want to hardwire, a few minutes of parking mode after you turn the car off is all you'll get.
Which SD card should I use with a Redtiger?
A U3 or V30 rated high-endurance card, 64 GB minimum, 256 GB maximum. SanDisk High Endurance and Samsung PRO Endurance are the two models that consistently survive the constant write cycle.
Can I install a Redtiger in a leased car?
Yes. Use the suction mount, not the adhesive. Route the wire to the cigarette lighter instead of hardwiring.
The only permanent mark will be a slightly darker spot on the windshield where the suction cup sat, which comes off with glass cleaner.
Will the dash cam drain my battery?
In normal use, no. A hardwire kit with low-voltage cutoff draws 150 to 300 mA and shuts off at 11.8 V. A cigarette lighter that stays live when the car is off can drain a battery over several days.
Unplug the charger or hardwire if you park for more than a week.
Is it legal to record audio in the car?
It depends on the state. Eleven US states require all-party consent for audio recording. If you're a rideshare driver or carry passengers regularly, turn off audio recording in the Redtiger app to stay on the right side of the law in those states.
Final Verdict: Is the Redtiger Worth Installing Yourself?
Yes, for most drivers. The install is genuinely DIY, the footage is good enough for insurance disputes, and the price leaves room for a high-endurance SD card and a hardwire kit in the same budget.
Go with the cigarette lighter route if you want a 20-minute job. Go hardwired if you want parking mode and a clean look. Skip the cheapest SD card you can find, format it quarterly, and check the local windshield placement law before you stick anything to the glass.
Do those three things and the install will be the easiest upgrade you make to your car this year.