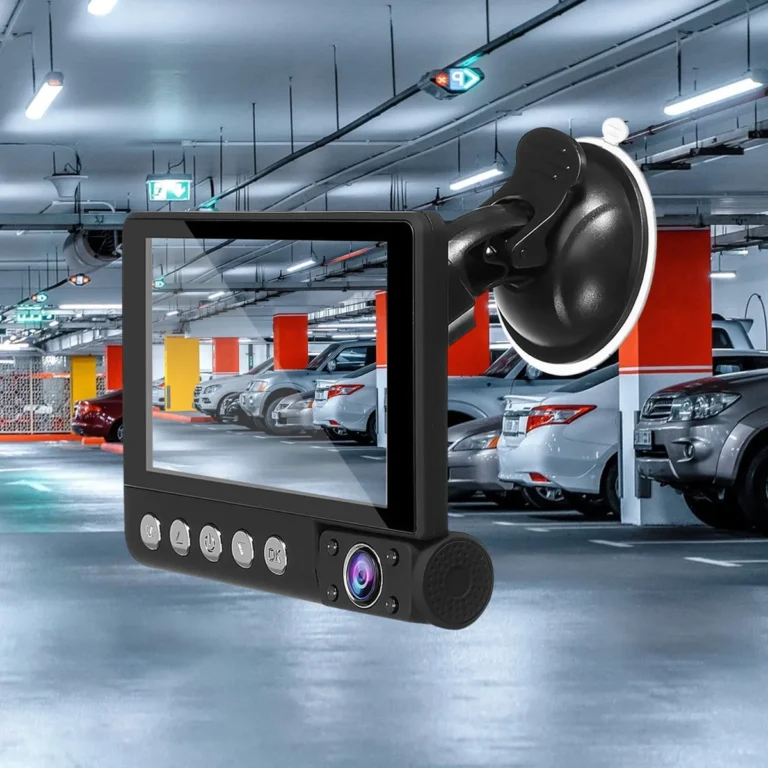
How to install black box dash cam: The Best Guide
Most people think "install dash cam" means sticking it on the glass and running a cord to the cigarette lighter. That works. But if you want a clean, factory-looking install that records while parked and doesn't kill your battery, you'll hardwire it to the fuse box.
That's the install we're walking through here. As of 2026, the most popular dual-channel units from BlackVue, Thinkware, and VIOFO all ship with low-voltage cutoff built in, so a proper hardwire install is safer than ever for your car's electrical system.
The full job takes 30 to 90 minutes for a front-only cam, and 60 to 120 minutes if you're routing a rear camera through the headliner and hatch. You'll need a hardwire kit, an add-a-fuse tap, a fuse puller, and a trim removal tool. The trickiest part isn't the wiring.
It's routing the cable along the A-pillar without crossing an airbag deployment zone. We'll cover that in detail below, then move step by step through the fuse box, ground point, and final tweaks. By the end, your install will look like it came from the dealership.
Quick Answer
Mount the dash cam behind the rearview mirror. Route the power cable along the headliner and down the A-pillar. Connect it to a switched fuse using an add-a-fuse tap.
Ground the kit's black wire to a chassis bolt. Set the low-voltage cutoff to 12.0V or higher. Format a high-endurance microSD card.
Test the recording.
Why a Clean Install Matters (and Where Most People Mess Up)
A sloppy dash cam install is more than an eyesore. Loose cables can snag on the steering wheel. Wires dangling across the A-pillar can interfere with curtain airbags during a crash.
And a fuse tap plugged into the wrong slot can kill your ECU the moment you turn the key.
Here's what separates a clean install from a hack job:
- Cables tucked inside the headliner, never across airbags
- Power drawn from a switched fuse, so the cam shuts off with the ignition
- Low-voltage cutoff set correctly to protect the battery
- Ground wire attached to bare metal, not a painted bolt
The biggest mistake we see in user photos is wires hanging in the driver's sightline or stretched across the A-pillar like a seatbelt. Both are avoidable. A trim removal tool, a little patience, and knowing your fuse box layout will get you 90% of the way there.
What You'll Need Before You Start
Before you crack open the fuse box, lay everything out. The job goes fast if your tools are ready and your SD card is formatted. Manufacturer specs for high-endurance cards (SanDisk Max Endurance, Samsung Pro Endurance) confirm they're rated for the constant write cycles a dash cam demands, typically 20,000+ hours of continuous recording.
Tools and Materials
| Item | What to look for | Why it matters |
|---|---|---|
| Dash cam with hardwire kit | 3-wire kit (BAT, ACC, GND) or built-in voltage cutoff | Bare 12V adapters don't protect your battery |
| Add-a-fuse tap | Match your fuse type (ATO, mini-ATO, micro2) | Wrong tap doesn't seat properly |
| Trim removal tool | Plastic, not metal | Prevents scratches on soft trim |
| Fuse puller | Often included in the fuse box lid | Safer than needle-nose pliers |
| High-endurance microSD | 64GB minimum, 256GB or 512GB for 4K | Standard cards fail in months |
| Multimeter (optional) | For checking switched vs. constant fuse | Saves time if the fuse legend is unreadable |
Take five minutes now to format the SD card in the camera itself, not on your computer. Camera firmware sets the file structure, and a card formatted elsewhere can cause write errors.
Picking the Right Mounting Spot Behind Your Mirror
The mount location decides everything else. Too low and the cam blocks your view. Too far right and the footage catches more dashboard than road.
Too far left and you lose license plate clarity on the right lane.
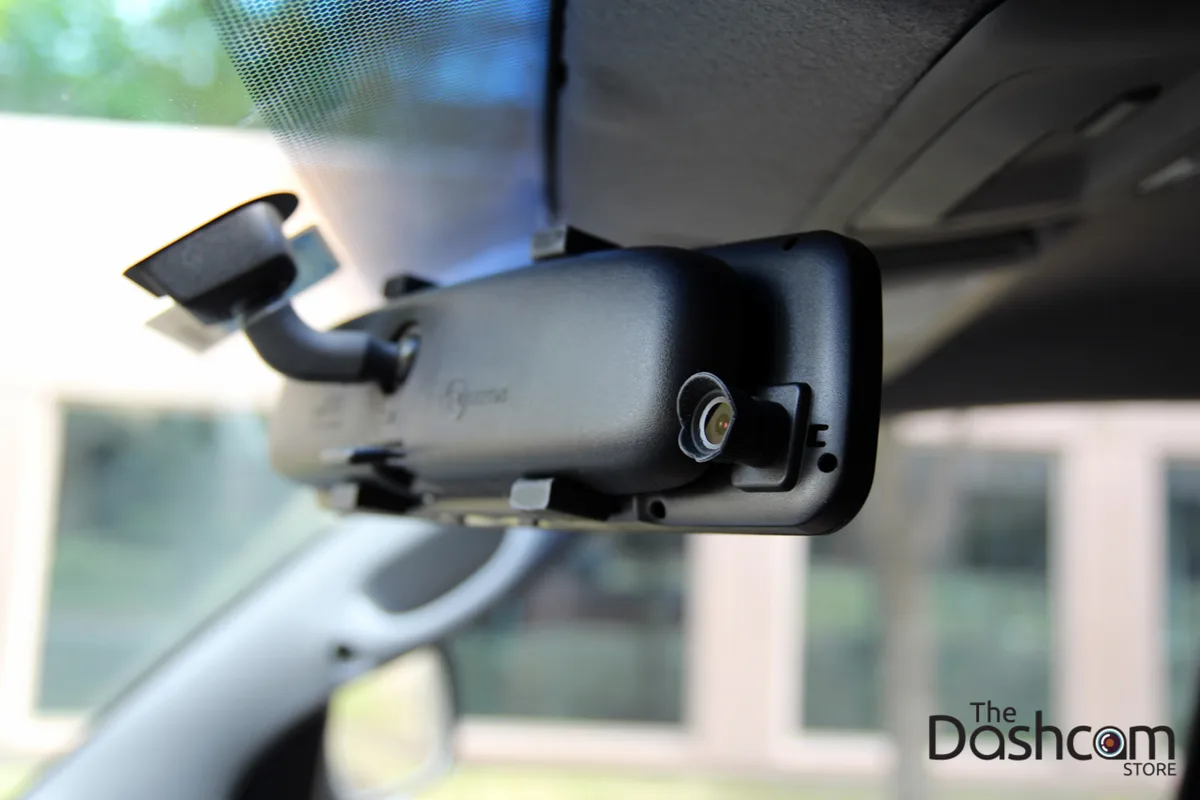
The sweet spot is directly behind the rearview mirror, biased toward the passenger side by about an inch. This puts the lens inside the wiper sweep zone, which keeps it clean in rain, and keeps the body of the cam hidden behind the mirror housing.
What to look for in a good spot:
- Inside the windshield wiper arc (the area wiped clean by the blades)
- At least 1 inch below the headliner to avoid mirror glare
- Not directly over a defroster line or dash sensor (adaptive cruise, lane-keep cameras)
- Within reach of the power cable's hardwire pigtail
Mounting height also affects what the lens sees. Aggregate user reviews report that 130° to 140° field of view (FOV) is the sweet spot for capturing license plates at distance without fisheye distortion. Anything wider, say 170°, makes the edges look warped and pulls plates out of readable range.
Once you've got your spot, wipe the glass with isopropyl alcohol and let it dry. Adhesive mounts, especially 3M VHB pads, bond best to clean glass. Press and hold the mount for 30 seconds.
Don't trust the bond for at least 12 hours, longer in cold weather.
The Quick-Connect Option: Cigarette Lighter Install
If you're not ready to hardwire, the cigarette lighter (12V outlet) install takes about five minutes. It also has a real downside: no parking mode unless the outlet stays live with the ignition off. On most cars, it doesn't.
Quick-install steps:
- Plug the car's 12V adapter into the cigarette lighter socket
- Route the cable up the door seal or along the headliner
- Tuck excess cable behind the trim
- Confirm the cam powers on and off with the ignition
The cable routing is the only part that takes thought. Door-seal routing is faster but the cable can get pinched in the hinge over time. Headliner routing looks cleaner and matches what you'd do for a hardwire install later.
Most users start with the 12V outlet, then convert to hardwire once they're comfortable with the cable path.
The hardwire route is what gives you parking mode, low-voltage protection, and that OEM look. That's what we'll cover next.
The Clean Look: Hardwiring to Your Fuse Box
Hardwiring gives you three things the cigarette lighter can't. Parking mode that works when the engine is off. A clean, hidden wire path.
And a connection that disappears into the car's electrical system instead of dangling from the dash.
The hardwire kit that ships with most premium cams, or sold separately as a three-wire kit, has three leads:
- Red (BAT/ACC): Switched power, comes on only when the car is running
- Yellow (BATT): Constant power, stays live even when the car is off
- Black (GND): Ground, attaches to bare metal on the chassis
Some cams use a single switched wire and a built-in parking mode timer. Others need both red and yellow for full buffered parking mode. Read your manual before you start.
Manufacturer documentation from BlackVue and Thinkware confirms that connecting both BAT and ACC wires is required for buffered parking mode (where the cam records a few seconds before and after motion is detected).
When to pick hardwire over OBD-II power
OBD-II ports are easier to access, but they pull constant power on most vehicles. That means your dash cam runs 24/7 unless you unplug it. Hardwiring to a switched circuit plus the cam's built-in low-voltage cutoff is the safer long-term play.
What hardwiring looks like under the hood of the install:
- Fuse tap in a switched fuse position
- Constant tap only if you want extended parking mode (and you're running a battery pack)
- Ground wire under a clean chassis bolt
- Voltage cutoff set between 12.0V and 12.4V depending on climate
We'll get to the cutoff settings later. First, let's find your fuse box.
Finding Your Fuse Box and the Right Fuse Slots
Most cars have two or three fuse boxes. The one you want is almost always the interior panel, usually driver-side under the dashboard, behind a small plastic cover. Some vehicles tuck it behind the glove box or under the passenger footwell.
The owner's manual lists the exact location, but the fuse box cover itself has a legend on the back showing what each switch is labeled for.
How to identify a switched vs. constant fuse
A switched fuse only has power when the ignition is on. A constant fuse has power all the time. You can test this two ways:
- Use a multimeter set to DC volts. Probe the fuse's test slot. With the car off, a switched fuse reads 0V, with the car on it reads around 12.6V. A constant fuse reads 12.6V in both cases.
- Plug in a small 12V test light. If the light only comes on with the key turned, it's switched.
Common switched fuse slots to look for:
- Radio / audio
- Cigarette lighter / 12V power outlet (front)
- Sunroof
- Heated seats
- Power mirrors
Common constant fuse slots to avoid for ACC:
- ECU, ECM, PCM
- Fuel pump
- Airbag control module
- Anti-lock brakes (ABS)
- Any fuse marked with a yellow or red high-amperage warning
Pulling power from an ECU or airbag fuse can cause fault codes, no-start conditions, or in the worst case, disable a safety system. Stay boring here. Radio and mirror fuses are your safest bets.
What the fuse box layout usually looks like:
| Location | Typical fuse count | Common switched labels |
|---|---|---|
| Driver side under dash | 20 to 40 | RADIO, CIG, MIRROR, SUNROOF |
| Passenger footwell | 15 to 30 | A/C, BLOWER, HEATED SEAT |
| Under hood | 40 to 80 | Avoid these for dash cams |
Once you've picked your slot, double-check the amperage. Add-a-fuse taps come in standard ratings. A 10A fuse tap paired with a 10A original fuse is fine.
If your cam draws more than 10A (it won't, but check the spec), drop to a 5A fuse and adjust accordingly.
How to Use an Add-a-Fuse Tap Safely
An add-a-fuse tap is a small plastic adapter that slots into the fuse box and gives you a second fuse position on top of the original. You slide the existing fuse into the bottom slot of the tap, add a second fuse of the same rating on top, and now you have two circuits sharing one slot.
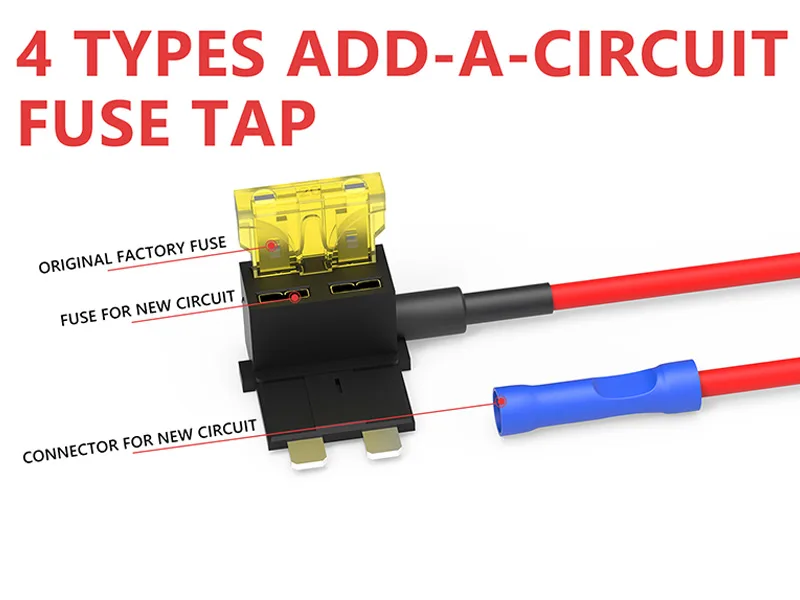
Step-by-step: installing an add-a-fuse tap
- Turn off the car and remove the key
- Identify your target fuse slot from the legend on the fuse box cover
- Pull the original fuse using the fuse puller
- Insert the original fuse into the bottom slot of the tap
- Insert a second fuse of the same rating into the top slot
- Crimp the dash cam's red (ACC) wire to the tap's pigtail
- Plug the tap back into the fuse slot
- Tug gently to confirm a solid seat
The top fuse powers your dash cam. The bottom fuse powers whatever was originally there. Both circuits work independently, which is the whole point of the design.
Which fuse rating goes on top?
Match it to the original. If the original fuse was 10A, both slots get 10A fuses. Some installers put a lower-rated fuse on top (say 5A) to protect the dash cam circuit.
That's fine if your cam draws less than 5A. Most cams draw between 1A and 3A, so a 5A fuse is plenty.
A note on fuse types
Fuse types vary by region and vehicle age. North American vehicles built before the mid-2000s often use ATO (standard) fuses. Newer vehicles use mini-ATO or micro2 fuses, which are smaller.
UK and EU vehicles use mini-blade fuses that look similar but aren't always cross-compatible. Match the tap to your fuse type, not just your region's standard.
Once the tap is seated, you can move on to ground and routing. But before we leave the fuse box, do one quick test: turn the key to ACC and confirm the cam powers on. Then turn the key off and confirm it shuts down.
If it stays on, you've plugged into a constant fuse. Pull the tap and pick a different slot.
Routing the Front Camera Cable (Headliner to A-Pillar)
Now the part that makes or breaks the install. Cable routing. The goal is to hide every inch of wire inside the headliner, A-pillar trim, and kick panel.
The technique is the same regardless of car make, with minor trim variations between models.
Headliner routing (mirror to A-pillar)
Pull the headliner down gently with your trim tool. There's a small gap between the headliner and the windshield frame. Tuck the wire into that gap and slide it toward the A-pillar.
The headliner fabric has enough flex to accept the wire without bunching.
You'll feel some resistance where the headliner meets the A-pillar trim. That's the edge of the trim piece. Don't force it.
Pull the A-pillar trim slightly outward with your trim tool and feed the wire behind it.
A-pillar routing
The A-pillar is the vertical trim piece running from the dash to the headliner on each side of the windshield. On most cars, the A-pillar trim pops off with a firm pull. There are usually two or three clips holding it.
Start at the top and work down.
Once the trim is loose, you'll see either a plastic airbag door or the airbag itself behind the trim. This is the spot where careless installs go wrong. We'll cover airbag routing in the next section.
For now, the safe rule: run the wire along the side of the A-pillar closest to the door, not the side closest to the windshield. The door side has no airbag components. The windshield side is the airbag deployment zone.
Down to the fuse box
Once the wire reaches the bottom of the A-pillar, route it along the kick panel (the flat trim piece where your feet go). Most kick panels pull straight off with a firm tug. Feed the wire behind the kick panel and up to the fuse box area.
Leave a little slack near the cam so you can adjust the mount later without straining the wire.
Airbag Zones: Where NOT to Run Your Wire
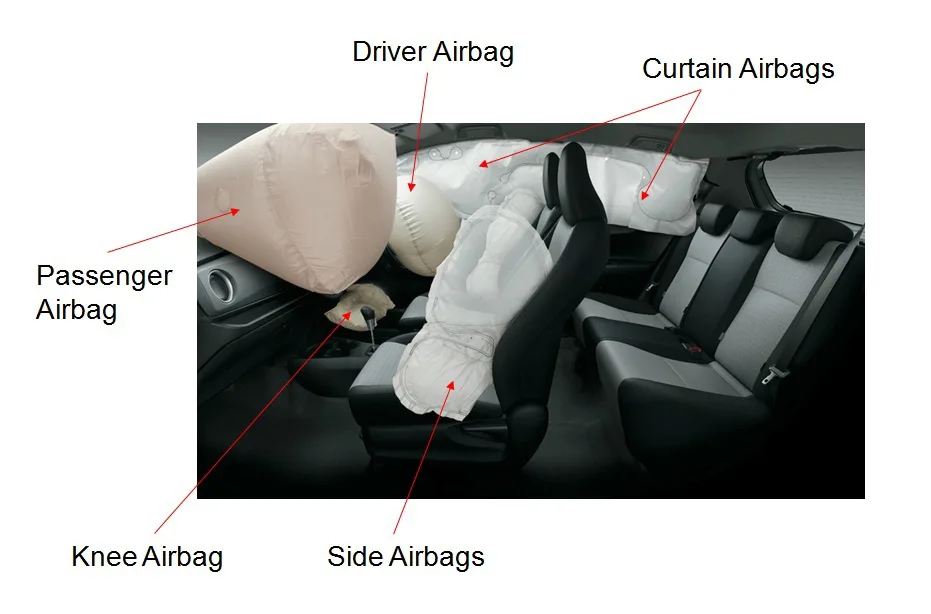
This is the single most important section of this guide. Get it wrong and your wire can interfere with a curtain airbag during a crash. NHTSA's airbag zone guidance confirms that curtain airbags deploy downward and outward from the roof rail, with deployment paths that cross the upper A-pillar area.
The safe path
The wire should run on the door-side edge of the A-pillar, behind the weatherstripping if possible, not across the face of the pillar. That keeps the wire out of the airbag's deployment path.
What NOT to do:
- Don't run the wire across the face of the A-pillar trim
- Don't tuck it under the airbag label or sticker
- Don't route it through the curtain airbag deployment zone near the roof rail
- Don't secure it with zip ties around airbag components
If your A-pillar has a visible airbag tag (most cars post-2000 do), the airbag is mounted inside the trim and deploys through a scored seam. Your wire should stay on the opposite side of that seam.
How to verify
After routing, push the trim back into place and look at it from outside the vehicle. The wire should be invisible. If you can see the wire bulging the trim, you've routed it across the face of the pillar.
Pull it out and reroute along the door edge.
Installing the Rear Camera (Dual-Channel Systems)
Adding a rear camera turns a 60-minute job into a 90 to 120-minute job. The extra time is all in the cable routing. The rear camera itself mounts in seconds.
Rear camera mounting
Mount the rear cam high on the rear windshield, just below the headliner and centered. Wipe the glass, peel the adhesive backing, press and hold for 30 seconds. Same drill as the front.
Routing the rear cable forward
The rear camera cable runs from the back window forward to the front cam. Most installers route it along the headliner on the passenger side, down the C-pillar (the vertical trim behind the rear passenger seat), along the floor or under the door sills, and up to the front cam.
The hatch seal trick
On hatchbacks and SUVs, the cable has to cross from the body to the hatch. There's a rubber conduit in the existing wiring loom that carries the rear window defroster and brake light wires. Most installers pull the rear cam cable through the same rubber boot using a fish tape or stiff wire.
Don't drill a new hole. Don't run the cable over the top of the hatch seal. Either way water finds the path and you end up with a wet trunk or a corroded cable.
What the rear cable connection looks like at the front cam
The rear camera cable plugs into the front cam's secondary input. It's usually a smaller 2.5mm or 3.5mm jack. Once connected, the front cam handles both files, writing them to the same SD card in separate folders.
Connecting the Ground Wire the Right Way
The ground wire is the black lead on your hardwire kit. It needs to attach to bare metal on the car's chassis. A painted bolt, a dirty bolt, or a plastic mounting point won't conduct properly.
Finding a good ground
Look for an existing chassis bolt near the fuse box. There's almost always one within a foot. Bolts holding the fuse box bracket, dashboard frame, or kick panel reinforcement are all good candidates.
The bolt should have a clean metal-to-metal contact with the chassis.
How to attach it:
- Loosen the bolt with the right size wrench or socket
- Slip the ground ring terminal under the bolt head
- Tighten the bolt back down firmly
- Give the wire a gentle tug to confirm it doesn't slide
If the paint around the bolt is chipped, that's fine. The ground terminal needs bare metal contact, not a pretty finish. If the bolt is fully painted, sand a small area bright before attaching.
A bad ground causes:
- Cam randomly shutting off
- Parking mode not working
- Flickering or rebooting footage
If your cam behaves weird after the install, the ground is the first place to check. AAA's vehicle electrical guidance recommends chassis grounding within 18 inches of the component being powered, which is easy in any dash cam install.
Setting Your Low-Voltage Cutoff
The low-voltage cutoff is the setting that tells your cam to stop drawing power when your car battery drops to a certain voltage. It's the single most important setting if you hardwire for parking mode.
Recommended cutoff voltages
| Climate | Cutoff setting | Notes |
|---|---|---|
| Cold winters (below freezing) | 12.4V | Preserves cold-cranking amps |
| Temperate year-round | 12.2V | Standard recommendation |
| Hot summers only | 12.0V | Maximum parking mode runtime |
Most cams let you set this in the app or through the on-device menu. Set it once and forget it. If your battery is older than four years, lean conservative.
A weak battery that drops to 11.8V won't start your car, and that's a worse day than a missed parking event.
What the cutoff actually does
When the cam detects battery voltage at or below your cutoff, it writes a final file, saves the current recording, and powers down cleanly. It won't start again until you drive the car and the alternator brings the voltage back up.
Mounting, Aiming, and Testing the Camera Angle
You're almost done. Mount the cam, plug in the rear cam if applicable, and confirm the angles.
Aiming the front cam
The horizon line should sit at about 40% from the top of the frame, slightly above center. This captures plenty of road ahead while keeping the hood and dashboard mostly out of the shot. Too high and you lose the road.
Too low and you spend the whole video watching your hood.
Aiming the rear cam
The rear cam should show the road behind with about 30% sky and 70% ground. This keeps the horizon line readable and gives you usable footage of any car that rear-ends you.
Test recording
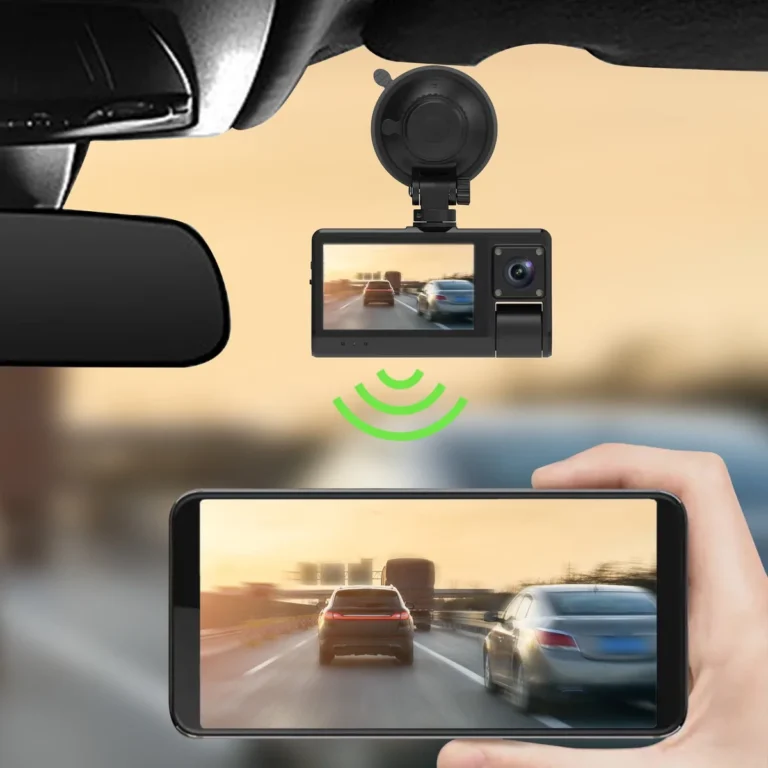
Hit record, drive around for two minutes, then review the footage on your phone via the cam's Wi-Fi. Look for:
- License plates readable at typical following distances
- No glare from the dashboard reflecting off the windshield
- Front and rear cams in sync (dual-channel units)
- Audio recording clear (if you want it, otherwise turn it off)
If anything looks off, adjust the mount and try again. Aiming takes 30 seconds once the mount is set.
Parking Mode Setup and Sensitivity Settings
Parking mode is where hardwiring pays for itself. With the cam connected to constant power (or via a battery pack) and parking mode enabled, the cam wakes up on motion or impact and captures whatever's happening around your parked car.
The three parking mode types
| Mode | What it records | Best for |
|---|---|---|
| Motion detection | Movement in the frame | High-traffic parking lots |
| Time-lapse | Continuous 1 to 2 fps | Long-term parking (overnight, airport) |
| Buffered | Few seconds before and after motion | Hit-and-run evidence |
Buffered parking mode is the gold standard, but it draws the most power and only works on cams with both BAT and ACC connections. If your cam has a single-wire hardwire kit, motion detection or time-lapse are your options.
Sensitivity settings
Start with medium sensitivity on both motion and G-sensor. Drive for a week. If your cam fills the SD card with wind-triggered recordings, drop motion sensitivity one notch.
If it misses bumps, raise G-sensor sensitivity one notch.
Hiding the Last Inch of Wire (Pro Touches)
You've routed everything. Now for the details that separate a pro install from an amateur one.
Where the wire meets the cam
Leave about 2 inches of slack at the cam end. This lets you remove the cam from the mount without unplugging. Tuck the slack into the headliner above the mirror.
Where the wire meets the fuse tap
Bundle any extra wire with a zip tie and tuck it behind the fuse box cover. The cover should close fully without bulging.
Trim alignment
Press all the trim pieces back into place firmly. A properly seated A-pillar trim doesn't rattle when you tap it with your knuckle. If it rattles, one of the clips didn't catch.
Remove it and try again.
Final visual check
Step back, look at the windshield from outside, look at the A-pillar from the driver's seat. No wires visible. That's a clean install.
Common Install Mistakes That Cause Problems Later
Most install problems show up within the first week. Here's what to watch for:
- Cam turns off while driving. Bad ground. Check the chassis bolt.
- Cam doesn't turn on with ignition. Wrong fuse slot. You picked constant instead of switched.
- Cam won't power up at all. Fuse tap not fully seated. Remove and reseat.
- Footage is shaky or vibrating. Mount not pressed firmly. Re-adhere.
- Parking mode drains battery overnight. Cutoff voltage too low. Raise to 12.2V or higher.
- Rear cam footage is dark. Adjust the angle to favor the road, not the sky.
These issues are all fixable without pulling the trim apart again. Just diagnose before you tear down the install.
When to Add an External Battery Pack Instead
Hardwiring with low-voltage cutoff is the standard install. But if you want multi-day parking mode without touching your car battery, an external battery pack is the upgrade.
Popular options include the Cellink NEO and BlackVue B-130. These packs sit in the trunk or under a seat, charge while you drive, and power the cam for 24 to 48 hours of parking mode depending on the cam's draw.
When it's worth the cost:
- You park at an airport for extended trips
- You drive an EV and don't want to risk auxiliary battery drain
- Your commute is short and the alternator barely tops up the battery
For most daily drivers, the built-in low-voltage cutoff is plenty. A battery pack is a nice-to-have, not a must-have.
SD Card, Firmware, and Long-Term Maintenance
A dash cam is only as good as the SD card inside it. Constant write cycles kill consumer-grade cards in months. High-endurance cards last years.
SD card replacement schedule:
| Use case | Replace every |
|---|---|
| Daily driver, parking mode on | 6 to 9 months |
| Daily driver, parking mode off | 12 months |
| Occasional driver | 18 to 24 months |
Set a calendar reminder. Replace the card, don't wait for it to fail. A failed card means no recording, and you won't know until you actually need the footage.
Firmware updates
Check the manufacturer's app or website every 6 months for firmware updates. Updates often improve parking mode behavior, fix bugs, and occasionally add new features. Updating takes 5 minutes and keeps the cam running well.
Lens cleaning
Wipe the lens with a microfiber cloth monthly. Dust, pollen, and road grime build up faster than you'd think, and a dirty lens ruins night footage.
Legal Stuff You Should Know Before Hitting Record
Recording on private property is mostly fine in the US and UK. Recording through the windshield in public is generally allowed. Audio recording is where things get complicated.
Two-party consent states (US)
If you record audio, you need consent from everyone being recorded in these states: California, Florida, Illinois, Massachusetts, Maryland, New Hampshire, Pennsylvania, Washington, and Montana. If you drive mostly in any of these states, turn audio recording off in the cam settings.
Windshield obstruction laws
Some states restrict where you can mount devices on the windshield. California, for example, requires devices to be in a 5-inch square in the lower corner of the windshield or the upper 7-inch area. Mounting behind the rearview mirror is legal in all 50 states.
Rideshare drivers
If you drive for Uber or Lyft, the platform policies require you to disclose recording to passengers. Visible signage is the simplest way to comply. The platform's terms of service have the exact wording.
UK and EU drivers
GDPR applies to footage that captures identifiable faces or license plates. You can use the footage for legitimate purposes (insurance claims, accident evidence) but can't publish it publicly without blurring identifying details.
Quick Troubleshooting Guide
When something feels off after the install, walk through this table before pulling the trim apart again. Most issues resolve in under five minutes.
| Symptom | Likely cause | Fix |
|---|---|---|
| Cam won't power on | Fuse tap not fully seated | Reseat the tap firmly |
| Cam randomly reboots | Loose or dirty ground | Retighten chassis bolt |
| Footage corrupted or missing | Failing SD card | Replace card |
| Parking mode won't engage | Constant fuse not connected | Verify both BAT and ACC wires |
| Time/date keeps resetting | Capacitor not charged | Drive 30 minutes to top it up |
| App won't connect to cam | Wi-Fi pairing lost | Reset cam and re-pair |
| Footage too dark at night | Lens dirty or HDR off | Clean lens, enable HDR |
| Glare on footage | Polarizing filter missing or rotated | Add or rotate CPL filter |
If none of these solve it, check the cam's firmware version against the manufacturer's current release. A bug fixed in last quarter's update might be exactly what's tripping your install.
Frequently Asked Questions
How long does it take to install a black box dash cam?
A front-only cigarette lighter install takes about 5 minutes. A hardwired front-only install takes 30 to 60 minutes. Adding a rear camera brings the total to 60 to 120 minutes depending on vehicle layout.
Can I install a dash cam without hardwiring?
Yes. Plugging into the 12V cigarette lighter gives you power when the ignition is on, but no parking mode on most vehicles. Hardwiring unlocks parking mode and a hidden wire path.
Will a dash cam drain my car battery?
Not if you set the low-voltage cutoff correctly. Most cams let you set a cutoff between 11.8V and 12.4V. Set it to 12.2V for year-round use and your battery will start the engine every morning.
Where is the safest place to mount a dash cam?
Directly behind the rearview mirror, biased toward the passenger side by about an inch. This keeps the camera inside the wiper sweep zone, hidden behind the mirror, and out of your line of sight.
Do I need a rear camera?
If you want full coverage in case of a rear-end hit, yes. A rear cam also helps with hit-and-runs while parked. If budget is the priority, start with a quality front-only cam and add the rear later.
How long does a dash cam SD card last?
High-endurance cards rated for 20,000+ hours of continuous recording typically last 12 months in daily-driver use with parking mode. Replacing the card annually is the easiest way to avoid corrupted footage.
Is it legal to record audio in the car?
In two-party consent states (CA, FL, IL, MA, MD, NH, PA, WA, MT), audio recording without consent is illegal. Turn off audio recording in the cam's settings if you drive in any of these states.