How to jump start car with portable jumper
If your engine won't crank and you hear that lonely click-click-click, knowing how to jump start car with portable jumper packs saves the day. No second car, no flagging down a stranger, no waiting on a tow truck. You grab the pack, follow a few clear steps, and you're back on the road in minutes.
The process is simple, but the order matters. A modern lithium portable jump starter rated around 1,000 to 2,500 peak amps can boost most 4-cylinder and V6 engines on a single charge, per manufacturer specs. We'll walk you through the full workflow, the condition checks that prevent damage, and the mistakes that fry electronics, so as of 2026 you're using the same method the pros recommend.
Quick Answer
Turn on the portable jump starter. Connect the red clamp to the dead battery's positive terminal. Connect the black clamp to an unpainted metal ground on the engine block.
Wait 30 seconds. Crank the engine for up to 5 seconds. Disconnect the black clamp first, then the red clamp.
Drive for at least 20 minutes to recharge the battery.
Why Your Car Won't Start (And How a Portable Jumper Fixes It)
Nine times out of ten, a no-start situation comes down to a dead 12-volt lead-acid battery. The engine needs a burst of cranking amps to spin the starter motor, and if the battery's voltage drops below about 11.8 volts, there just isn't enough juice to turn things over. You might still see dashboard lights or hear the radio, but the starter can't do its job.
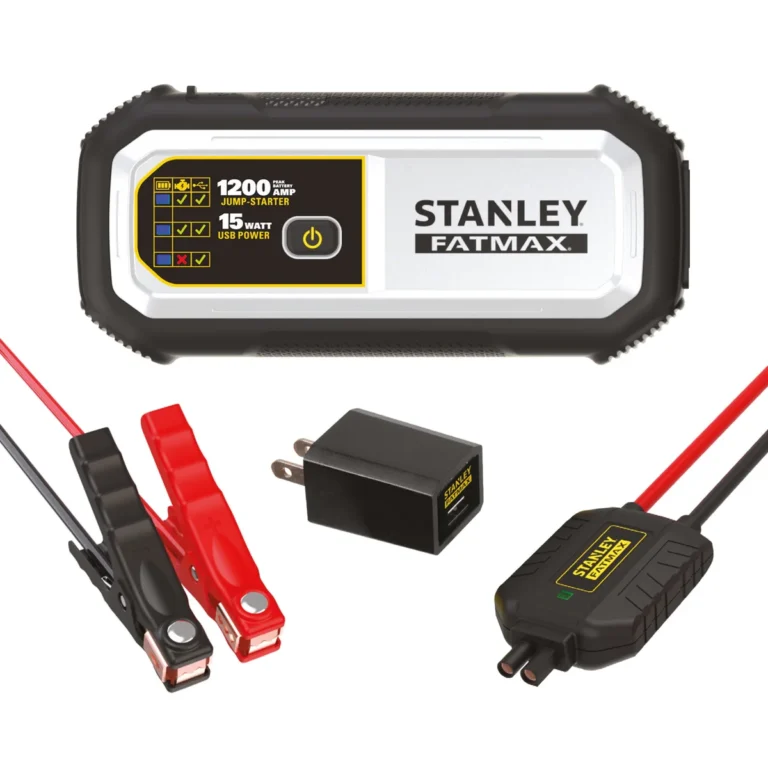
A portable jump starter is a compact lithium battery pack with heavy-duty jumper cables built in. It delivers a short, high-amperage burst of DC current directly to your battery terminals, enough to crank the engine. Once the engine runs, the alternator takes over and recharges the battery while you drive.
The whole interaction usually takes under five minutes.
The catch is that not every no-start is a dead battery. If your battery is fine and the problem is actually a bad alternator, a starter motor, or a fuel system issue, no jump starter in the world will help. That's why the first thing we'll cover is a 30-second condition check.
Before You Start: The 30-Second Condition Check
Before you pull out the clamps, do a quick visual and audio inspection. This step tells you whether jump-starting is even the right move, and it prevents wasted time and potential damage.
Here's what to look for:
- Battery voltage check. If you have a multimeter, a reading below 12.2 volts means the battery is discharged. Above 12.4 volts means the issue is likely elsewhere.
- Listen for the click. A rapid clicking sound when you turn the key points to a dead battery. A single loud click usually means a bad starter.
- Look at the battery. Bulging, cracking, leaking fluid, or heavy corrosion on the terminals means stop. Call a tow truck instead.
- Smell test. A sulfur or rotten-egg smell means the battery is venting hydrogen gas. Do not jump it. Ventilate and call for service.
- Check the jumper pack. Most lithium jump starters need at least 50% charge to deliver a full boost. A blinking red light usually means too low.
If everything checks out, you're cleared to jump. If anything looks off, especially a swollen or leaking battery, skip the jump and call for professional help. Lead-acid batteries can explode if mishandled, and the hydrogen gas they release is flammable.
What You'll Need (And What to Skip)
You don't need much, but having the right gear laid out makes the process faster and safer.
| Item | Why You Need It | Skip If… |
|---|---|---|
| Portable jump starter (1,000+ peak amps) | Delivers the cranking burst to your battery | Your pack is under 600A for a V6/V8 engine |
| Gloves and safety glasses | Protects from acid splashes and sparks | You don't have any (not ideal, but not a dealbreaker) |
| Wire brush or sandpaper | Cleans corroded terminals for solid contact | Terminals look clean and shiny |
| Owner's manual | Confirms battery location and jump points | You know your engine bay well |
| Multimeter (optional) | Verifies battery voltage before and after | You don't have one, the visual check still works |
A few things you can skip. You don't need a second vehicle. That's the whole point of a portable pack.
You don't need to run the jumper pack's engine, it has no engine. And you don't need to disconnect the battery from the car first, as long as you're following the correct clamp order.
Step-by-Step: How to Jump Start a Car With a Portable Jumper
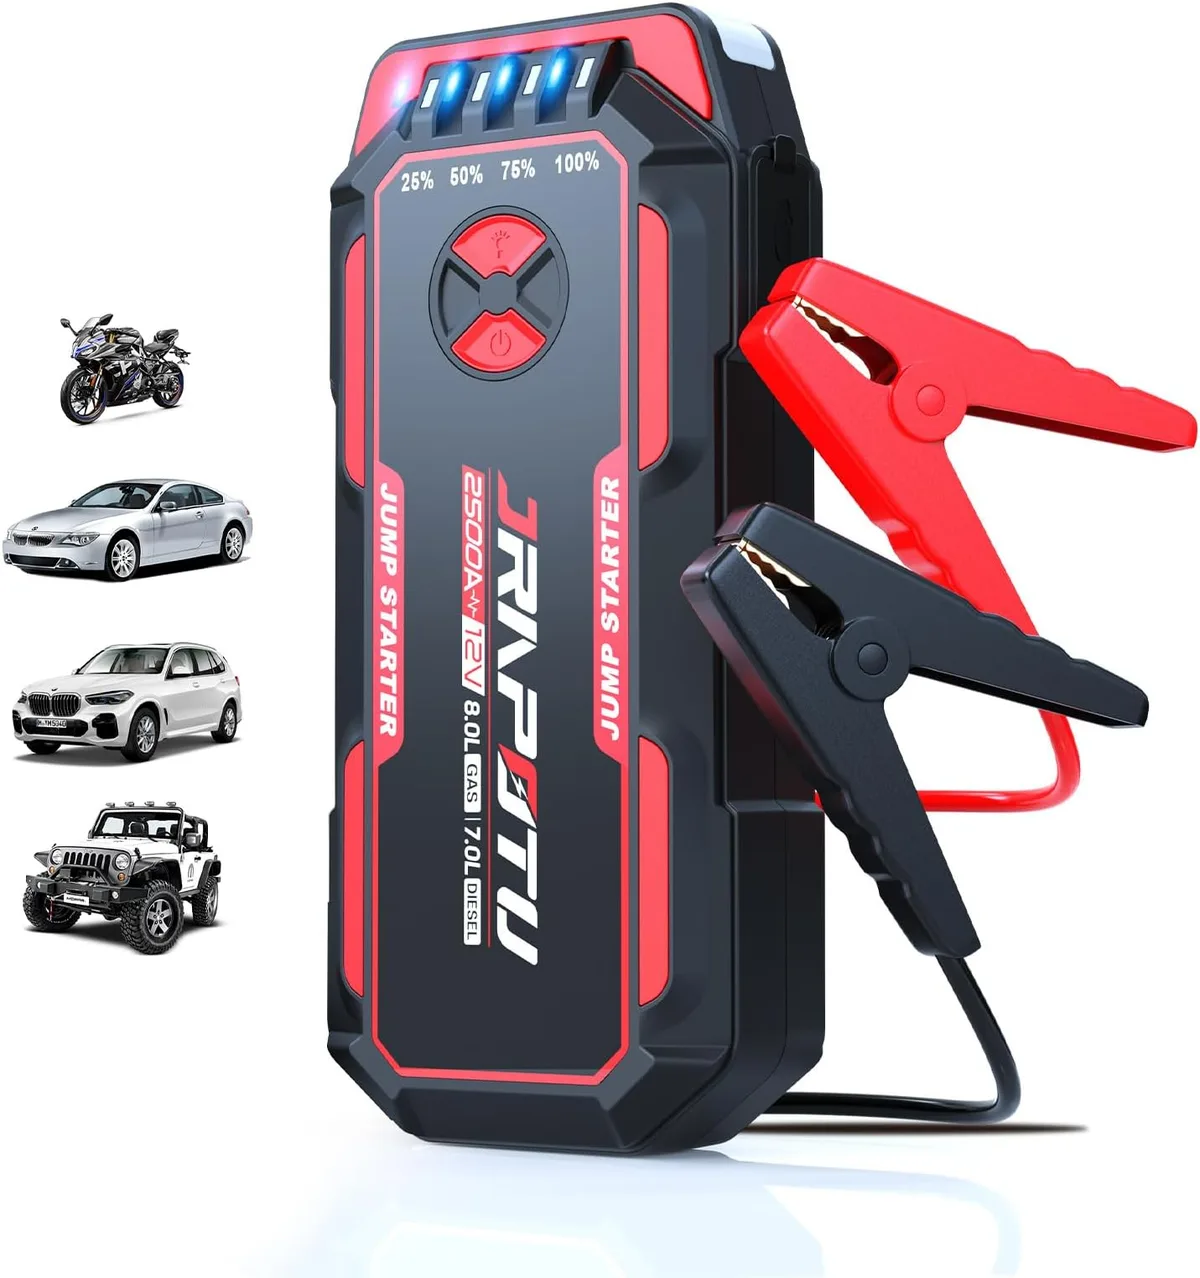
Now for the main event. Follow these steps in order, and don't skip ahead. The sequence is designed to minimize spark risk and protect your car's electronics.
Step 1: Power On and Inspect the Jumper Pack
Press the power button on your portable jump starter. Most models light up with an LED display showing battery percentage. Confirm it's above 50% charge.
If it's flashing a low-battery warning, charge it first or grab a different pack.
Check the clamps. Make sure the jaws are clean, the teeth aren't bent, and the cables aren't frayed. Damaged clamps can arc or fail under load.
If anything looks sketchy, don't use the pack.
Park the car in neutral (manual) or park (automatic), engage the parking brake, and turn off all accessories: headlights, radio, climate control, phone chargers. These draw current you want reserved for cranking.
Step 2: Connect the Red Clamp to the Positive Terminal
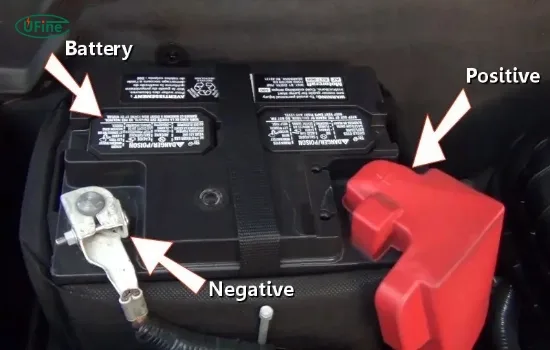
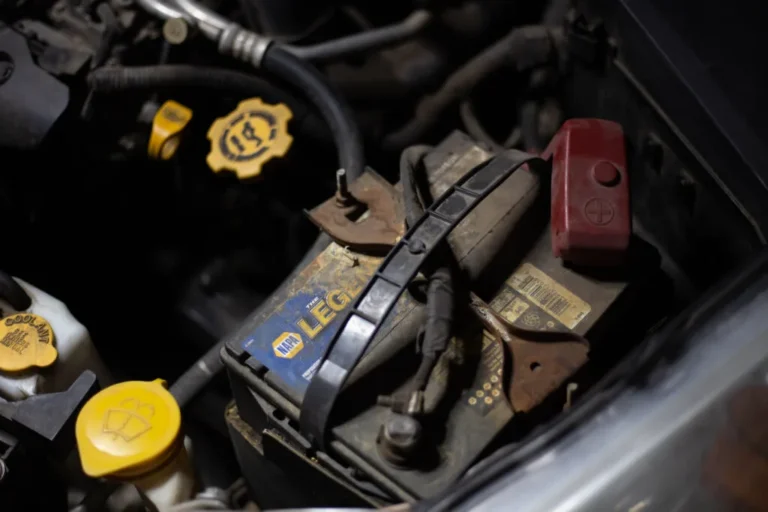
Open the hood and locate the battery. On most cars it's under a plastic cover, often marked with a (+) symbol. The positive terminal is almost always red, and the negative is black.
If the markings are worn off, the positive post is usually slightly larger.
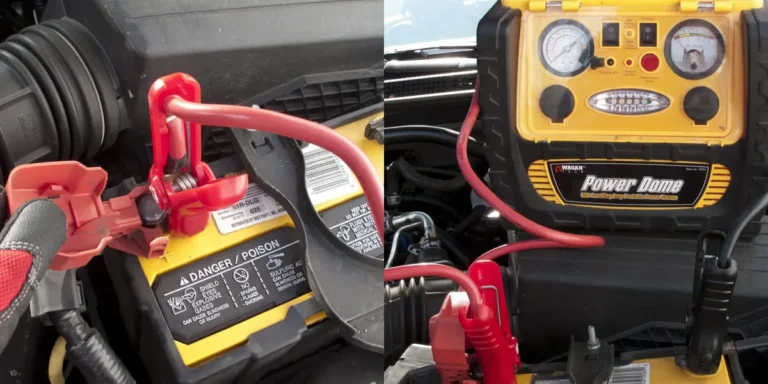
Clamp the red jumper cable directly onto the positive terminal post. Wiggle it gently to confirm a tight metal-on-metal grip. If there's heavy corrosion, scrape it off with a wire brush first.
A loose or dirty connection means the pack can't deliver full amps, and you'll get a slow crank or no crank at all.
A few don'ts here. Don't clamp to the battery cable clamp bolt instead of the post itself, it often insulates poorly. Don't touch the red clamp to anything metal on the car body.
And don't connect the red clamp yet if your hands are wet or you're standing in a puddle.
Step 3: Connect the Black Clamp to a Proper Ground
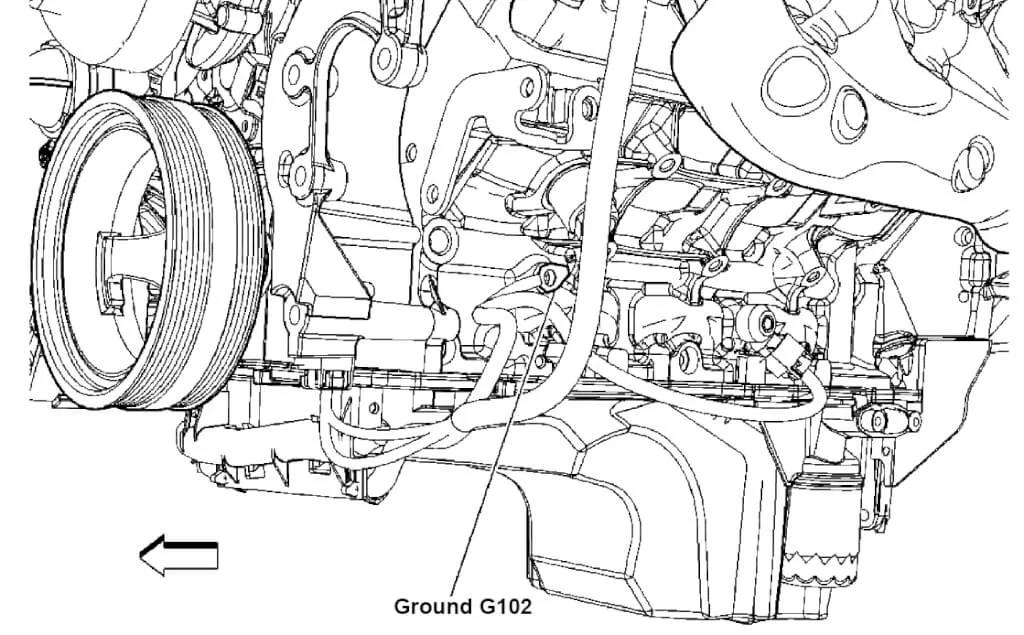
This is the step most people mess up. The black clamp does not go on the negative battery terminal, at least not ideally. It goes on a solid, unpainted metal part of the engine block or chassis, away from the battery, belts, and fuel lines.
Good ground points include:
- A bare metal engine bracket
- The alternator mounting bracket
- A chassis bolt (unpainted)
- The engine lift hook
Bad ground points include:
- The negative battery terminal (works in a pinch, but riskier)
- Painted or rusty metal
- Fuel lines or fuel rail
- Moving parts like belts or fans
- The throttle body or intake manifold
Why does this matter? Connecting to a ground point away from the battery reduces the chance of igniting any hydrogen gas that may have vented from the battery. It's a small risk, but it's why the National Highway Traffic Safety Administration and most manufacturer manuals recommend this method.
Once the black clamp is secure, you should see a solid green or steady light on most modern jump starters. A flashing red light usually means a connection problem: loose clamp, reversed polarity, or insufficient pack charge.
Step 4: Wait, Then Crank the Engine
Let the connection sit for 30 to 60 seconds. This lets the jump starter pre-charge the dead battery slightly, which improves cranking speed. It also gives the system a moment to stabilize.
Now turn the ignition key (or press the start button). Crank for up to 5 seconds. If the engine fires, great.
Release the key and let it idle. If it doesn't start, wait about 30 seconds and try again. Don't crank more than three times in a row, you'll overheat the starter motor and drain the jump pack.
If you hear a fast clicking but the engine doesn't turn, the connection is weak. Turn everything off, recheck the clamps, and try once more. If it still won't crank after three solid attempts, the problem is probably not the battery.
Move on to the troubleshooting section below.
Step 5: Disconnect in Reverse Order
Once the engine is running, leave it idling. Don't shut it off. Now disconnect the clamps in reverse order: black clamp first, then red clamp.
The reason is the same as why you connected them in that order. It keeps any spark away from the battery's vented gases.
Set the clamps somewhere they won't accidentally touch each other or any metal surface. A live clamp touching the chassis can short the jump pack or damage your car's electrical system.
Step 6: Recharge the Engine and the Jumper
Keep the engine running for at least 20 to 30 minutes. This gives the alternator time to put some charge back into the battery. A short 5-minute drive around the block isn't enough, especially if the battery was deeply discharged.
Most manufacturers and roadside safety groups like AAA recommend driving for at least 20 minutes or letting the car idle for an equivalent time. If the battery was severely drained or is more than four years old, it may not hold a full charge, and you could end up with another dead battery the next morning.
After you're home, plug the jump starter into its wall charger. Most packs take 3 to 6 hours to fully recharge. Store it somewhere temperature-stable, like a glove box or garage shelf.
Avoid leaving it in a hot car in summer or a freezing car in winter, extreme temperatures damage lithium cells over time.
Decision Branches: What to Do When the Car Still Won't Start
Sometimes you follow every step and the engine still doesn't fire. Don't panic, and don't keep cranking. Each symptom points to a different underlying issue, and the right next move depends on what you're hearing (or not hearing).
Branch A: Clicking But No Crank
A rapid, machine-gun click when you turn the key usually means the battery has just enough charge to engage the starter solenoid but not enough to spin the motor. If your jump starter's clamps are properly connected and the pack is charged, the issue is often a poor electrical connection.
Try this:
- Turn off the jump starter and the car.
- Re-seat both clamps. Make sure the red clamp is biting directly into the positive post metal, not the plastic coating.
- Scrape any corrosion off the terminals.
- Wait a full 60 seconds before cranking again.
If the clicks continue after three solid attempts with a verified good connection, the battery may be too dead or internally shorted. A jump starter can't fix a shorted cell. Move on to calling for service.
Branch B: Complete Silence
Nothing. No clicks, no lights, no dashboard glow. This is often a sign of a completely dead battery, a tripped main fuse, or a faulty ignition switch.
Check these in order:
- Confirm the jump starter is on and showing a solid green light.
- Verify the car's main battery fuse hasn't blown (check your owner's manual for the location).
- Try the interior lights. If they're completely dead too, the battery may be at zero volts.
- Some lithium jump starters have a "force start" or "override" button for batteries under 2 volts. Check the manual.
If everything checks out and you still get silence, the problem is almost certainly not the battery. Don't waste the jump pack. Call a mechanic.
Branch C: Engine Cranks Slowly
The starter turns, but it sounds like a tired wind-up toy. This usually means the jump starter isn't delivering enough current, or the battery has a weak cell.
Things to try:
- Confirm your jump starter's peak amp rating matches your engine size. A 600A pack on a V8 truck won't cut it.
- Let the connection sit for 2 to 3 minutes before cranking. This pre-charges the dead battery slightly.
- Check for warm clamps. If they're hot to the touch, the connection is high-resistance. Clean and reseat.
If slow cranking persists with a properly rated pack, the battery is likely sulfated or has a dead cell. It needs replacement, not just a jump.
Branch D: Starts Then Dies Immediately
The engine fires, runs for a second or two, and dies. This almost always means the alternator isn't charging. The battery provided the spark, but there's no system voltage to keep the engine running.
Signs of a bad alternator:
- Battery warning light stays on after the engine starts
- Headlights dim when you rev the engine
- A burning rubber or hot wire smell
If the car starts and dies, don't keep trying. You can run the jump pack dry and still not get the car moving. Drive to a mechanic (or tow it) and have the alternator tested.
Clamp Order Mistakes That Can Fry Your Electronics
The order in which you connect and disconnect the clamps isn't a suggestion. It's a safety protocol. Getting it wrong can send a voltage spike through sensitive modules like the ECU, infotainment system, or sensor network.
The correct sequence:
- Red clamp to positive terminal
- Black clamp to ground
- Jump start the car
- Black clamp off ground
- Red clamp off positive terminal
Reversing this order, or connecting the black clamp first, increases the chance of a spark at the battery. A spark near vented hydrogen gas is a real explosion risk, not a theoretical one. Aggregate mechanic reports and manufacturer manuals both warn against it.
Reverse Polarity: What Happens and How to Avoid It
Reverse polarity means you've accidentally connected the red clamp to the negative terminal and the black clamp to the positive. This is one of the most expensive mistakes you can make with a portable jump starter.
The immediate effects:
- Most modern jump starters have reverse polarity protection. They simply won't deliver power, and they'll beep or flash red.
- Older or cheap packs without this protection can push current backward through the system. This fries diodes in the alternator, blows fuses, and can damage the ECU.
- In rare cases, it can overheat the jumper cables and melt the insulation.
The fix is simple: if your jump starter beeps or refuses to work, don't force it. Turn everything off, swap the clamps, and try again. Look for the (+) and (−) symbols on the battery and double-check before you clamp.
Choosing the Right Ground Point (And Where Never to Clamp)
We covered this in Step 3, but it deserves a second look because ground point choice is where most home jump-starts go sideways. The right ground point does two things: completes the circuit and keeps any spark away from the battery.
Safe ground points:
- Engine block (unpainted metal)
- Alternator bracket
- Chassis bolt (clean, bare metal)
- Engine lift hook
Never clamp to:
- Fuel lines, fuel rail, or throttle body
- Battery negative terminal (acceptable but riskier)
- Moving parts: belts, pulleys, fans
- Painted or rusty surfaces
- Any wiring harness
A quick test: the ground point should feel cold to the touch, look shiny or slightly oily, and not be near any rubber or plastic fuel components. When in doubt, the alternator bracket is almost always a safe bet.
Jump Starting in the Rain or Extreme Cold
Is It Safe to Jump Start in the Rain?
Yes, but with normal caution. Water doesn't conduct enough current at 12 volts to cause a problem, and modern jump starters are sealed against moisture. The main risk is slipping or accidentally touching two clamps together.
Stand on dry ground, keep the pack sheltered if possible, and wipe the battery terminals before clamping.
What About Below-Freezing Temperatures?
Cold is the real enemy. At 0°F, a lead-acid battery loses about 35% of its cranking power, and engine oil thickens, requiring more amps to turn the motor. Here's how to handle it:
- Keep the jump starter warm. Store it inside your coat or in the cab overnight. A cold lithium pack delivers less current.
- Let the connection sit for a full 60 to 90 seconds before cranking. This pre-heats the dead battery and improves chemistry.
- Crank for up to 7 to 8 seconds instead of 5. Cold engines need a longer starter engagement.
- If the battery is frozen (visible bulge or ice on the case), do not jump it. A frozen battery can crack and leak acid. Thaw it first or replace it.
Most winter jump-start failures are really pack-temperature failures. A warm jump starter with a fully charged battery can fire a frozen engine where a cold one won't.
Lithium-Ion vs. LiFePO4 Jump Starters: Which Chemistry Matters
Most packs under $100 use lithium-ion (LiPo). They're light and cheap but degrade in extreme heat. LiFePO4 packs cost more but last 2,000+ cycles and handle cold better.
For year-round reliability, LiFePO4 wins.
Matching Peak Amps to Your Engine Size
A 4-cylinder needs about 150A to crank. A V6 needs 250A. A V8 or diesel wants 400A or more.
Match your pack's peak amp rating to your engine, not the marketing claims on the box.
Portable Jumper vs. Traditional Jumper Cables
Cables need a donor car, which means trust, time, and correct hookup order. A portable pack works solo in two minutes. For solo drivers, the pack wins every time.
Portable Jumper vs. Roadside Assistance
A membership helps with tows and lockouts, but average wait times run 30 to 60 minutes. A jump pack in your trunk fixes the problem before you finish dialing. Carry both if you can.
When the Real Problem Is the Alternator, Not the Battery
If the car starts, then dies within seconds, the alternator isn't charging. Jump it once to get to a shop, but don't expect a second start. Replace the alternator before driving long distances.
How Long to Drive After a Jump to Fully Recharge
Plan for 30 minutes of continuous driving at highway speed. Stop-and-go city driving or idling puts less charge back into the battery. A full recharge from deeply depleted usually takes an hour on the road.
How to Maintain Your Jump Starter So It Works When You Need It
Charge it every 3 months. Lithium cells slowly self-discharge, and a dead pack is useless. Store it at room temperature, and check the charge before any road trip.
When to Call a Mechanic Instead of Jumping
If the battery is swollen, leaking, or smells like rotten eggs, stop. If the car won't start after three solid jump attempts, the problem is deeper than a dead battery. If the battery is more than 5 years old, replace it instead of jumping.
A jump pack fixes convenience, not chronic failure.
Safety Warnings Most People Skip
Don't jump a frozen, swollen, or leaking battery. Don't smoke near the battery. Don't let the clamps touch each other while connected.
And don't skip the safety glasses, acid splashes are rare but painful.
Quick Reference: Jump Starting Checklist
- Inspect battery for damage, leaks, or swelling
- Confirm jump pack is charged above 50%
- Turn off all car accessories and engage parking brake
- Red clamp to positive (+) terminal
- Black clamp to bare metal engine ground
- Wait 30 to 60 seconds before cranking
- Crank for up to 5 seconds, max three attempts
- Disconnect black clamp first, then red
- Drive 20 to 30 minutes to recharge the battery
- Recharge the jump pack within 24 hours of use
For full specs and safety standards, refer to the Society of Automotive Engineers guidelines on vehicle electrical systems.
Frequently Asked Questions
Can You Jump Start a Car in the Rain?
Yes. 12-volt systems are safe in wet conditions, and modern packs are sealed. Just keep the pack sheltered and stand on dry ground.
How Long Should You Drive After a Jump Start?
At least 20 minutes of driving or idling. Short trips don't fully recharge a deeply drained battery.
Can a Portable Jump Starter Damage Your Car?
Only if you reverse the polarity, skip the ground point, or use an underpowered pack on a large engine. Modern units have built-in protections.
How Many Times Can You Jump Start With One Pack?
Most lithium packs hold enough charge for 10 to 20 jumps before recharging. Cold weather cuts that number in half.
Is It Safe to Leave a Jump Starter in a Hot Car?
Not long-term. Heat above 140°F degrades lithium cells. Store it in the cab or take it inside during summer.