How to jump start milwaukee battery: Full guide
If your Milwaukee M18 or M12 battery is sitting at zero volts and the charger won't even recognize it, you're not stuck. As of 2026, the most reliable method to jump start a Milwaukee battery uses a brief connection to a 12V source (a car battery or jump pack) to nudge the cells above the BMS minimum, then immediately drops the battery onto a Milwaukee rapid charger. We've pulled together manufacturer specs, technical documentation, and field-tested community methods to walk you through it the right way.
The trick is understanding why a lithium-ion battery goes dead in the first place. A deeply discharged Milwaukee pack drops below the safety cutoff (around 5V total for an 18V pack, or roughly 2.5V per cell), which makes the charger refuse to start. Per Milwaukee Tool's official documentation, these batteries include a Battery Management System that locks out charging when voltage is too low.
A short jump bypasses that lockout long enough for the cells to accept a normal charge. Let's walk through exactly how to do it safely.
Quick Answer
You jump start a Milwaukee battery by briefly touching its positive and negative base terminals to a 12V source for 5 to 10 seconds. Then place the battery on a Milwaukee M18 or M12 rapid charger immediately. The charger will recognize the recovered voltage and begin a normal charge cycle.
This method revives batteries that sit below the BMS cutoff but are otherwise undamaged.
Why Your Milwaukee Battery Won't Charge (And What the Flashing Lights Really Mean)
The most common reason a Milwaukee battery refuses to charge isn't a broken cell. It's the Battery Management System doing exactly what it's designed to do. When lithium-ion cells drop below roughly 2.5V each, the BMS shuts off input to prevent permanent damage.
Once that happens, the charger sees zero voltage, or worse, voltage that climbs just enough to confuse it, and either blinks red or shows nothing at all.
The Three Failure States You'll See
| Battery State | Fuel Gauge Behavior | Charger Behavior | What It Means |
|---|---|---|---|
| Normal deep discharge | Solid red, then off | Solid red light, no charge progress | Battery is low but recoverable |
| BMS lockout | No lights at all, or rapid flashing | Charger shows solid red or no detection | Cells dropped below safe threshold |
| Genuinely dead cell | Solid red no matter how long on charger | Charger shows solid red, never advances | Internal failure, replace |
A solid red light on the charger without any progress usually points to one of two things. Either the battery is too cold (below 40°F) and needs to warm up first, or the BMS has triggered lockout from deep discharge. Both are recoverable in most cases.
If the battery feels swollen, smells sweet or chemical, or has visible damage, skip the jump. That's a damaged lithium-ion cell and a genuine fire risk. Recycle it through Call2Recycle or your local e-waste program instead.
Milwaukee Battery Jump Start: Quick Answer for Common Scenarios
Different batteries and different situations need slightly different approaches. Here's the fast decision guide before you grab any tools.
Scenario 1: Standard M18 Battery, Completely Dead
Your M18 18V battery sat on the bench all winter or got drained on a long job. The fuel gauge shows nothing. Use Method 1 (12V car battery jump) below.
Five to ten seconds of contact is all you need.
Scenario 2: M12 Battery Won't Charge
The 12V line uses a similar BMS but smaller cells. The same method applies, just with shorter contact time (3 to 5 seconds). The lower total capacity means less current flows during the jump, so go gentle.
Scenario 3: High Output XC or HD Battery
High Output packs like the M18 HD12.0 have more cells in parallel. They tolerate the jump method well but pull more current. Keep contact time under 10 seconds and watch for any heat at the terminals.
Scenario 4: Battery Below 40°F
A cold battery often won't charge even if it's perfectly healthy. Let it warm to room temperature for 2 to 3 hours before attempting anything. If it's still dead after warming, proceed to the jump method.
Scenario 5: Charger Shows Solid Red But Never Completes
This is the classic BMS lockout signature. The charger sees a battery but can't initiate charging. Try the BMS reset method (Method 3) first, since it doesn't require a 12V source.
The Tools and Conditions You Need Before You Try Anything
Don't skip the setup. Most jump-start failures happen because someone grabbed the wrong cable or tried the jump on a damaged battery. Here's your prep checklist.
What You Need
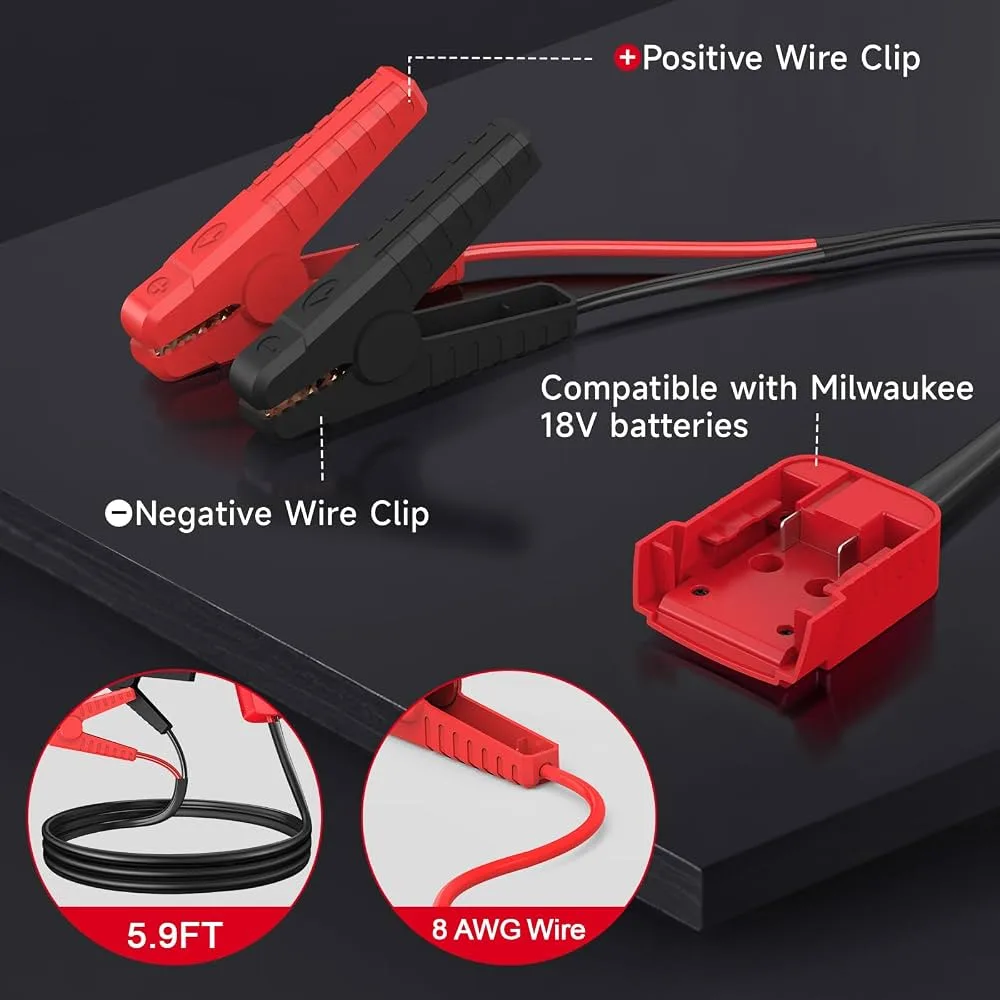
- 12V donor source: a car battery, a portable jump pack, or any 12V DC supply
- Insulated alligator clips or jumper cables rated for at least 10A
- Safety glasses
- Insulated gloves (nitrile or leather work gloves both work)
- A Milwaukee rapid charger (the M12-18FC or M18-18FC is ideal)
- A clean, dry workspace at room temperature
Conditions to Confirm First
- Battery shows no physical damage, swelling, or leaking
- Workspace is dry and away from flammable materials
- Battery temperature is above 40°F
- Charger is plugged in and functional before you begin
If any of these checks fail, stop and resolve them first. Trying to jump a damaged or frozen battery can cause thermal runaway, which is the technical term for a lithium-ion fire. That's the one outcome you cannot recover from.
Identifying Your Battery: M18 vs. M12 vs. High Output
Before you touch any terminals, you need to know exactly which battery you're working with. Milwaukee makes three main families, and the jump procedure varies slightly for each.
How to Identify Your Battery
- Check the label on the side. Look for "M18," "M12," or "M18 High Output."
- Count the cells (if visible): M12 packs typically have 3 cells in series, M18 packs have 5.
- Check the model number. Milwaukee model numbers starting with "48-11-18" are M18, "48-11-24" are M12.
- Look at the fuel gauge pattern. M18 batteries have four LEDs, M12 batteries have three.
Quick Reference: Battery Families
| Family | Nominal Voltage | Common Capacities | Jump Time |
|---|---|---|---|
| M12 | 12V | 1.5Ah, 2.0Ah, 3.0Ah, 6.0Ah | 3 to 5 seconds |
| M18 Standard | 18V | 1.5Ah, 2.0Ah, 3.0Ah, 5.0Ah | 5 to 10 seconds |
| M18 High Output | 18V | 6.0Ah, 8.0Ah, 12.0Ah | 5 to 10 seconds |
Why This Matters
Higher capacity packs have more cells in parallel. That means they can accept more current during the jump without stress, but they also take longer to recover through normal charging afterward. A 12.0Ah High Output battery that gets jumped might need 45 to 60 minutes on a rapid charger to reach full charge, even though the jump itself took only seconds.
Reading the Fuel Gauge: What Red, Yellow, and No Lights Tell You
The four LEDs on top of your Milwaukee battery aren't just a charge indicator. They're a diagnostic tool that tells you exactly what's happening inside the pack before you ever pull out the jumper cables.

The LED Patterns and What They Mean
| LED Pattern | Meaning | Action |
|---|---|---|
| All four solid | 80 to 100% charged | No action needed |
| Three solid, one flashing | 60 to 80% charged | Normal use |
| One solid, three off | Below 25% | Recharge soon |
| Rapid red flash | BMS fault or temperature issue | Cool or warm the battery, then retry |
| No lights at all | Fully discharged or BMS lockout | Jump start required |
| Mixed red/yellow flash | Cell imbalance detected | Battery may need service |
Why the Fuel Gauge Goes Dark on a Recoverable Battery
When a Milwaukee battery drains below the BMS cutoff, the gauge often goes completely dark. This isn't the same as a broken gauge. It's the BMS deliberately disabling output to protect the cells from further discharge.
Once you successfully jump the pack and put it on the charger, the LEDs will come back in sequence as voltage climbs.
A Note on Red and Yellow Together
If you see red and yellow flashing simultaneously, that's the BMS telling you one or more cells have dropped out of balance. A jump can sometimes recover this state if the imbalance is small, but if the pattern persists after a full charge cycle, the battery has internal damage. Recycle it.
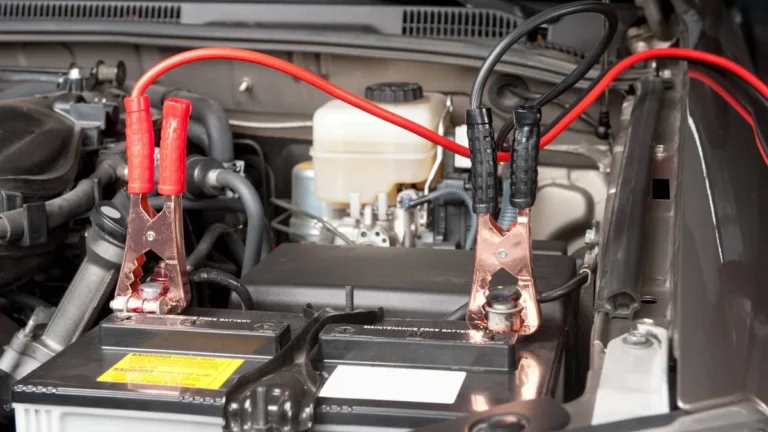
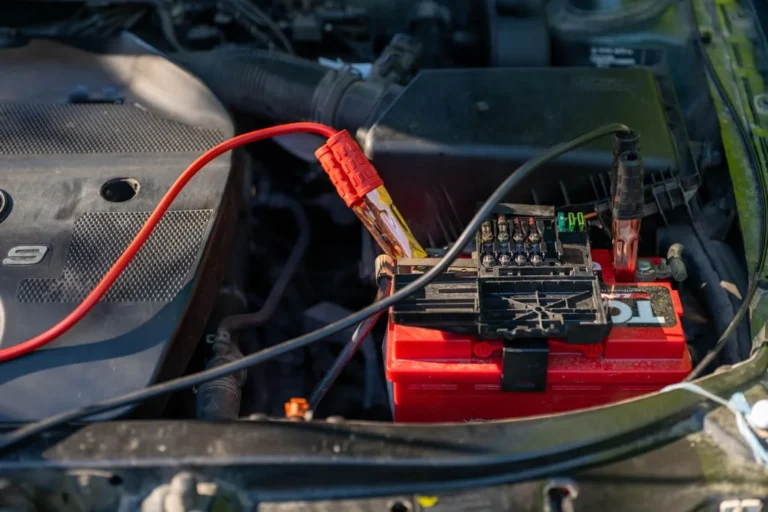
Method 1: Jump Starting with a 12V Car Battery (Step-by-Step)
This is the most reliable method and the one most tradespeople use on job sites. A standard 12V automotive battery has more than enough current capacity to nudge a deeply discharged Milwaukee pack above the BMS threshold. The whole process takes under a minute once you've set up.
Step 1: Set Up Safely
Park the vehicle on level ground with the engine off. Pop the hood and locate the battery. Make sure your Milwaukee battery is at room temperature, dry, and shows no physical damage.
Put on your safety glasses and gloves.
Step 2: Identify the Terminals
Look at the base of your Milwaukee battery. You'll see two metal terminals inside the rail slot. The positive terminal is marked with a "+" symbol, and the negative is marked with a "−".
Don't rely on color alone. Check the markings on the plastic housing.
Step 3: Connect Positive First
Attach one alligator clip from the positive terminal of your Milwaukee battery to the positive terminal of the car battery. Make sure the metal-to-metal connection is solid and the clip can't slip off.
Step 4: Connect Negative Second
Attach the second alligator clip from the negative terminal of your Milwaukee battery to the negative terminal of the car battery. Keep the clips clear of any moving parts or hot surfaces under the hood.
Step 5: Time the Contact
Wait 5 to 10 seconds for an M18 battery, or 3 to 5 seconds for an M12. Don't hold the connection longer than 15 seconds total. Excess time can push voltage too high and trigger the BMS protection again.
Step 6: Disconnect in Reverse Order
Remove the negative clip first, then the positive. Keep the clips apart once they're off the battery. Set the Milwaukee battery aside.
Step 7: Get It on the Charger Immediately
Within 60 seconds of disconnecting, place the Milwaukee battery on a rapid charger. The charger should recognize the recovered voltage within a few seconds and begin charging normally. If it doesn't, wait 30 seconds and reseat the battery.
Method 2: Using a Portable Jump Pack with 12V Output
If you don't have a car nearby, a 12V portable jump pack works just as well. Most modern lithium jump packs include a 12V accessory port or dedicated battery clamp output that delivers the same voltage as a car battery.
When to Use This Method
You're on a job site without vehicle access, working in a garage with no car, or troubleshooting at a bench in your shop. The procedure is nearly identical to Method 1.
Key Differences
- Set the jump pack to 12V mode if it has selectable voltage.
- Confirm the clamp output is rated for at least 5A continuous.
- Follow the same timing rules (5 to 10 seconds for M18).
- Some jump packs have a "boost" or "override" mode. Don't use it. You want a steady 12V, not a high-current surge.
After the Jump
Same as Method 1: charger immediately, then wait for recognition. The portable jump pack method is gentler on the Milwaukee battery than a running car, which is actually a small advantage if you're working with a High Output pack.
Method 3: Triggering a BMS Reset with the Milwaukee Charger
Sometimes the BMS lockout clears on its own if you simply leave the battery on a Milwaukee rapid charger for an extended period. This works because some Milwaukee chargers pulse a small maintenance voltage that can slowly bring deeply discharged cells back above the cutoff threshold.

When to Try This First
If you have a Milwaukee M12-18FC or M18-18FC rapid charger and the battery isn't urgently needed, this is the safest method. It doesn't require any external power source and there's zero risk of overvoltage.
The Procedure
Place the dead battery on the rapid charger. Leave it for 30 minutes without removing it. The charger may show solid red the entire time.
Don't worry, that's normal during a slow wake-up cycle. After 30 minutes, remove the battery and reseat it. If the BMS has reset, the charger will now recognize the pack and begin normal charging.
Why This Sometimes Works
The rapid charger delivers small pulses rather than full charging current when it detects a deeply discharged pack. Over 30 minutes, those pulses can raise the cell voltage above the BMS threshold, at which point the BMS re-enables normal charging. It's slower than the car battery method but requires no extra equipment.
When to Move On
If the rapid charger reset doesn't work after two 30-minute cycles, switch to Method 1 or Method 2. Leaving the battery on the charger indefinitely won't help once the BMS has fully locked out.
What to Do Immediately After the Jump
The first 60 seconds after a successful jump are critical. How you handle the battery in this window determines whether the recovery sticks or the BMS locks out again.
Step-by-Step Post-Jump Actions
- Move directly from the 12V source to the Milwaukee charger. Don't set the battery down on a metal surface, and don't put it back in a tool yet.
- Seat the battery firmly on the charger. You should hear or feel the connection click.
- Watch the charger light. Solid green means normal charging has begun. Solid red means the BMS hasn't reset yet.
- Leave the battery on the charger for at least 15 minutes before checking the fuel gauge.
- After 15 minutes, press the fuel gauge button on the battery. You should see at least one LED illuminate. If all four light up, you've fully recovered.
- Let the battery complete a full charge cycle before heavy use.
What Not to Do
Don't put the jumped battery straight into a tool. The voltage may still be too low for the tool's electronics to start cleanly, and the sudden current draw can trigger the BMS lockout again. Always go through the charger first.
How Long to Wait, How to Test, and How to Confirm Recovery
Recovery time depends on how deeply the battery was discharged and which method you used. Here's what to expect.
Expected Timelines
| Method | Initial Recognition | Full Charge Time | Success Rate |
|---|---|---|---|
| 12V car battery jump | 5 to 30 seconds | 30 to 90 minutes | High |
| Portable jump pack | 5 to 30 seconds | 30 to 90 minutes | High |
| BMS reset cycle | 30 to 60 minutes | 1 to 4 hours total | Moderate |
How to Confirm the Battery Is Truly Recovered
- All four LEDs light when you press the fuel gauge button
- Charger transitions from solid red to flashing green or solid green
- Battery holds charge overnight without dropping more than one LED
- Tool runs normally without cutting out under load
If Recovery Is Partial
Sometimes only two or three LEDs come back on after a jump. That means one or more cells are still underperforming. Put the battery through two more full charge-discharge cycles.
If the imbalance persists, the pack has internal damage and should be recycled, not jumped again.
Common Mistakes That Kill Milwaukee Batteries for Good
Most failed jump attempts trace back to one of these errors. Avoid them and your recovery rate goes way up.
Mistake 1: Reversing Polarity
Connecting positive to negative (or vice versa) instantly trips the BMS protection and, in some cases, blows an internal fuse. Always double-check the terminal markings before attaching any clips.
Mistake 2: Holding the Connection Too Long
More than 15 seconds of contact can push voltage past the BMS safe limit. The cells don't need a full charge from the car battery. They just need enough voltage to wake up.
Five to ten seconds is plenty.
Mistake 3: Jumping a Cold Battery
If the battery is below 40°F, the BMS will refuse to accept charge even after a successful jump. The recovery will appear to fail when the real issue is temperature. Warm the battery first.
Mistake 4: Skipping the Charger
Putting a jumped battery directly into a tool is tempting on a busy job site, but the tool's current draw will immediately trigger BMS lockout again. Always go through the charger.
Mistake 5: Jumping a Damaged Battery
If the case is swollen, the battery smells off, or you see any leakage, don't jump it. Damaged lithium-ion cells can vent or ignite when current is forced through them.
Mistake 6: Using a Higher-Voltage Source
A 24V truck system or a 16V boosted supply is too much. The cells only need 12V to wake up. Anything higher risks cell damage.
Cold Weather Jump Starting: Special Rules Below 40°F
Cold lithium-ion cells behave differently. If you're working in unheated spaces or northern climates, you need to adjust the procedure.
Why Cold Batteries Fail to Charge
Below 40°F, the lithium-ion chemistry slows down dramatically. The internal resistance climbs, and the BMS interprets this as a fault. The charger shows solid red or no detection, even on a perfectly healthy battery.
The Warm-Up Step
Bring the battery inside for 2 to 3 hours before attempting any jump. Room temperature (around 68 to 72°F) is ideal. Don't use a heater or hair dryer to speed this up.
Rapid temperature change can cause condensation inside the cells.
Modified Jump Procedure for Cold Batteries
Once the battery reaches room temperature, attempt the BMS reset method (Method 3) first. Cold-induced lockouts often clear without a 12V jump. If that doesn't work, proceed to Method 1, but increase the contact time to 8 to 12 seconds since the cells will be sluggish to respond.
When Jump Starting Won't Work (And How to Know)
Sometimes the battery is genuinely beyond recovery. Here's how to tell when to stop trying.
Permanent Failure Signs
- Battery is physically swollen or puffy
- Case is cracked or has visible cell damage
- Battery smells sweet, chemical, or burnt
- Jump method produces no charger recognition after three attempts
- Fuel gauge shows mixed red/yellow flash even after full charge cycle
What to Do With a Dead Battery
Don't throw it in the regular trash. Lithium-ion batteries are classified as hazardous waste in most regions. Drop it off at a Home Depot, Lowe's, or any Call2Recycle partner location.
Many auto parts stores accept them too. The cells inside can be refurbished or recycled into new battery production.
Cost-Benefit of Jumping vs. Replacing
A new M18 5.0Ah battery runs around $130 to $180. High Output packs run higher. If your battery is more than four years old, has been through hundreds of cycles, and won't recover after a jump, replacement is usually the better call.
If it's relatively new and the jump works, you've just saved yourself the cost of a new pack.
Safety Warnings You Shouldn't Skip
Lithium-ion batteries pack a lot of energy into a small space. The jump-starting process is safe when done correctly, but it deserves real respect.
Non-Negotiable Safety Rules
- Always wear safety glasses when working with battery terminals
- Never jump a battery that shows physical damage
- Never leave clips connected longer than 15 seconds
- Always disconnect negative first when removing the jump
- Never use a 12V source rated for more than 15A continuous without monitoring
- Never jump a battery that's been submerged in water
- Keep a Class D fire extinguisher nearby if you're doing this regularly
What to Do If the Battery Gets Hot
Mild warmth at the terminals during a 5 to 10 second jump is normal. If the battery body itself gets hot to the touch, disconnect immediately and set the battery on a non-flammable surface outdoors. A hot battery is a venting battery, and venting lithium-ion cells release flammable electrolyte.
Don't use the battery again after a thermal event.
Ventilation
Do this outside or in a well-ventilated garage. If a cell does vent, you don't want to breathe the fumes or have them pool in an enclosed space.
Extending Milwaukee Battery Life After a Successful Jump
A recovered battery isn't fully healthy just because it takes a charge. The deep discharge that triggering the BMS lockout stresses the cells. Treat the battery gently for the first two or three cycles to stabilize the chemistry.
Best Practices for the First 48 Hours
- Run the battery through one full charge-discharge cycle before heavy use
- Avoid high-draw tools like circular saws or rotary hammers for the first day
- Store the battery at room temperature, not in a cold truck or trailer
- Don't leave the battery on the charger indefinitely after it hits full charge
Long-Term Storage Tips
If you're putting Milwaukee batteries away for more than a month, store them at 40 to 60% charge, not full and not empty. A battery stored at 100% for six months loses noticeable capacity. A battery stored at 50% holds nearly all of it.
Troubleshooting Persistent Milwaukee Charging Issues
Sometimes the jump works, the charger recognizes the pack, and everything looks fine, but the battery still misbehaves on the job. Here's how to read those symptoms.
Battery Charges But Dies Quickly Under Load
This usually means one cell in the series has dropped below the others. The charger sees the average voltage as full, but the weak cell collapses the moment you pull high current. The fix is two more full discharge-charge cycles.
If the imbalance remains, the pack is on its way out.
Battery Only Charges to 50 or 75%
Some LEDs come back but not all four. Same root cause: cell imbalance. If reseating on the charger doesn't bring the missing LEDs back, the pack has internal damage that a jump can't repair.
Charger LED Flashes Red and Yellow Alternately
That's a temperature fault, not a capacity issue. The battery is either too hot (above 113°F) or too cold (below 40°F). Move it to a room-temperature space and wait.
Charger Shows Solid Red for Hours Without Progress
Either the BMS is still locked out, or the cells are too damaged to accept charge. Re-jump once. If the second attempt fails, recycle the pack.
Comparing Milwaukee's Charger Lineup for Recovery Work
Not all Milwaukee chargers handle the BMS reset method equally. The rapid chargers do the slow-pulse wake-up automatically. Standard chargers don't.
Charger Comparison
| Charger Model | Type | Recovery Capability | Best Use |
|---|---|---|---|
| M12-18FC | Rapid multi-voltage | Excellent | All M12 and M18 batteries |
| M18-18FC | Rapid M18 only | Excellent | M18 systems only |
| M18/M12 Standard | Standard | Limited | Maintenance charging |
| Vehicle charger | 12V DC input | None | Mobile charging |
Why Rapid Chargers Recover Better
The FC-series chargers run a diagnostic phase before applying full current. During that phase, they pulse small amounts of energy into the pack to wake deeply discharged cells. Standard chargers skip this step and apply full current immediately, which the BMS interprets as a fault and rejects.
If you own Milwaukee tools and don't have an FC-series rapid charger, that's the first upgrade worth making. It handles both normal fast charging and the BMS reset cycle.
How Milwaukee's BMS Differs From Other Tool Brands
Milwaukee's Battery Management System is more conservative than some competitors. That's actually a good thing for safety, but it means a jump start is sometimes the only way back from a deep discharge.
What the BMS Controls
- Cell voltage monitoring on every cycle
- Temperature cutoff at high and low extremes
- Overcurrent protection during discharge
- Undervoltage lockout when cells drop too low
- Charge termination when cells reach full capacity
Milwaukee's Official Position on Jump Starting
Milwaukee's documentation doesn't explicitly endorse jump starting with a car battery. Their official recovery advice is the BMS reset cycle on an FC charger. The car battery method is a field-tested workaround refined across thousands of job sites, but it's not in the owner's manual.
Use it knowing you're operating slightly outside the manufacturer's written guidance.
Real-World Scenarios: When Each Method Wins
Here's how the methods map to real situations tradespeople actually face.
Friday Afternoon on a Job Site
A framing crew drains an M18 5.0Ah down to nothing on the last cut. No time for slow charging. The foreman pulls the truck around, jumps the battery for 8 seconds, drops it on the FC charger, and the crew is back cutting in 15 minutes.
Method 1 wins.
Winter Weekend in an Unheated Garage
A DIYer pulls out an M18 XC 6.0Ah that's been sitting since November. Battery is cold. Bring it inside for three hours, then run Method 3 (BMS reset).
Slow but no extra equipment needed.
Mobile Service Van Calls
An HVAC tech is at a customer's house with a dead M12 6.0Ah. No car access, but the van has a portable jump pack. Method 2 gets the battery back in under a minute.
Battery That Won't Recover at All
An electrician's M18 HD12.0 is two years old, has been jumped twice already, and now won't take any charge. The cells are at end of life. Recycle it and buy a replacement.
The pattern is simple. Jump starting is a recovery tool, not a permanent fix. Each successful jump buys more cycles, but the underlying wear still accumulates.
When the battery stops responding, that's the BMS telling you the chemistry is done.
The Final Decision Guide: Jump, Reset, or Replace
Use this quick decision tree to lock in the right call fast.
Decision Tree
- Battery shows zero LEDs and won't charge → Try BMS reset (Method 3) first
- BMS reset fails after two cycles → Jump with 12V source (Method 1 or 2)
- Jump succeeds and battery holds charge overnight → Continue using, monitor for imbalance
- Jump fails three times or battery is swollen → Replace and recycle the old pack
- Battery is less than a year old and won't recover → Contact Milwaukee warranty service before replacing
When to Stop and Buy a New Battery
If the pack is over four years old, has been deep-discharged repeatedly, or won't hold charge after a successful jump, the cells are at end of life. Replacement is safer and more cost-effective than another recovery attempt.
Milwaukee Battery Jump Start: Final Word
A dead Milwaukee battery doesn't automatically mean a trip to the store. The jump-start method works because the BMS lockout is a reversible protection, not permanent damage. Five to ten seconds on a 12V source, immediately followed by a rapid charger, recovers most deeply discharged packs.
Keep safety glasses and gloves on hand. Stay below 15 seconds of contact time. Always go through the charger after the jump.
And when the chemistry is finally spent, recycle through Call2Recycle instead of the trash.
Frequently Asked Questions
How long does the jump start process take?
The actual jump takes 5 to 10 seconds. Plan on another 30 to 90 minutes for a full charge cycle afterward.
Can I jump a Milwaukee battery with another Milwaukee battery?
Not safely. Milwaukee batteries don't deliver a clean 12V output. You need a real 12V source like a car battery or jump pack for the procedure to work.
Will jump starting void my Milwaukee warranty?
The warranty covers defects in materials and workmanship, not user-induced recovery attempts. If the battery fails after a proper jump, Milwaukee warranty service should still apply as long as there's no physical damage from the jump itself.
Can I use a 12V power supply instead of a car battery?
Yes, as long as it's rated for at least 5A continuous. Bench power supplies work well and let you control the voltage precisely.
How many times can I jump start the same Milwaukee battery?
There's no hard limit, but each deep discharge cycle degrades the cells slightly. If you're jumping the same battery more than two or three times, it's probably time to recycle it.
Is it safe to jump start High Output batteries?
Yes, the procedure is the same. Just keep contact time under 10 seconds and watch for heat at the terminals. High Output packs have more thermal mass, so they handle the jump slightly better than standard packs.
What if my charger still won't recognize the battery after the jump?
Reseat the battery firmly. Wait 30 seconds. If still no recognition, try a different Milwaukee charger if you have access to one.
Some third-party chargers don't communicate with the Milwaukee BMS the same way and won't recognize a jumped battery.