How to jump start a riding lawn mower: Easy guide
A riding lawn mower that won't crank turns a Saturday into a frustrating scavenger hunt. The good news: if your battery is just dead from sitting, you can jump start a riding lawn mower in about ten minutes with basic jumper cables and a second vehicle or a portable jump box. Most modern riding mowers use a 12-volt battery, the same as a car, which makes the process nearly identical to jumping a car.
You will need a donor vehicle or a lithium jump pack rated for small engines, a set of 4-gauge or thicker booster cables, and a basic understanding of your battery's location. Manufacturer specifications confirm that riding mower batteries typically fall under BCI Group U1 with cold cranking amps (CCA) between 150 and 300, so a standard automotive jump source has plenty of power to spare. Let's walk through the diagnosis, the safety steps, and the exact order of cable connections so you don't fry a solenoid or spark a battery.
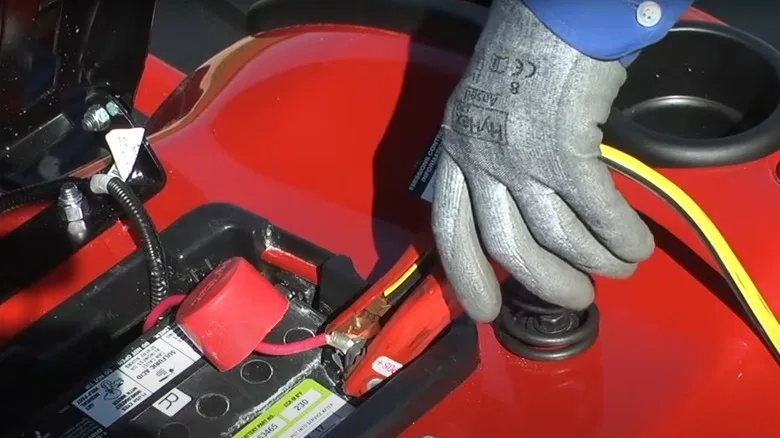
Quick Answer
Yes, you can jump start a riding lawn mower using a car or portable jump box. Make sure the mower has a 12-volt battery (most do). Turn off both vehicles.
Connect red to the dead battery's positive terminal first. Connect black to the donor's negative terminal or a mower ground point. Start the donor, then crank the mower for up to 5 seconds.
Disconnect in reverse order and let the mower run 15 to 30 minutes.
Why Riding Mower Batteries Die in the First Place
Riding mower batteries die for the same reasons car batteries die, just faster. Small engine batteries sit through long stretches without being charged, then face a heavy cranking load when you finally turn the key.
- Off-season storage. A stored battery self-discharges at roughly 1% per day at room temperature, and faster in cold or heat.
- Infrequent use. Short mow sessions don't give the alternator enough time to recharge what the starter pulled out.
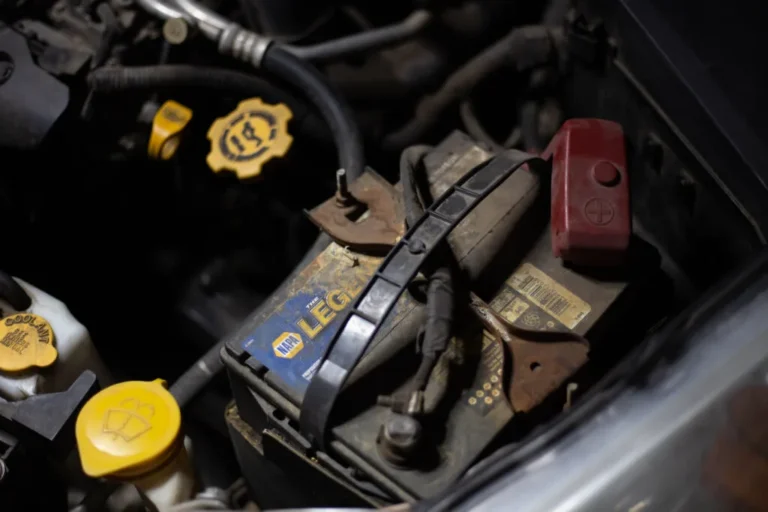
- Corroded terminals. A white, crusty buildup on the terminals acts like a resistor and can prevent the starter from getting full voltage.
- Old battery. Most lead-acid mower batteries last 3 to 5 years. Past that, they hold less charge with each cycle.
- Parasitic drain. Some mowers have clocks or safety modules that pull a small current even when the key is off.
If your battery died after sitting for a few weeks, a jump is probably all you need. If it died and the mower is still under warranty or only a year or two old, you may be looking at a charging system problem instead.
What You'll Need Before You Start
Gather these items before you touch a cable. Running back and forth wastes time and increases the chance of mixing up the connection order.
| Item | What to Look For | Why It Matters |
|---|---|---|
| Jumper cables | 4-gauge or 2-gauge, 12+ feet | Thicker cables carry cranking amps without voltage drop |
| Donor vehicle or jump box | 12V source, engine off if a car | Provides the boost to crank the starter |
| Safety glasses | ANSI-rated | Battery acid and hydrogen gas are real hazards |
| Wire brush or terminal cleaner | Brass or steel bristles | Removes corrosion so clamps make solid contact |
| Baking soda + water | 1 tablespoon per cup | Neutralizes acid and cleans heavy corrosion |
| Multimeter (optional) | Reads DC volts | Confirms battery state before and after the jump |
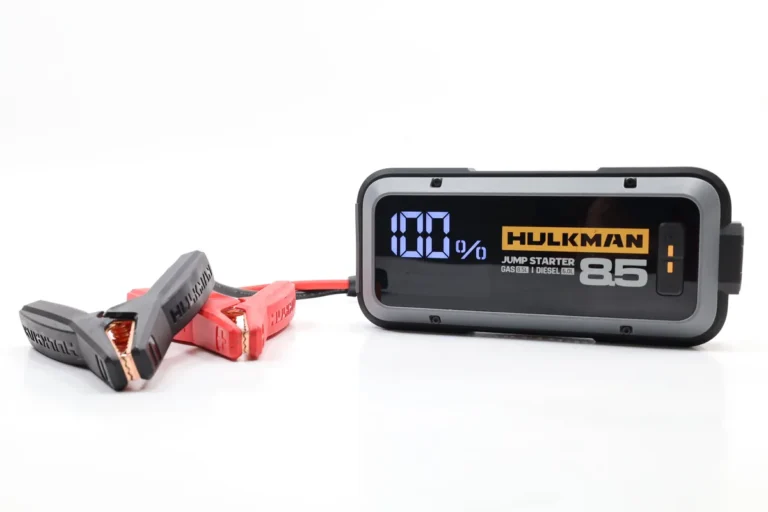
If you don't have a second vehicle, a portable lithium jump starter rated 400 to 1000 peak amps works just as well on small engines. Many newer units also auto-detect 12V vs. 6V systems, which protects older tractors that still run on 6 volts.
Find Your Mower's Battery (It May Not Be Where You Think)
Manufacturers hide mower batteries in three common spots: under the seat, under the front hood, or behind a rear fender panel. Most modern John Deere, Cub Cadet, Husqvarna, and Troy-Bilt models tuck the battery under the seat or below the front cowl.
To find yours:
- Check the owner's manual first if you still have it. The battery location is usually on the spec page.
- Lift the seat. On most riding mowers, the seat hinges forward and reveals the battery tray.
- If no battery under the seat, look for a small hood latch under the steering column or front grille.
- Check behind the rear fender on older garden tractors, where batteries sometimes live in a side-mounted tray.
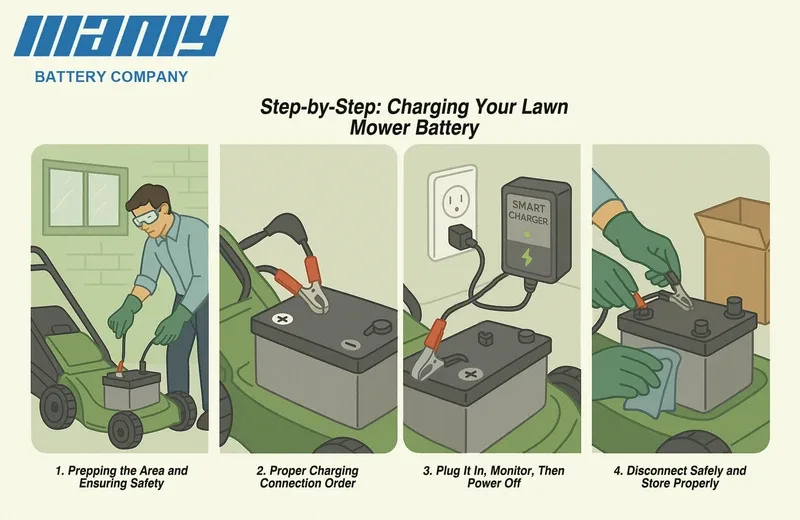
Once you spot the battery, take 60 seconds to inspect it. Look for cracks in the case, a bulging side, or wet acid residue. If you see any of these, do not jump the battery.
A damaged battery can vent hydrogen, explode, or leak acid when you connect cables. Replace it instead.
Also check the resting voltage if you have a multimeter. A reading below 10.5 volts means the battery is deeply discharged and may not recover even after a jump.
Identify Your Battery Type: 12V vs. 6V (This Matters)
This is the step most generic guides skip, and it's the one that saves you from a real headache. The majority of riding mowers built after the late 1970s use a 12-volt battery. A small number of vintage and compact models still use 6 volts, and you can tell them apart with a multimeter or by reading the label on top of the battery.
- A 12V system reads between 12.4 and 12.7 volts at rest when fully charged.
- A 6V system reads between 6.2 and 6.4 volts at rest when fully charged.
Why this matters: if you try to jump a 6V mower with a 12V car battery, you can cook the lights, blow fuses, and damage the solenoid. If your jump box has a 6V/12V auto-detect mode, use it. If not, confirm the voltage manually before connecting anything.
Once you know your system voltage, you're ready to make the actual connections.
Jump Starting with a Donor Vehicle
This is the most reliable method when you have a car or truck nearby. The donor acts as a temporary power source while your mower's starter does the heavy lifting.
Position the Vehicles Correctly
Pull the donor vehicle close enough that the cables reach comfortably without stretching. Both engines off, parking brakes set, keys out of the ignitions.
The two vehicles should not touch each other. A small bump while parking can cause a short if the metal frames contact while cables are live.
Match Voltages First
We've already covered this, but it bears repeating in context: a 12V donor on a 12V mower is the safe pairing. If your mower is a vintage 6V unit, use a portable 6V jump box instead.
Run the Sequence
With both vehicles off and stable, you're ready to connect. The exact cable order is critical, and that's the next dedicated section.
Jump Starting with a Portable Jump Box
A lithium jump pack is the cleaner option if your mower sits in a shed away from any car. It's also the safer option for beginners, since most modern units have reverse-polarity alarms and spark-proof clamps.
Here's how the workflow differs from a donor vehicle:
- No idling donor. The jump box delivers its full output the moment you turn it on. No need to rev a second engine.
- Connect clamps in the same order. Red to positive on the dead battery, black to negative or a ground point.
- Crank the mower immediately. Most jump boxes are designed for short, high-amperage bursts. Hit the starter right away.
- Recharge the box afterward. Lithium jump packs lose charge sitting in storage. Plug it back in after every use.
Jump boxes rated between 400 and 1000 peak amps handle every riding mower on the market. Any unit with a 12V mode and at least 400 peak amps will do the job.
If the jump box clicks but the mower doesn't crank, the battery in the box may be too cold. Lithium packs lose output below freezing, so warm the unit indoors for an hour and try again.
The Correct Cable Order (Connect This Way, Not That Way)
Order matters. Reversing it can fry electronics, blow fuses, or spark a battery explosion. The rule is simple: positive first, negative last, and reverse the sequence when disconnecting.
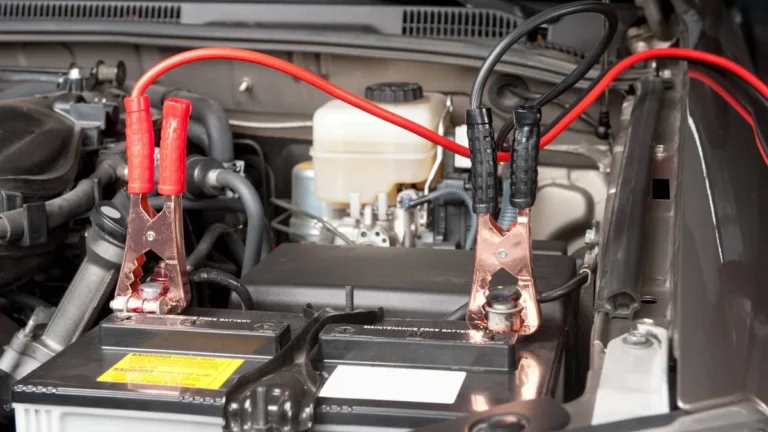
Step 1: Connect Red to the Dead Battery
The red clamp goes on the positive (+) terminal of the mower's dead battery. This terminal is usually marked with a plus sign and may have a red plastic cover.
Step 2: Connect Red to the Donor Battery
Attach the other red clamp to the positive terminal of the donor battery or jump box. Same rule: positive to positive.
Step 3: Connect Black to the Donor Battery
Attach a black clamp to the negative (-) terminal of the donor battery or jump box.
Step 4: Connect Black to a Ground Point on the Mower
This is where most people get it wrong. Do not connect the final black clamp to the dead battery's negative terminal. Connect it to an unpainted metal surface on the mower engine block or chassis, away from the battery and fuel lines.
The reason: connecting to the dead battery's negative terminal can spark directly over the battery, igniting hydrogen gas that vents from the cells. A chassis ground point routes the spark safely away.
Step 5: Start the Donor, Wait, Then Crank the Mower
If using a donor vehicle, start it and let it idle for two to three minutes. If using a jump box, skip the idle and crank the mower immediately. Turn the mower key and hold the crank for no more than 5 to 10 seconds.
Release and wait 30 seconds before trying again.
Step 6: Disconnect in Reverse Order
Once the mower is running, disconnect in reverse: black from chassis ground, black from donor, red from donor, red from mower. Keep the clamps from touching each other during removal.
The whole sequence looks like this:
| Step | Action | Terminal |
|---|---|---|
| 1 | Red clamp on | Dead battery positive (+) |
| 2 | Red clamp on | Donor battery positive (+) |
| 3 | Black clamp on | Donor battery negative (-) |
| 4 | Black clamp on | Mower engine block (ground) |
| 5 | Start donor, then crank mower | Up to 10 seconds |
| 6 | Disconnect in reverse order | Black ground first, red dead last |
What to Do If the Mower Cranks but Won't Fully Start
A spinning starter that can't quite catch the engine usually means the battery is too weak to deliver both cranking power and ignition spark at the same time. You'll hear the engine turn over slowly or stutter before giving up.
Try this sequence:
- Let the donor vehicle idle another five minutes with cables still connected. This tops off the dead battery slightly.
- Crank the mower again, this time holding the throttle halfway open. More air helps a weak spark catch.
- If it still won't fire, the issue isn't the jump. Check the spark plug, fuel solenoid, and seat safety switch.
If the mower starts but runs rough and dies within a minute, the battery wasn't the only problem. A failing voltage regulator or stator can prevent the charging system from keeping the engine alive.
What to Do If the Mower Doesn't Crank at All
A silent starter, or a single loud click with no spin, usually points to a connection problem rather than a dead battery.
Work through this quick decision tree:
- No sound at all when turning the key? Check that the parking brake is set and the seat switch is engaged. Most modern mowers won't crank without these safety conditions.
- Single click, no spin? The battery is too weak to turn the starter. Recheck clamp connections for solid contact, and try cranking again.
- Rapid clicking? Same issue as above. Let the donor charge the dead battery for another few minutes.
- Clicks but the engine tries to turn? Clean the terminals with a wire brush. Corrosion blocks current even with new clamps.
- Still nothing after two attempts? The solenoid may be bad. Tap it gently with a wrench handle while turning the key. If the engine cranks, replace the solenoid.
How Long to Let the Mower Run After a Successful Jump
Once the engine fires up, leave it running for at least 15 to 30 minutes. That gives the mower's charging system enough time to put a partial charge back into the battery.
The alternator on most riding mowers outputs only 15 to 20 amps, so don't expect a full recharge from a single idle session. What you get is enough juice to start the mower again next time, assuming the battery wasn't deeply damaged.
Drive the mower around the yard instead of letting it idle. Higher RPMs push the alternator harder, which charges faster.
Common Jump-Starting Mistakes That Damage Mowers
A few habits show up over and over in service shop write-ups. Avoid these and your mower will thank you:
- Connecting the donor while it's running. Some sources say revving the donor helps. It doesn't, and it can spike voltage into the mower's regulator. Keep the donor off or at idle.
- Hooking up backward. Reverse polarity instantly fries fuses and can destroy a voltage regulator. Always confirm red-to-positive and black-to-negative before clamping.
- Letting the clamps touch during connection. A short between the red and black clamps is essentially a welder. It will spark, pop fuses, and possibly burn you.
- Cranking for 30+ seconds. Hold the starter for no more than 5 to 10 seconds. Anything longer overheats the starter motor and drains both batteries.
- Skipping the seat-switch and brake checks. Riding mowers have safety interlocks. If you bypass them, the starter won't engage and you'll swear the jump didn't work.
If you ever smell rotten eggs during the process, that's hydrogen sulfide from a venting battery. Disconnect immediately and ventilate the area.
Safety Warnings You Shouldn't Skip
Lead-acid batteries store enough energy to burn skin, blind eyes, or crack a tooth if they explode. The Outdoor Power Equipment Institute publishes consistent guidance across manufacturers: treat every mower battery as if it's fully charged, even when it's dead.
Wear safety glasses. Battery acid is sulfuric, and a single splash can cause permanent eye damage. Gloves and old clothes help too.
Keep sparks and flames far away from the battery. Hydrogen gas builds up in the cells and vents during charging or jump-starting. A single spark can ignite it.
Never jump a frozen, cracked, or bulging battery. Freezing expands the electrolyte and cracks the case. A jump can rupture it.
Replace it instead.
Finally, never attach the final black clamp to the dead battery's negative post. We've covered this already, but it's the single most common cause of battery explosions during jump-starts.
For deeper guidance, the Outdoor Power Equipment Institute maintains safety bulletins that cover small-engine electrical systems, including jump-start procedures.
Testing Your Battery After the Jump (Multimeter Guide)
A successful jump tells you the mower runs. It doesn't tell you whether the battery is healthy. A quick multimeter check fills in the rest.
Check Resting Voltage
Turn the mower off and wait 30 minutes. This lets the surface charge dissipate so you read the actual battery state, not the temporary voltage from the alternator.
Set your multimeter to DC volts and touch red to positive, black to negative. Here's what the reading means:
| Voltage Reading | Battery State |
|---|---|
| 12.6V or higher | Fully charged |
| 12.4V | Around 75% charged |
| 12.2V | Around 50% charged |
| 12.0V or lower | Discharged, may be damaged |
| Below 11.8V | Likely sulfated, replace soon |
Check Charging System Output
Start the mower and re-measure at the battery terminals. A healthy charging system reads 13.5 to 14.5 volts at the battery with the engine running. Anything outside that range points to a bad stator or voltage regulator.
When a Jump Isn't Enough — Time to Replace the Battery
Batteries older than 4 to 5 years often won't recover from a deep discharge. The internal plates sulfate, capacity drops, and the next dead-battery event is days or weeks away, not months.
Signs it's time to swap the battery rather than jump it again:
- The mower starts after a jump but dies within an hour.
- Resting voltage stays below 12.2V even after a full hour of running.
- The battery case is swollen or smells like sulfur.
- You hear a rapid clicking sound every time you turn the key, even right after a successful jump.
Replacement batteries for most riding mowers cost $40 to $120 for standard lead-acid, or $150 to $250 for AGM. Match the group size (usually U1) and CCA rating to your old battery. Mounting dimensions matter too, since a too-tall battery can hit the seat bracket.
For disposal, most auto parts stores accept old batteries for recycling. Lead-acid batteries are nearly 100% recyclable, so don't toss one in the trash.
Keeping Your Mower Battery Healthy So This Doesn't Happen Again
A little seasonal care prevents most jump-start situations entirely. Here's the routine that keeps batteries alive through winter storage and long work breaks:
- Use a trickle charger or battery maintainer. A 1 to 2 amp maintainer holds a stored battery at full charge without overcharging.
- Disconnect the negative cable for long storage. This stops parasitic drain from clocks or safety modules.
- Store the mower indoors if possible. Garages and sheds stay warmer than outdoor storage, which slows self-discharge.
- Clean terminals once a season. A wire brush and a paste of baking soda and water removes corrosion before it becomes a problem.
- Run the mower every two to three weeks. Even 10 minutes of operation keeps the plates conditioned and the electrolyte mixed.
University extension services, including the University of Minnesota Extension, publish seasonal maintenance checklists for small engines and reinforce these same steps for off-season storage.
If you follow that list, the next time you turn the key, the mower will probably fire right up without any cables involved.
Frequently Asked Questions
Can you jump a riding lawn mower with a car?
Yes, as long as both use 12-volt batteries and you connect the cables in the correct order. Keep the car off or idling, never revving.
Will jump starting damage a riding mower?
Not if you follow the correct polarity and ground to the engine block instead of the dead battery's negative post. Reverse polarity can fry the regulator.
How long does a jump-started mower battery last?
A healthy battery recharged by the mower's alternator should start the engine again for several weeks. An old or sulfated battery may die again within days.
Can I use a portable jump box instead of another car?
Yes. Any lithium jump pack rated 400 amps or higher works on small engines. Make sure it's set to 12V mode before connecting.
Why does my mower click but not crank?
Usually a weak connection at the terminals. Clean the posts with a wire brush, retighten the clamps, and try again. A failed solenoid or safety switch is the next thing to check.