How to jump start a car with portable battery: Easy guide
A dead battery always shows up at the worst time. You turn the key, hear one click, and your whole day is sitting in the parking lot with you. Learning how to jump start a car with portable battery packs turns that moment from a panic into a five-minute job.
No second car. No flagging down a stranger. Just you, the pack, and a few clean steps.
Most modern lithium jump starters weigh under three pounds and live in your glove box until you need them. Manufacturer specs indicate top units deliver 1,000 to 3,000 peak amps from a pocket-sized brick, enough to crank a V8 in most conditions. The whole process takes around 10 minutes once you've done it once.
Below, we'll walk through the exact conditions, branches, and mistakes so your first time goes smooth.
Quick Answer
Power on the portable jump starter. Connect the red clamp to the dead battery's positive terminal. Connect the black clamp to an unpainted metal ground.
Wait 30 to 60 seconds. Crank the engine for 3 to 5 seconds. Disconnect in reverse order once the engine starts.
Why a Dead Battery Doesn't Mean You're Stuck
A dead 12V battery feels final because nothing happens when you turn the key. No lights, no radio, no crank. In reality, you're dealing with a battery sitting below the voltage it needs to spin the starter motor.
A healthy resting voltage reads 12.4 to 12.7 volts. Cranking needs roughly 10.5 volts at the terminals under load. If you're below that, the starter can't do its job.
A portable jump starter fixes the problem by injecting cranking amps directly into the battery's posts. The starter motor doesn't know the difference between a full battery and a boosted one. It just needs voltage and current for a few seconds.
Three situations show up most often:
- Left the lights on. Parasitic drain pulls a healthy battery flat overnight.
- Cold weather. Lead-acid batteries lose 30 to 40 percent of their cranking power below freezing.
- Old battery. Once a battery passes 4 to 5 years, it stops holding a full charge.
If your dashboard lights come on but the engine won't crank, the battery is weak but not dead. If nothing lights up at all, you're dealing with a deeper discharge. Both are fixable with a portable jump pack, though the deeper one may need a longer connection time before cranking.
The fix only works if the battery can still accept a charge. If the jump pack clicks off immediately or the engine still won't turn after 3 to 5 attempts, the battery is likely sulfated and needs replacement rather than a jump.
What a Lithium Jump Starter Actually Does (And Why It Works)
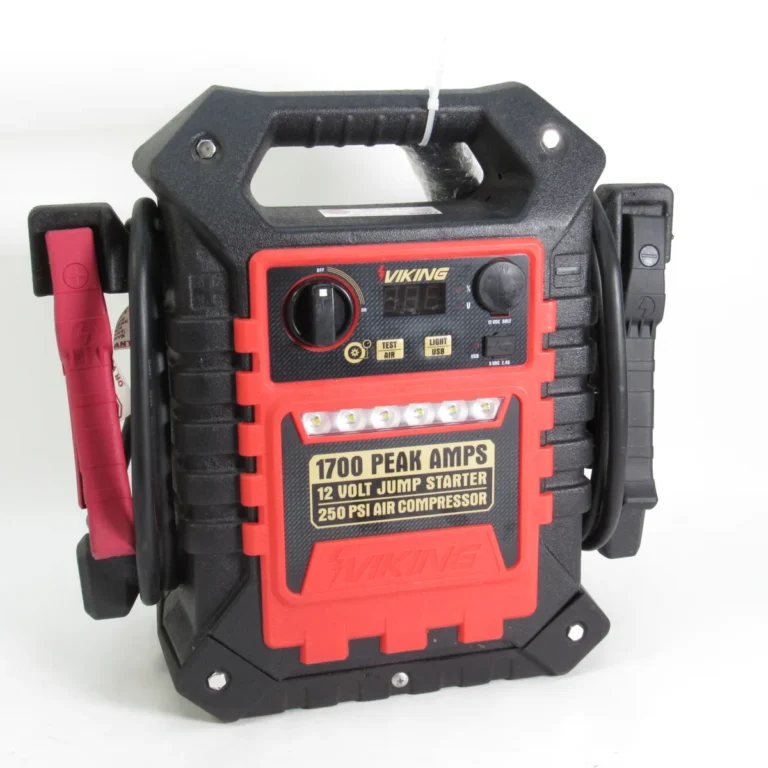
A portable jump starter is a high-output lithium-ion battery in a tough plastic case, paired with heavy-gauge clamps. Inside the pack, lithium cells store energy measured in milliamp-hours or watt-hours. When you fire it up, an internal circuit pushes that stored energy out through the clamps at a much higher current than a phone or laptop would ever draw.
Two numbers matter for your engine:
| Spec | What It Means | Typical Range |
|---|---|---|
| Peak amps | Maximum current the pack can deliver in a short burst | 400 to 3,000+ A |
| Cranking amps (CA) / Cold cranking amps (CCA) | Sustained current the pack can deliver during a real crank | 200 to 1,500 A |
| Capacity (mAh or Wh) | How much energy the pack stores | 5,000 to 20,000 mAh (18 to 74 Wh) |
A small 4-cylinder can usually start on 400 to 600 peak amps. A V6 or V8 needs 1,000 to 1,500. Diesel engines and heavy-duty trucks often need 2,000 amps or more.
Manufacturer specs indicate most consumer packs sold in 2026 are rated for engines up to 7 liters on gasoline and 4 to 5 liters on diesel.
The lithium cells also do double work when you're not jump starting:
- USB-A and USB-C ports charge phones, tablets, and laptops.
- A 12V output runs tire inflators, portable fridges, or small inverters.
- A built-in flashlight helps during nighttime battery swaps.
The reason lithium packs replaced the old lead-acid jump boxes comes from energy density. A 10-pound lead-acid brick from the early 2000s delivered maybe 400 peak amps. A 1.5-pound lithium pack in 2026 delivers 1,500.
Same job, fraction of the weight.
Before You Start: The 3 Things You Must Check First
Jumping a battery the right way takes 5 minutes of actual work. Jumping it the wrong way can fry a $1,200 alternator or melt a set of clamps. The checks below take 60 seconds and prevent 99 percent of jump-start mishaps.
Is the Jump Pack Actually Charged?
Most lithium packs self-discharge about 1 to 3 percent per month. Stash one in your trunk for a year and it'll be flat when you need it. Check the LED indicator before anything else.
A pack below 50 percent charge may not have the cranking amps to start a larger engine. A pack below 25 percent often won't deliver enough sustained current.
If the pack is low and the wall outlet is nearby, charge it first. Don't try to jump start with a half-dead jump pack. You'll burn through its capacity in one crank attempt and have nothing left for the next try.
Is the Battery Frozen, Cracked, or Leaking?
Look at the battery case. A bulging, cracked, or frozen battery is unsafe to jump. A frozen battery can explode when cranking amps hit it because the acid has expanded into ice inside the cells.
If the case looks swollen or you can see white crusty corrosion around the terminals, don't connect the clamps.
A heavily corroded terminal will block current flow even with a perfect pack. If you see green or white powder on the posts, scrape it off with a wire brush or flathead screwdriver before connecting anything. Corrosion adds resistance.
That resistance kills cranking power.
Is the Vehicle in Park or Neutral With the Parking Brake Set?
Sounds obvious. It's the cause of more driveway mishaps than any other step. A running engine in gear will lurch forward the instant it starts.
Park (automatic) or neutral (manual) plus parking brake is non-negotiable. Also, turn off headlights, HVAC, and accessories. They pull current away from the starter and slow the crank.
If all three look good, you're cleared to connect.
Battery Type and Voltage — This Changes Your Steps
Not every 12V battery is the same. The chemistry matters for connection order, charge rate, and whether you should jump at all.
| Battery Type | Full Charge Voltage | Jump Safe? | Notes |
|---|---|---|---|
| Flooded lead-acid (FLA) | 12.6V | Yes | Most common in older cars and trucks |
| Absorbed glass mat (AGM) | 12.8V | Yes, with care | Found in start-stop vehicles and newer luxury models |
| Enhanced flooded battery (EFB) | 12.6 to 12.8V | Yes | Entry-level start-stop battery |
| Gel cell | 12.8V | Yes, lower current only | Common in motorcycles, deep-cycle applications |
| Lithium (LiFePO4) automotive | 13.3V | Use vehicle-specific procedure | Not all jump starters handle these well |
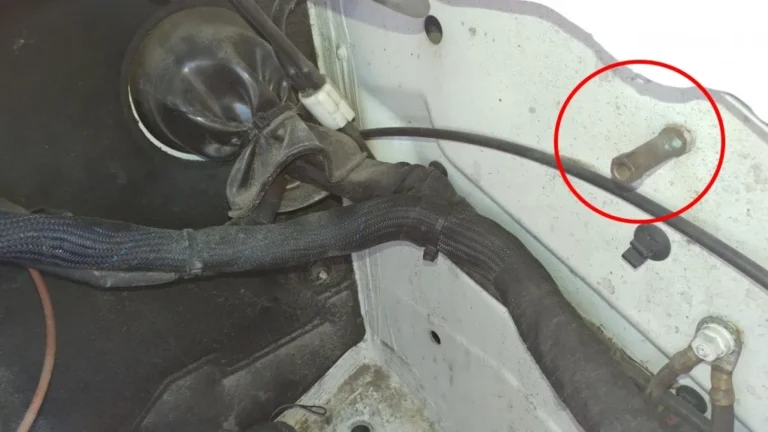
If your vehicle has a start-stop system or an AGM battery under the hood, the battery management system (BMS) may need to relearn after a jump. Some vehicles require a specific "jump start terminal" under the hood rather than the battery itself. Check the owner's manual if you see a labeled red post in the engine bay that's not on the battery.
Commercial trucks, RVs, and some heavy-duty diesels run 24V electrical systems. Most consumer jump packs only output 12V. Jumping a 24V system with a 12V pack will either do nothing or damage the pack's internal boost circuit.
You'll need a 24V-rated jump starter for those vehicles.
Passenger cars, SUVs, motorcycles, ATVs, and most light trucks are 12V, which is what every mainstream consumer jump pack handles.
How to Jump Start a Car With a Portable Battery: The Exact Steps
This is the heart of the process. Take your time. Most jump-start damage happens during rushed connections, not during the actual crank.
Step 1: Position the Pack and Prep the Clamps
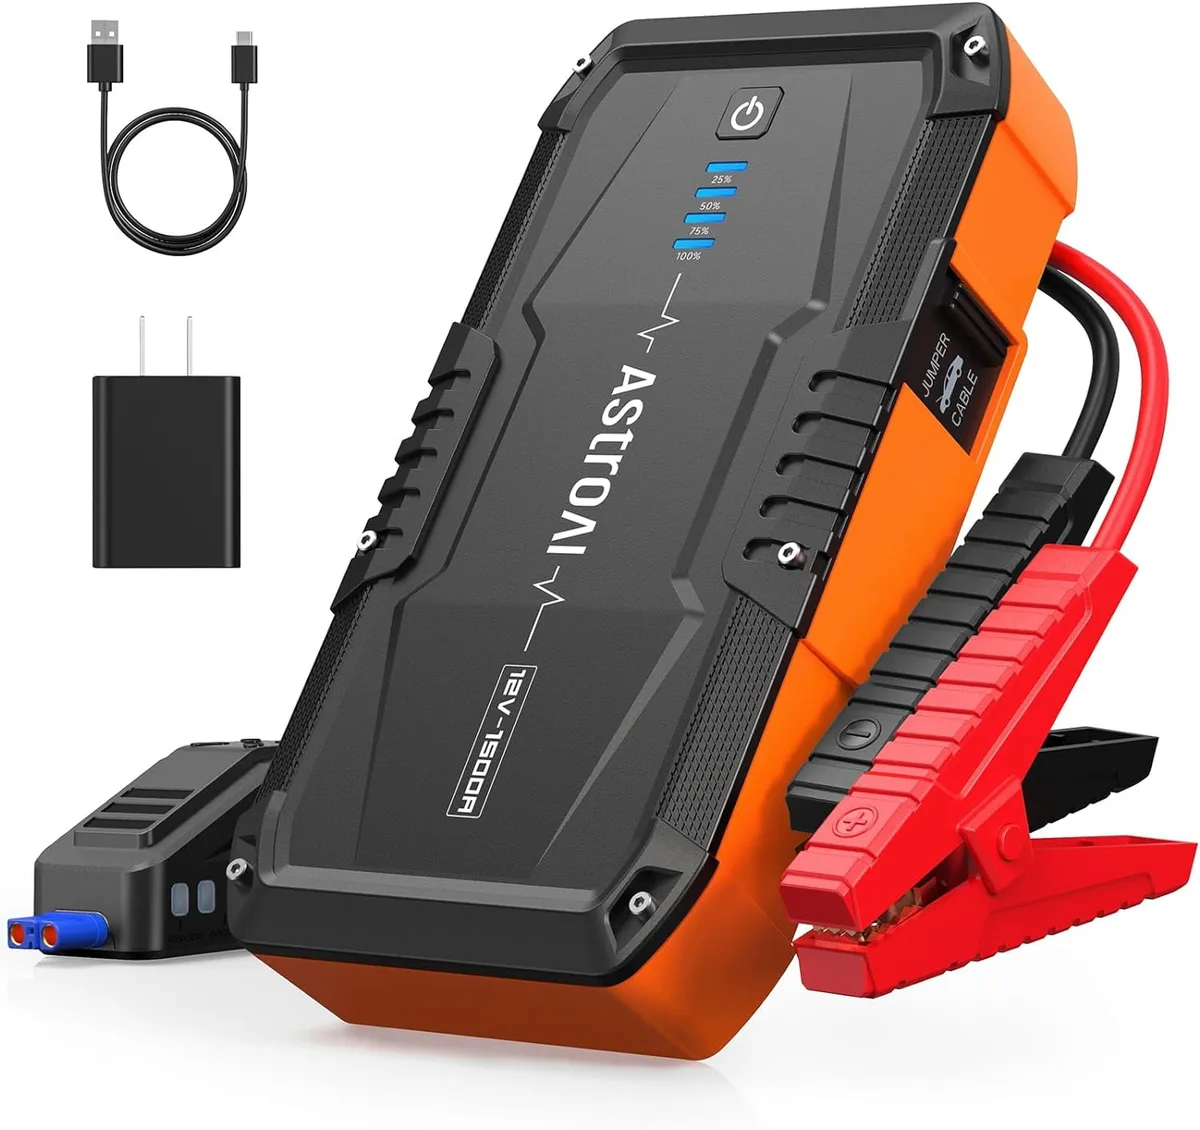
Set the jump starter on a flat, stable surface near the battery. The clamps should reach the terminals without stretching the cables taut. A stretched cable pulls the pack toward the engine bay, which can short it out against a metal bracket.
Make sure the pack is OFF before connecting anything. Most packs have a power button you press and hold to activate. Leaving it off during connection prevents arcing at the terminal.
Step 2: Connect the Red (Positive) Clamp
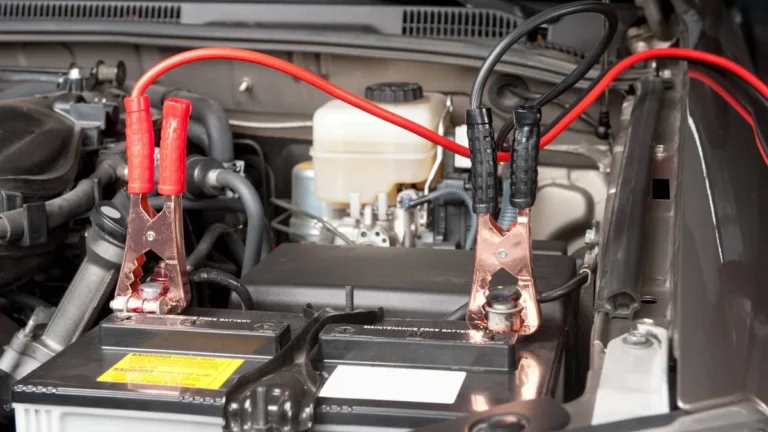
The positive terminal is marked with a "+" symbol and usually has a red cover or red cable attached to it. Clamp the red lead firmly onto the positive post. Wiggle the clamp slightly to make sure it's seated on bare metal, not on top of corrosion or the plastic case.

Reverse polarity is the single most common jump-start mistake. Most modern packs have reverse polarity alarms that beep or flash red if you've got it wrong. Don't ignore that alarm.
Disconnect and swap the clamps before doing anything else.
Step 3: Connect the Black (Negative) Clamp
This is where decision logic kicks in. There are two valid options:
- Connect to the battery's negative terminal. Works fine on most older vehicles.
- Connect to a clean, unpainted metal ground on the engine block. Safer, especially on vehicles with sensitive electronics. A bracket, bolt head, or engine lifting point all work.
Pick the engine ground if the battery is hard to reach or if the owner's manual calls for it. The reason: a dying battery can off-gas hydrogen. The spark from the final clamp connection can ignite that gas.
Grounding away from the battery moves that spark to a safer spot.
Make sure the ground point is unpainted and uncoated. Paint acts as an insulator. You want bare metal for a solid electrical path.
Step 4: Power On the Jump Pack
Now turn on the jump starter. A green light typically means the pack sees a valid connection and is ready to deliver current. A red light or beep means something is wrong.
Reverse polarity, low pack voltage, or a poor clamp connection will all trigger the warning.
Step 5: Wait 30 to 60 Seconds
This isn't a superstition. The pack needs a moment to push voltage into the dead battery's cells. A short stabilization period before cranking improves cold-start success, especially in cold weather.
Think of it like priming a pump.
Step 6: Crank the Engine
Turn the key or press the start button. Hold it for 3 to 5 seconds maximum. If the engine starts, release immediately.
If it doesn't, stop cranking and wait 30 to 60 seconds before the next attempt. Continuous cranking overheats the jump pack's internal wiring and can trip its safety cutoff.
Three short attempts is the practical limit. If the engine hasn't fired by the fourth try, something else is wrong, and forcing it risks damaging both the pack and the vehicle's electrical system.
Step 7: Disconnect in Reverse Order
Once the engine is running:
- Turn off the jump pack.
- Remove the black (negative) clamp first.
- Remove the red (positive) clamp second.
- Let the engine idle for 10 to 20 minutes to put charge back into the battery.
Keep the clamps from touching each other or any metal surface during removal. A live clamp touching the chassis will spark and can damage the pack's electronics.
Step 8: Recharge the Pack
A jump starter that successfully started a car is now partially drained. Plug it in as soon as you can. Most packs recharge in 3 to 9 hours depending on capacity and the wall adapter used.
A pack that sits at low charge for weeks will degrade faster than one stored at 50 to 80 percent.
Matching Your Jump Starter to Your Engine Size
Engine displacement and battery type drive the amps you need. Buying a pocket pack for a 6.2L diesel is a guaranteed disappointment. Buying a 3,000-amp commercial unit for a 1.8L sedan is overkill but won't hurt anything.
| Engine Type | Peak Amps Needed | Pack Class |
|---|---|---|
| 4-cylinder gasoline (1.5 to 2.5L) | 400 to 800 A | Pocket / compact |
| V6 gasoline (3.0 to 4.0L) | 800 to 1,200 A | Mid-size |
| V8 gasoline (4.5 to 6.2L) | 1,200 to 1,800 A | Mid to heavy-duty |
| Small diesel (2.0 to 3.0L) | 1,500 to 2,000 A | Heavy-duty |
| Large diesel (5.0 to 6.7L) | 2,000 to 3,000+ A | Commercial / truck |
| Motorcycle / ATV | 200 to 400 A |
Manufacturer guidance from brands like NOCO and Antigravity indicates their consumer packs are typically rated for engines up to 7 liters on gasoline and 4 to 5 liters on diesel. If you're running a heavy-duty Power Stroke or Cummins, double-check the pack's rated engine size before relying on it in the field.
Cold weather also bumps the requirement. A V8 that needs 1,200 amps at 70°F may need 1,500 amps at 10°F. We dig into that more below.
What to Do If the Engine Clicks But Won't Crank
A single click from the starter solenoid means the battery has enough voltage to engage the solenoid but not enough to spin the motor. This is the most common dead-battery symptom. The fix is usually more time on the jump pack, not a replacement battery.
Try this branch:
- Pack is fully charged and clamps are clean. Wait another 60 seconds, then crank again. Sometimes the dead battery needs a longer pre-charge to lift its surface charge.
- Still clicks after 3 attempts. Check the ground connection. A weak ground path is the second most common failure point. Move the black clamp to a different bare-metal spot and retry.
- Click stops but engine still doesn't turn. The starter itself may be worn out or the solenoid is sticking. A jump pack can't fix a bad starter motor. You'll need a tow or on-site repair.
What you should NOT do:
- Keep cranking for 10+ seconds at a time. The starter motor will overheat.
- Smack the starter with a wrench. Old-school fix, but on modern starters it can crack the solenoid housing and create a dead short.
- Assume the battery is fine because the lights work. Interior lights only need a fraction of the amps a starter motor pulls.
If the engine cranks slowly and catches, that's a successful jump. If it cranks normally and dies right after release, the alternator may not be charging. Drive directly to a service shop rather than shutting the engine off.
Connecting to a Ground Point vs. the Negative Terminal
The choice between the negative battery terminal and a chassis ground isn't stylistic. Each one has a real reason to exist.
Negative terminal direct:
- Faster setup, fewer decisions.
- Works fine on vehicles built before 2000 with minimal electronics.
- Slightly better current flow because there's one less connection in the path.
Engine block / chassis ground:
- Safer on vehicles with sensitive electronics (modern ECU-driven cars).
- Moves any spark during clamp connection away from the battery, reducing hydrogen ignition risk.
- Required on some vehicles per the owner's manual, especially those with BMS sensors on the negative cable.
If you see a labeled ground stud under the hood marked with a small "-" or ground symbol, the manufacturer wants you to use it. Ignoring that instruction can confuse the BMS into logging error codes that take a dealer visit to clear.
For most daily drivers and trucks, either spot works. When in doubt, the engine block is the conservative pick.
Jump Starting Vehicles With Start-Stop or AGM Batteries
Start-stop systems shut the engine off at traffic lights to save fuel. They put huge demand on the battery because the engine restarts dozens of times per day. Most of these vehicles use AGM or EFB batteries rated for deeper cycling.
Three things change:
- Use the under-hood jump terminal. Most start-stop vehicles have a dedicated positive post in the engine bay, often under a red cover, marked with a "+" symbol. The negative ground stud is usually nearby. The battery itself sits in the trunk or under the rear seat, and connecting directly to it may bypass the BMS sensor.
- Expect higher amp demand. A start-stop AGM battery that has been depleted often shows 11.8 to 12.0V instead of a complete 10V dead state. The voltage looks "okay," but the battery's internal resistance is high. It needs a longer stabilization time on the jump pack before cranking.
- Drive for at least 30 minutes after the jump. The BMS needs to see sustained charging current to reset its state-of-charge calculation. Short trips won't do it. If the BMS stays confused, the start-stop feature may stay disabled until a dealer scan tool resets it.
Aggregate reviews from owners of BMW, Mercedes, Ford, and Toyota start-stop vehicles report success with mid-size lithium packs (1,000 to 2,000 peak amps) when the under-hood terminals are used. Cheaper packs without reverse polarity protection have caused BMS error codes on these vehicles. The protection circuit matters more than the peak amp rating.
Jump Starting Diesel Trucks and Larger Engines
Diesel engines use higher compression ratios and bigger starter motors. They also draw more cranking amps, especially when glow plugs are running. The math is simple: more compression, more amps needed.
Three practical adjustments:
- Pack rating. A 3.0L diesel needs 1,500 peak amps minimum. A 6.7L Power Stroke or Cummins needs 2,500+. Budget consumer packs won't cut it for these engines.
- Pre-heat cycle. Most diesels have glow plugs that cycle for 5 to 15 seconds before cranking. Turn the key to "on" without cranking first. Wait for the glow plug light to go out. Then jump and crank. Trying to crank a cold diesel without pre-heating pulls extra current and often fails.
- Connection order. Some heavy-duty trucks have dual batteries (one in each fender well). Jump either one, but ground the negative clamp on the same battery's cable or on a solid chassis point near it. Cross-grounding between batteries can confuse the truck's charging system.
If the diesel cranks but won't fire, that's a fuel system issue, not a battery issue. A jump pack won't help with air in the lines, a failed fuel solenoid, or a bad lift pump.
Common Mistakes That Can Fry Your Electronics
Modern vehicles run computers for everything from the throttle body to the infotainment system. A jump-start mistake that was harmless in 1995 can brick a $2,000 ECU in 2026. Here are the failure modes we see most often.
Reverse polarity. Red on negative, black on positive. Even with reverse polarity protection on the jump pack, the current spike during connection can damage diodes in the alternator or voltage regulator.
Connecting the negative clamp to a fuel line or painted surface. Paint insulates. Fuel lines are aluminum or steel and look like ground points but aren't actually bonded to the chassis ground in some vehicles.
Always pick a confirmed ground stud or bare engine block bolt.
Crumbling the terminal while tightening the clamp. Battery posts are soft lead. Aggressive clamp-on action can snap a post off the battery, leaving you with no connection point and a battery full of acid leaking onto your driveway.
Tighten clamps by hand pressure. If they don't seat, clean the post.
Letting the clamps touch each other while the pack is on. A dead short across the clamps will trip the pack's protection circuit, but in cheap packs without that protection, it can weld the clamps together or ignite the cable insulation.
Jump starting a frozen battery. The acid inside the cells has turned to ice or expanded. Cranking amps hitting that ice can crack the case or, worse, cause the battery to rupture violently.
Skipping the engine idle period after a successful start. The alternator needs 10 to 20 minutes at idle to push meaningful charge back into the battery. Killing the engine right away means you're one accessory cycle away from another dead start.
Cold Weather Jump Starting: What Changes Below Freezing
Cold weather is the most common jump-start trigger. Cold-soaked batteries lose cranking capacity. Engine oil thickens.
Diesel fuel can gel. All three factors stack against you.

The physics:
- Battery capacity drops about 20 percent at 32°F and 40 to 50 percent at 0°F.
- Engine oil thickens, raising cranking resistance by 30 to 60 percent.
- Lithium jump packs also lose some output below freezing, typically 20 to 30 percent at 0°F and more in extreme cold.
Decision logic for cold starts:
- Above 20°F (-6°C): Standard jump procedure works. Pre-charge for 30 to 60 seconds.
- 20°F to 0°F (-6 to -18°C): Pre-charge for 60 to 90 seconds. Use a heavier-rated pack if available. Keep the pack inside the cabin overnight instead of the trunk so it starts warmer.
- Below 0°F (-18°C): Bring the pack inside to warm it up before the attempt. A cold-soaked pack may refuse to deliver full output. Some packs have "pre-heat" modes that warm internal cells before allowing a crank.
Two extra safety notes for cold weather:
- Never attempt a jump if the case is bulged or the fluid level looks low. A frozen battery expands. Ice-damaged batteries can crack when current is applied.
- Check for gel or AGM rating. Standard flooded batteries handle cold best. AGM batteries hold up well too but can be slower to recover from deep discharge in extreme cold.
If your vehicle routinely sits in sub-zero temps, a battery warmer blanket plus a quality AGM battery will prevent most cold-weather jump situations entirely.
Jump Starting a Completely Dead Battery That Won't Accept a Charge
Sometimes the battery is so flat the jump pack's protection circuit shuts off the moment you clamp up. No green light. No output.
This is the dead-cell scenario, and it has its own playbook.
Try this branch:
- Let the pack sit connected for 2 to 5 minutes before cranking. Some deeply discharged batteries need a slow trickle to begin accepting current. If the pack's voltage cutoff is at 9V, a battery sitting at 6V will trigger it. A long, slow connection can lift the surface voltage just enough.
- Disconnect, wait 60 seconds, reconnect. This resets the pack's internal monitor. The second attempt often succeeds where the first failed.
- Try a different ground point. A poor ground connection can read as "no battery" to the pack's protection circuit.
- Bypass the BMS sensor. On vehicles with current sensors on the negative cable, connect directly to the battery post instead of the cable end. The sensor can read as an open circuit and confuse some jump packs.
If none of that works after 3 cycles, the battery has a dead cell. A jump pack can't fix that. The battery needs replacement.
Tow the car rather than burning through 10 jump attempts.
Charging and Storing the Pack So It's Actually Ready Next Time
Most jump-start failures happen because the user grabbed a dead pack. A pack stored improperly self-discharges faster and loses capacity over time.
Best practices for pack longevity:
- Store at 50 to 80 percent charge. Full charge speeds up lithium cell degradation. Empty storage risks the cells dropping below their safe voltage threshold and becoming permanently damaged.
- Top off every 60 to 90 days. Lithium cells lose 1 to 3 percent per month through self-discharge. A pack that sat all winter may be flat by spring.
- Keep it at room temperature when possible. Trunk storage in Arizona or garage storage in Minnesota stresses the cells. Bring the pack inside during extreme weather.
- Recharge fully after every jump. A jump that pulls 30 percent of the pack's capacity means it should be back at 100 percent within a week.
- Run a test cycle every 6 months. Power it up, check the LED indicator, and let it charge from empty to full. This keeps the cells balanced and confirms the pack still holds rated capacity.
The lifespan of a quality lithium pack is roughly 300 to 1,000 charge cycles, depending on chemistry and brand. Heavy-duty LiFePO4 cells can stretch past 1,500. Cheap lithium-polymer packs may give out at 200 cycles.
Treat the pack well and it'll outlive the car.
Portable Jump Starter vs. Jumper Cables vs. Roadside Assistance
Each option has its place. The right pick depends on where you are, who's around, and how much time you have.
| Option | Best For | Cost Range (2026) | Speed |
|---|---|---|---|
| Portable jump starter | Solo drivers, remote areas, preppers | $40 to $300 | 5 to 10 minutes |
| Traditional jumper cables | Two-car households, urban areas | $15 to $50 | 10 to 15 minutes |
| Roadside assistance | Non-DIYers, fleet drivers, those without a pack | $0 to $200 per call (membership varies) | 30 to 90 minutes wait |
| Battery tender / trickle charger | Long-term storage, motorcycles, classic cars | $25 to $100 | 4 to 24 hours |
Portable jump starters win on speed and independence. You don't need a second vehicle, a stranger, or a tow truck. The trade-off is upfront cost and the need to keep the pack charged.
Traditional jumper cables are cheaper upfront but require a willing donor car and someone who knows how to connect them safely. They also don't help if you're alone in a parking lot at 11 p.m.
Roadside assistance (AAA, OnStar, manufacturer programs, insurance add-ons) handles jump starts but introduces wait time. In a metro area, that's 30 to 60 minutes. In a rural area, it can be hours.
Battery tenders aren't jump starters. They're slow chargers for vehicles in storage. If your classic car sits all winter, a tender keeps the battery alive so you never need to jump in the first place.
How Long a Good Jump Starter Should Last (Cycles, Years, and Shelf Life)
Lithium jump packs don't last forever. Three numbers tell you when to replace one.
| Metric | Typical Range | Replace When |
|---|---|---|
| Charge cycles | 300 to 1,500 | Below 80 percent rated capacity |
| Calendar years | 3 to 7 | Cells bloat or pack won't hold charge |
| Shelf discharge rate | 1 to 3 percent per month | Pack reads empty after 30 days idle |
A pack that you use twice a year and top off quarterly can easily last 5 to 7 years. A pack that lives in a hot trunk and gets dragged out weekly may need replacement in 2 to 3 years. Heat is the biggest enemy of lithium cells.
Cold storage is much friendlier.
UL 2743 is the safety standard for portable lithium jump starters. Packs that carry the UL mark have passed tests for short-circuit, overcharge, and thermal runaway protection. Buying UL-listed gear is a small cost premium for a meaningful safety margin.
The U.S. Department of Transportation also regulates how these packs ship and travel. Under FAA rules as of 2026, packs under 100Wh can fly in carry-on luggage.
Packs between 100 and 160Wh require airline approval. Anything above 160Wh is banned from passenger aircraft.
Safety Rules Worth Actually Following
Most jump-start safety rules get ignored because they sound obvious. Then somebody loses a fingertip or sets a battery on fire. Here's what actually matters.
- Wear eye protection. Lead-acid batteries can off-gas hydrogen or crack during a jump. A splash of sulfuric acid in your eye is a hospital visit.
- No smoking or sparks near the battery. Hydrogen gas ignites at low concentrations.
- Keep the pack and cables away from moving engine parts. Belts and pulleys will shred a cable if you let it drape across them.
- Never lean over the battery while making the last clamp connection. Move your face to the side, then connect. If a spark ignites hydrogen, it'll go up and away from you.
- Don't jump a battery that smells like rotten eggs. That's heavy hydrogen sulfide from overcharging or internal damage. Leave it alone and call for service.
- Keep the pack dry. Lithium packs and water don't mix well unless they're specifically rated IP65 or higher. A wet pack can short and overheat.
Manufacturer guidance from NOCO, Antigravity, and Clore all emphasize the same trio: clean connections, correct polarity, and short crank times. Three habits cover 90 percent of safety outcomes.
Airplane, Storage, and Disposal Rules for Lithium Jump Packs
Lithium batteries in travel and storage fall under different rules than the ones in your phone.
Air travel:
- Under 100Wh: Carry-on only, no airline approval needed.
- 100 to 160Wh: Carry-on with airline approval (usually 1 to 2 spares max).
- Over 160Wh: Banned entirely from passenger aircraft.
Most consumer jump packs fall between 18 and 74Wh, which means they're carry-on friendly without airline paperwork. Heavy-duty commercial packs can exceed 100Wh. Check the spec label before flying.
Storage:
- 50 to 80 percent charge is the sweet spot.
- Cool, dry location. Room temperature beats hot garages or freezing sheds.
- Out of direct sunlight. UV degrades the plastic case over time.
Disposal:
- Never throw a lithium pack in regular trash. Most hardware stores, automotive shops, and municipal recycling centers accept them.
- Tape over the terminals before transport. A residual charge can short against other metal in a recycling bin and start a fire.
- For damaged or swollen packs, contact a hazardous waste facility. A punctured lithium cell can ignite.
The IATA (International Air Transport Association) publishes detailed guidance on lithium battery shipping each January. Rules tighten every few years, so check current limits before traveling with a new pack.
Quick Troubleshooting Guide
| Symptom | Likely Cause | What to Try |
|---|---|---|
| Pack won't power on | Deeply discharged or tripped protection | Plug into wall charger for 30+ minutes, then try |
| Red light / beep after clamps connect | Reverse polarity | Swap clamp positions |
| Pack shuts off during crank | Voltage cutoff triggered | Let battery pre-charge for 60 to 90 seconds |
| Engine clicks but won't crank | Weak ground or insufficient pre-charge | Move ground clamp, wait longer |
| Crank is slow and engine barely fires | Pack too small for engine | Use a higher-amp pack |
| Engine starts, then dies immediately | Alternator not charging | Drive directly to service shop |
| Clamps spark when touching | Pack is still on | Turn off pack before connecting |
| No response from pack when connected | Battery has dead cell | Battery needs replacement |
Real Scenarios: Three Common Jump Start Outcomes
Picture a 2017 Toyota Camry in a grocery store lot on a Tuesday evening. Interior lights dim, dome light flickers when the key turns, single click from under the hood. A pocket 1,000-amp pack handles this in under three minutes.
The driver's battery is a 4-year-old flooded lead-acid, probably drained by an interior light left on. A 30-minute drive home recharges enough to start the next morning. No battery replacement needed.
Now picture a 2019 Ford F-250 with the 6.7L Power Stroke diesel. Temperatures dropped to 5°F. Glow plug cycle runs for 8 seconds, then a slow crank, then nothing.
A pocket pack won't cut it here. A 3,000-amp commercial pack with a 60-second pre-charge gets it done. The truck's batteries are AGM and just two years old.
After a 45-minute highway drive, they recover fully. This is a cold-soak scenario, not a failed battery.
Third scenario: a 2015 BMW 328i with start-stop. Owner parks at the airport for 10 days. Returns to a car that won't unlock with the key fob.
Mechanical key opens the door, but the push-button start does nothing. A mid-size 1,500-amp pack connects to the under-hood jump terminal, not the trunk-mounted battery. Engine fires on the second crank.
The BMW's BMS throws no codes. Drive home, top off the battery overnight with a CTEK charger, problem solved.
Each scenario uses the same fundamental process. The differences are pack size, connection point, and pre-charge time. Match those to your situation and the jump takes care of itself.
Tools and Materials Worth Keeping With Your Jump Pack
A jump starter alone solves the electrical problem. A small kit of extras solves the rest.
- Pair of nitrile gloves. Battery acid and grime don't belong on your hands.
- Wire brush or battery terminal cleaner. Brushed-off posts transfer current far better than corroded ones.
- Flashlight. Even if the pack has one built in, a separate handheld is useful for inspecting battery cases.
- Microfiber rag. Wipe terminals and clamps clean before connecting.
- Multi-bit screwdriver. Useful for prying open battery covers or loosening terminal bolts.
- USB-C charging cable. Most modern packs charge via USB-C. Keep one in the vehicle.
Some owners also carry a small 12V cigarette-locket tire inflator. Pairing the inflator and jump pack in one bag covers the two most common roadside delays for under $150 total.
When the Jump Pack Itself Is the Problem
Sometimes the pack is what's broken. Three failure modes show up in warranty data from major brands.
The Pack Won't Power On At All
Suspect a tripped internal protection circuit. Most packs have a reset button or a "force on" mode accessible by holding the power button for 10 to 15 seconds. If that doesn't work, the cells may have dropped below the safe discharge threshold from extended storage.
Plug it in and let it charge for at least an hour before testing.
The Pack Powers On but Has No Output
A blown fuse inside the clamp cable is the common culprit. Some packs have user-replaceable fuses. Others require warranty service.
Check the manual for the fuse location before assuming the pack is dead.
The Pack Reads Full but Won't Crank
Cell degradation is the likely cause. After 500+ cycles, lithium cells lose capacity even when the indicator says full. If the pack is more than four years old and struggles to crank engines it used to start easily, it's reached end of useful life.
Replacement is the only fix.
Maintenance Schedule for a Reliable Jump Pack
Treat the pack like a piece of emergency gear, not a phone accessory.
Every use:
- Recharge fully before storing.
- Inspect clamps for cracks or corrosion.
- Wipe down the case.
Every 90 days:
- Top off the charge to 80 percent.
- Power on and check indicator LEDs.
- Run a USB device off the pack to confirm one output still works.
Every 12 months:
- Deep-cycle the pack (run it down to 10 percent, then full recharge).
- Inspect cable insulation for cracking.
- Confirm the flashlight, USB ports, and 12V output all work.
A pack on this schedule will outlive the warranty by years. A pack stuffed in a glove box and ignored will die in 18 to 24 months, right when you need it most.
Buying a Jump Pack: The Specs That Actually Matter
Skip the marketing. Three specs predict whether a pack will start your engine on a cold morning.
Peak amps (matched to displacement). Match the rating to your engine as we covered above. Bigger isn't always necessary, but under-sized is a guaranteed failure.
Capacity in watt-hours. Wh matters more than mAh because Wh accounts for voltage. A 50Wh pack is roughly 3 to 5 jump starts on a V6.
A 75Wh pack is 5 to 8. Anything under 20Wh is really a phone charger with a marketing budget.
Safety certifications. UL 2743, FCC, CE, RoHS. Skip packs with no certifications.
The cost savings aren't worth the fire risk.
Nice-to-haves: USB-C PD output, built-in voltmeter, IP65 weather sealing, and a hard case. None are essential, all are worth a few extra dollars if you'll actually use them.
What to Do Right After a Successful Jump
The jump is done. The engine is running. Most people shut the car off in the parking lot and find out two days later that nothing has changed.
Instead:
- Drive at least 20 minutes. Idling in the driveway won't do it. The alternator needs engine RPMs above 1,500 to push meaningful charge current into the battery. A highway on-ramp or a 20-minute commute works.
- Avoid accessories. Don't run the heated seats, rear defrost, or high-blast AC during the recovery drive. They pull amps away from the battery.
- Test the battery within a week. Most auto parts stores load-test for free. A 5-minute test tells you whether you're driving on borrowed time.
- Watch for repeat symptoms. If the engine cranks slowly the next morning, the battery is dying. Get ahead of the failure instead of waiting for another stranded moment.
What to Do If You Don't Own a Jump Pack
Sometimes the dead battery happens before you've bought the gear. Quick backup plans:
- Call roadside assistance. Most insurance policies and manufacturer programs include coverage. AAA, OnStar, FordPass, Toyota Connected Services, and similar programs all handle jump starts.
- Flag a passerby with jumper cables. Old-school, but still works. You'll need a willing helper and a basic understanding of the clamp order.
- Use a battery tender overnight. If you're at home, a slow 2-amp charger over 12 to 24 hours will resurrect most lightly discharged batteries without a jump at all.
- Push-start a manual. Get the car rolling at 5 to 10 mph, pop the clutch in second gear, and the engine fires. Automatic transmissions can't do this.
None of these are as fast as a personal jump pack. All of them beat waiting for the car to magically fix itself.
Expert Tips From Roadside Techs
After thousands of service calls, certain patterns repeat. Three tips come up over and over.
First, clean terminals before connecting. A corroded post can look fine on top and be terrible underneath. Thirty seconds with a wire brush is the difference between a successful start and a frustrating afternoon.
Second, let the dead battery pre-charge. Cranking the moment the pack lights up green is tempting. Thirty extra seconds of pre-charge doubles success on deeply discharged batteries.
Third, after a jump, drive before parking. A short trip to the store doesn't recharge a depleted battery. Twenty minutes of highway driving is closer to a real recovery cycle.
Common Jump Start Myths
A few pieces of "common knowledge" are actually wrong.
Myth: revving the donor engine helps. It doesn't help the dead battery in a portable-pack jump. There's no donor vehicle to rev.
Myth: letting the dead battery sit connected longer will recharge it. A jump pack delivers cranking amps, not charging amps. It starts the car.
The alternator handles the rest.
Myth: jump starting a modern car damages its computer. Not if done correctly. The risk comes from reversing polarity or letting the clamps arc.
With a UL-listed pack and clean connections, modern ECUs handle it fine.
Myth: a larger pack always starts a smaller engine better. Amps are pulled, not pushed. The starter motor takes what it needs.
Excess capacity just means more headroom and more USB charging cycles for your phone.
Jump Starting as a Skill Worth Having
A dead battery is one of the few roadside problems you can fully fix yourself in 10 minutes with a $100 tool. That kind of self-sufficiency is rare in modern driving.
The gear pays for itself the first time it saves you a tow, a taxi, or a day of missed work. After that, it's just insurance. The best kind, because it sits quietly in the trunk for years and works exactly when you need it.
The Bottom Line on Portable Jump Starting
A quality lithium jump pack turns a dead battery from a crisis into a 10-minute inconvenience. Match the pack's cranking amps to your engine, follow the clamp order, respect the pre-charge time, and the process is the same whether you're jump starting a Civic or a Cummins.
Keep the pack charged, store it somewhere dry, and refresh it every few months. Do that, and it'll be ready when you need it, which is the whole point of owning one in the first place.
Frequently Asked Questions
Can you jump start a car with a portable battery in the rain?
Yes, as long as the jump pack itself is dry. The clamps and cables are designed to handle engine bay moisture. Water on the battery terminals doesn't change the electrical connection.
Just don't submerge the jump pack or splash it directly with a hose.
How long does a portable jump starter hold its charge?
Most lithium packs self-discharge at 1 to 3 percent per month. A fully charged pack will read 80 percent or better after 6 months of storage. Beyond a year, expect to top it off before relying on it.
Is it safe to jump start a car with start-stop technology?
Yes, but use the under-hood jump terminal instead of the battery itself. Most start-stop vehicles have a labeled positive post and ground stud in the engine bay for this exact purpose. Check the owner's manual for the location.
Can a jump starter start a completely dead car?
It depends on how dead. Batteries with a resting voltage above 8V can usually be jump started with a quality pack. Batteries below 5V or with a swollen case have internal damage and need replacement, not a jump.
How many times can a jump starter start a car on one charge?
A typical 10,000 mAh pack delivers 3 to 6 jump starts before needing a recharge, depending on engine size and temperature. A heavy-duty 20,000 mAh pack can stretch to 10 or more starts on smaller engines.
Will jump starting a car damage the alternator?
Not if done correctly. Modern alternators handle recharging a low battery without issue. The risk comes from reverse polarity, which can blow the alternator's rectifier diodes.
Always double-check clamp colors before cranking.
Can you use a portable jump starter on a motorcycle?
Yes. Most consumer packs have a "motorcycle mode" or low-amp setting that prevents overcurrent to smaller batteries. Motorcycle batteries typically need only 200 to 400 peak amps, well below the rating of most packs.
What is the difference between peak amps and cranking amps?
Peak amps is the maximum current the pack can deliver in a millisecond burst. Cranking amps (or CCA for cold cranking amps) is the sustained current available during an actual 3 to 5 second engine crank. Cranking amps is the more useful real-world number.
Should I replace my battery after a jump start?
Not necessarily. If the battery is less than 4 years old and holds a charge after a 30 minute drive, it's probably still good. If it dies again within a few days, have it load-tested at an auto parts store.
Most do it for free.
Can a jump starter start a diesel truck?
Yes, if the pack is rated for diesel. Small diesels need 1,500+ peak amps. Large diesels need 2,000 to 3,000+.
A pocket pack rated for 4-cylinder gasoline engines won't crank a 6.7L Cummins no matter how many times you try.