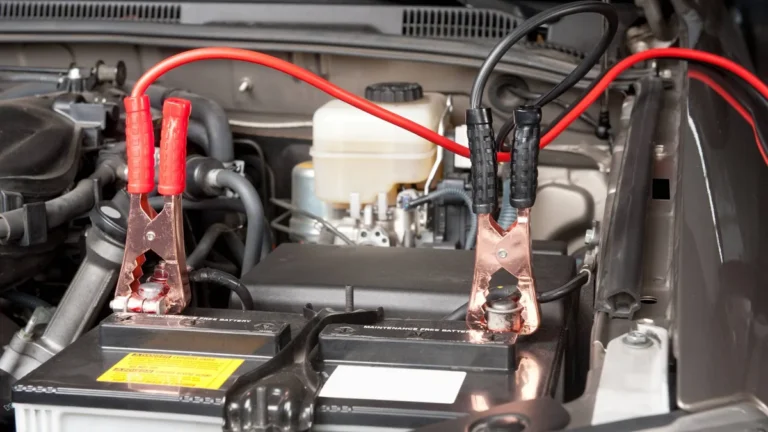
How to use a duralast jump starter: Easy guide
Your car won't start, and there's no second vehicle in sight. That's exactly the situation a Duralast jump starter was built for. Learning how to use a Duralast jump starter the right way saves you the wait for roadside assistance and gets you moving in minutes.
Duralast units, sold through AutoZone, range from compact 800A models to 1200A heavy-duty boxes rated for larger engines. Per the SAE J1494 jump-starting standard, a portable lithium unit should match or beat your engine's cranking demands. Most Duralast jump starters double as a USB power bank and an LED workbench light.
As of 2026, the lineup still includes compressed-air combo units, useful when cold weather leaves your tires soft too.
Quick Answer
Turn the Duralast jump starter on. Connect the red clamp to the battery's positive terminal. Connect the black clamp to an unpainted metal ground point.
Wait for the green ready light. Crank the engine for three to five seconds. Disconnect in reverse order.
Recharge the unit after use.
What a Duralast Jump Starter Actually Does
A Duralast jump starter is a self-contained 12V battery in a box, paired with heavy-duty jumper clamps. You attach it directly to your car's battery, and it delivers a surge of cranking amps to spin the starter motor. No second car needed.
No waiting.
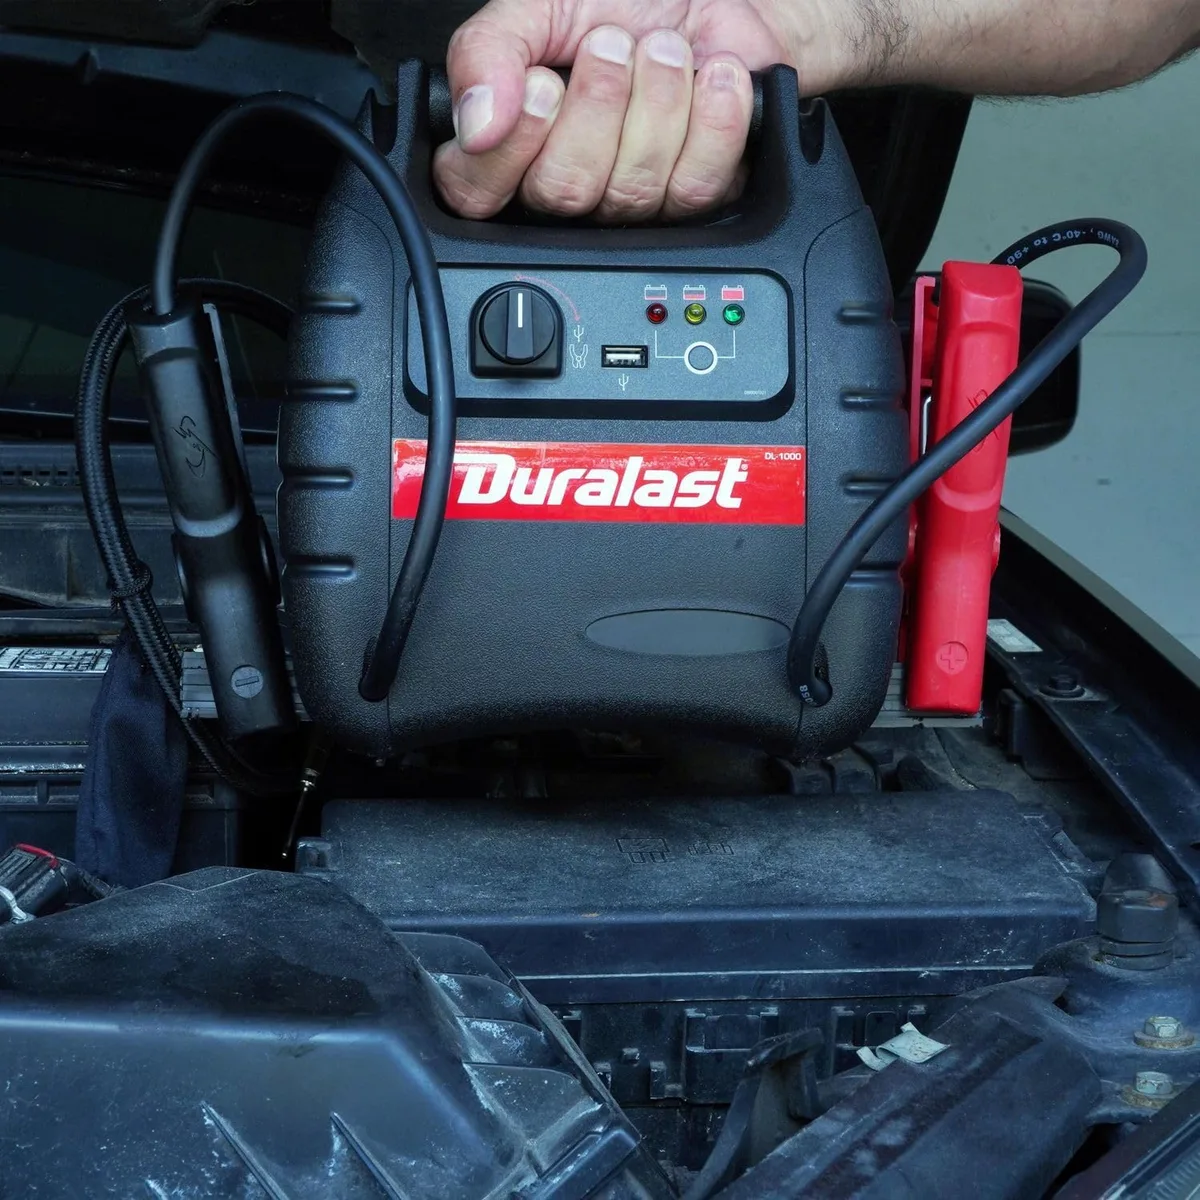
The internal battery is almost always lithium-ion in modern Duralast units, even the budget 800A models. Lithium packs hold their charge for months, weigh less than ten pounds, and push enough peak current to start a 6.0L gas engine in most conditions.
Manufacturer specs confirm Duralast lithium units output 12V DC nominal, recharge from a wall outlet in roughly three to six hours, and cycle 300 to 1,000 times before noticeable capacity loss. That's years of weekend use for the average driver.
Before You Start: Know Your Duralast Model and Battery Situation
Not every dead-battery situation is the same. The right steps change based on what you're working with. Run through this quick decision tree before you touch the clamps.
| Your situation | What to do |
|---|---|
| Lights dim, engine cranks slowly | Standard jump. Connect normally, no override mode needed. |
| Engine won't crank at all, dashboard dead | Fully discharged battery. Connect and crank immediately. |
| Jump starter beeps or shows red light after clamp hookup | Reverse polarity. Swap clamp positions and recheck. |
| Green ready light stays on, but engine won't fire | Try Boost or Override mode for fully dead batteries. |
| Vehicle is a diesel truck or large SUV | Use the 1000A or 1200A Duralast model for sufficient cranking amps. |
Check the unit's charge level first. Press the battery status button. If you're under three indicator bars, recharge before attempting a jump.
A half-charged jump starter on a deeply discharged battery is the most common cause of failed jump-starts in user feedback.
Inspect the clamps. Look for cracked insulation, corroded teeth, or loose springs. Corroded clamp jaws drop current flow and give you a no-start even with a fully charged unit.
Charge It Up First: Pre-Use Checklist
Skip this step and you risk getting stranded with a dead jump starter. Aggregate user reviews consistently flag "no charge when I needed it" as the top complaint about portable units. A simple pre-use routine prevents it.
- Confirm the unit is at 75% charge or higher before any trip.
- Recharge after every use, even a successful three-second crank.
- Top up every one to three months during storage.
- Store the unit inside the car, not the trunk, in extreme cold.
- Verify the clamps and cables show no visible damage.
If you own a Duralast combo unit with a built-in air compressor, check the tire chuck and hose too. Cold storage ages rubber faster than plastic.
The Step-by-Step: How to Use a Duralast Jump Starter Safely
This is the workflow that gets it right every time. Move through the steps in order. If the unit beeps or flashes red at any point, stop and diagnose before continuing.
| Step | Action | Why it matters |
|---|---|---|
| 1 | Park in neutral (manual) or park (automatic). Turn off the ignition and all accessories. | Prevents electrical backfeed during cranking. |
| 2 | Power on the Duralast unit. Check the battery indicator is at three or more bars. | A weak jump starter can damage itself on a hard crank. |
| 3 | Locate the battery. Identify the positive (+) and negative (-) terminals. | Polarity mistakes trip reverse polarity protection and abort the start. |
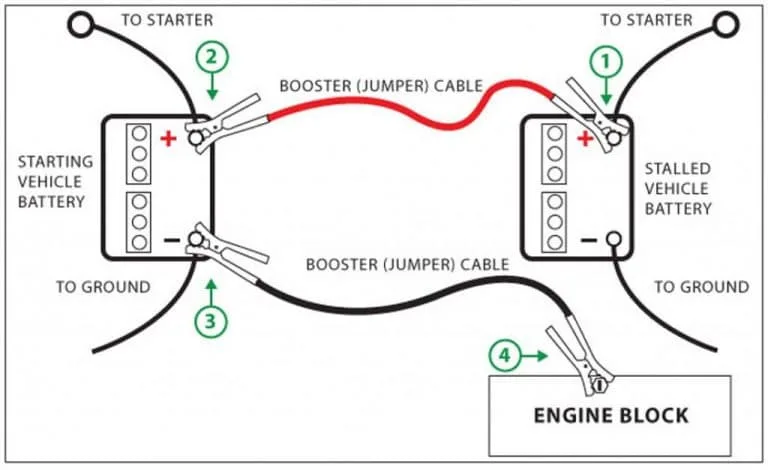
| 4 | Connect the red clamp to the positive terminal. Wiggle it to ensure a solid bite. | Loose connection = no current transfer. |
| 5 | Connect the black clamp to an unpainted metal ground point on the engine block or chassis. | Grounds the circuit away from any battery gas. |
| 6 | Wait for the green ready light or "safe to start" indicator. | Confirms polarity is correct and current is flowing. |
| 7 | Crank the engine in three to five second bursts. | Longer cranking overheats the jump starter's internal cells. |
| 8 | Once the engine starts, disconnect the black clamp first, then the red. | Reverse order prevents accidental short across the clamps. |
| 9 | Let the engine run for 15 to 20 minutes to recharge the car's battery. | Restores enough charge for a restart without the jump starter. |
| 10 | Recharge the Duralast unit the same day. | Lithium packs held at zero degrade faster than topped-off ones. |
If the engine doesn't fire after three crank attempts, stop. Continuous cranking without rest overheats the jump starter's lithium cells and can trip its internal protection circuit. Wait two to three minutes, then try again.
If three rounds still don't work, the issue isn't charge. It might be a bad starter motor, corroded terminals, or a fuel problem. Time to call for service.
Connecting the Clamps: Positive, Negative, and Ground Point
This is where most beginners slip up. Polarity mistakes, wrong ground points, and clamp order errors account for nearly every "the jump starter didn't work" complaint in user feedback. Let's walk through it clean.
Positive First, Always
Connect the red clamp to the positive (+) battery terminal first. The terminal is usually marked with a plus sign, a red cover, or both. Push the clamp down and twist slightly so the teeth bite through any surface corrosion.
If you see heavy green or white buildup on the terminal, scrape it off with a key or wire brush before clamping. Corrosion acts like insulation. The clamp looks connected, but the current isn't actually transferring.
A bad connection at the positive terminal is one of the top three causes of failed jump starts in cold weather.
Ground Goes on Metal, Not the Negative Terminal
This is the single biggest tip most people miss. Connect the black clamp to an unpainted metal surface on the engine block or chassis, away from the battery, fuel lines, and moving parts.
Good ground points include:
- An engine lift bracket
- A bare metal bolt on the chassis
- The alternator bracket
- A dedicated ground stud (if equipped)
Why not the negative terminal directly? Two reasons. First, batteries off-gas hydrogen.
A spark near the vent can ignite it. Second, connecting the negative clamp last means any spark happens at the ground point, not at the battery. Safer all around.
If You Hear a Beep or See a Red Light
Stop. The Duralast unit has reverse polarity protection and will refuse to push current if the clamps are crossed. Disconnect both clamps, recheck your terminal markings, and reconnect.
The green ready light should appear within a few seconds of correct hookup.
Final Check Before Cranking
Run through this quick mental checklist:
- Red clamp on positive, confirmed
- Black clamp on bare metal ground, confirmed
- Jump starter powered on, confirmed
- Green ready light visible, confirmed
- Vehicle in park or neutral, parking brake set, confirmed
If all five check out, you're safe to crank.
When to Use Boost or Override Mode
Most Duralast jump starters have a button labeled Boost, Override, or Force Start. Pressing it bypasses the smart detection system. That sounds useful, but it's also the easiest way to fry something if you use it wrong.
When Override Is the Right Call
Use Boost or Override mode only when:
- The battery is so dead the jump starter can't detect any voltage
- You've connected the clamps correctly but the green ready light never appears
- You need to crank an engine with a deeply discharged cell
In every other scenario, the standard start mode is safer and sufficient. Override mode pushes current without confirming battery condition. It works, but it removes a layer of protection.
When to Avoid Override
Don't press Boost if you're not sure the clamps are on the right terminals. Reverse polarity in override mode can fry the jump starter's internal board. According to OSHA battery handling guidance, damaged or leaking automotive batteries should never receive a forced jump.
The off-gassing risk is real.
If you're a beginner and the green light isn't showing, double-check your connections first. Skip override until you're confident the polarity is correct.
Cranking the Engine Without Damaging the Unit
Three to five seconds is the safe cranking window. Anything longer risks overheating the jump starter's lithium battery and force-shutting it down mid-crank.
Here's the rhythm that works:
- Crank for three to five seconds
- Release and wait one to two minutes
- Repeat up to three times if needed
- Stop and diagnose if the engine still won't fire
What Happens If You Over-Crank
The internal protection circuit will cut output. You'll see the unit power off or flash an error light. It usually resets after a few minutes of cooling.
But repeated over-cranking permanently lowers the lithium pack's capacity.
A well-maintained Duralast unit should deliver 300 to 1,000 jump cycles before noticeable capacity loss. Mishandled units hit that wall in a fraction of the time.
Disconnecting the Jump Starter the Right Way
Once the engine fires, leave it running. Now disconnect, in reverse order from how you connected.
| Order | Step |
|---|---|
| 1 | Disconnect the black clamp from the ground point |
| 2 | Disconnect the red clamp from the positive terminal |
| 3 | Power down the jump starter |
| 4 | Stow clamps and unit |
Why Reverse Order Matters
The last clamp you connected is closest to live current. Pulling it first risks a spark near the battery. Pulling the ground clamp first moves any spark away from off-gassing hydrogen.
It's a small detail, but it's the difference between a clean disconnect and a fire risk.
Don't let the red and black clamps touch each other after disconnection. A momentary short can spark, weld, or blow the unit's internal fuse.
Mistakes That Can Fry Your Jump Starter (or Your Car)
User feedback and warranty claim patterns point to the same handful of mistakes. Avoid these and your unit will last years.
- Connecting the black clamp to the negative terminal instead of a ground point
- Cranking for 15+ seconds without a break
- Using Boost mode to "fix" a connection you haven't checked
- Letting the unit sit discharged for months
- Storing it in a freezing car in winter with a partial charge
- Jump starting a damaged, leaking, or swollen battery
- Touching the red and black clamps together while powered on
The Costly One: Reverse Polarity
Hooking the clamps backward doesn't usually damage the car. Modern vehicles have fusible links that blow before anything serious happens. But it can permanently damage the jump starter's control board.
Repairs often cost more than a replacement unit.
If you ever see smoke, smell burning plastic, or notice the unit getting hot after a failed jump, stop using it immediately. The internal cells may be compromised.
What to Do If the Jump Starter Won't Power On
This is the most common panic moment. You grab your Duralast unit, press the power button, and nothing happens. Before assuming it's dead, run through this quick diagnostic.
Check the Obvious First
- Is the unit charged? Plug it into a wall outlet and wait 15 minutes.
- Is the power button held long enough? Some models require a two to three second press.
- Is there a safety lock switch? Flip it.
- Are the clamps touching each other? Some units auto-shut off when they sense a short.
Deeper Issues
If the unit still won't power on after charging, the internal lithium cell may have dropped below its safe voltage threshold. This happens when the unit sits unused for a year or more without a top-up. Per the TSA's lithium battery travel guidance, deeply discharged lithium batteries can become unsafe and may not recover with a standard charger.
A completely dead Duralast unit that won't respond to charging is generally not worth repairing. Replacement is the safer route. AutoZone typically stocks replacement units in the same 800A to 1200A range as of 2026.
Troubleshooting: Clamp Lights, Reverse Polarity, and No Start
The lights on a Duralast unit aren't decoration. They're diagnostic tools. Here's what each signal typically means and what to do about it.
Green Light On
Polarity is correct, voltage is detected, and the unit is ready to crank. Proceed.
Red Light or Beeping
Reverse polarity or a poor clamp connection. Disconnect both clamps, recheck the terminal markings, and reconnect to a clean ground point.
No Light At All
The jump starter isn't detecting a battery. Could be a fully dead cell, a broken ground strap, or a unit that's lost its own charge. Press Boost if available.
Unit Cuts Output Mid-Crank
Over-current or over-temperature protection tripped. Wait three to five minutes, then try again with shorter crank bursts.
Using a Duralast Jump Starter in Cold Weather
Cold cuts lithium battery capacity hard. At 0°F, a fully charged Duralast unit delivers roughly 60% of its rated cranking amps. At -20°F, that drops further.
This is the most common scenario for dead jump starters in northern climates.
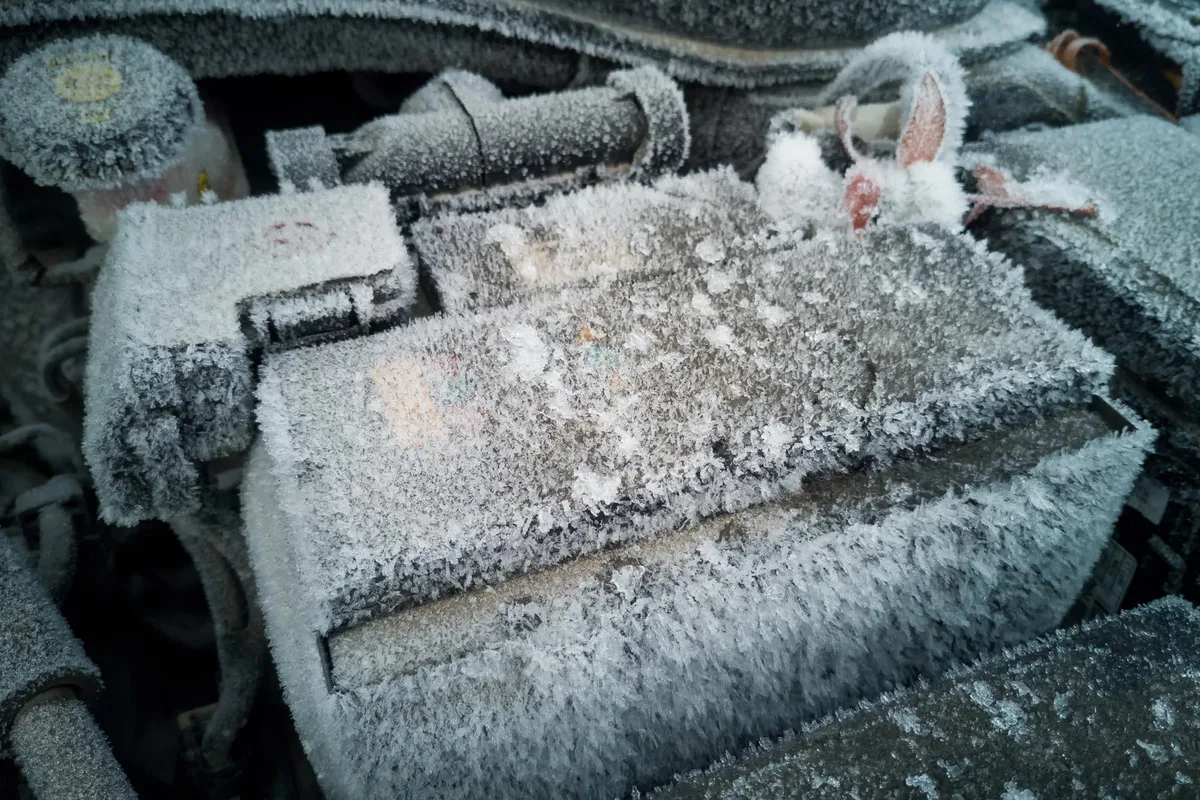
Three habits keep cold-weather jumps reliable:
- Store the unit inside the cabin, not the trunk
- Top up the battery every month during winter
- Warm the unit briefly with the car's heater before cranking if it's been in sub-zero temps
Caring for the Battery So It Lasts Years
Lithium-ion cells hate two things: full discharge and high heat. Avoid both and your Duralast unit will outlast your car's battery.
Recharge after every jump. Don't wait until the next trip. Top off the unit every one to three months during storage.
Keep it out of direct sunlight in summer. A glove box or center console is ideal for year-round storage.
Jump Starter vs. Jumper Cables vs. Battery Charger
These three tools solve overlapping problems, but they're not interchangeable. Picking the right one depends on whether you need a fix-now solution or a slow fix.
| Tool | Best for | Speed | Needs a second car |
|---|---|---|---|
| Portable jump starter | Emergency start, solo driver | Instant | No |
| Traditional jumper cables | Quick start with another vehicle running | Instant | Yes |
| Battery charger (trickle/maintainer) | Recharging a weak battery overnight | 4 to 24 hours | No |
A Duralast jump starter wins for emergencies. A trickle charger wins for long-term battery health. Cables win when another driver is willing to help and you don't own a portable unit.
Duralast Jump Starter Specs Compared (800A vs. 1000A vs. 1200A)
The number on the box tells you peak cranking amps. Higher isn't always better. Match the unit to your engine size and use case.
| Model | Peak amps | Engine coverage | Best for |
|---|---|---|---|
| Duralast 800A | 800A | Up to 5.0L gas, 2.0L diesel | Sedans, compact SUVs, daily drivers |
| Duralast 1000A | 1000A | Up to 6.0L gas, 3.0L diesel | Full-size trucks, larger SUVs |
| Duralast 1200A | 1200A | Up to 8.0L gas, 4.0L diesel | Heavy-duty trucks, diesels, fleet use |
The 800A covers most commuters. The 1000A is the sweet spot for owners of full-size pickups and SUVs. The 1200A earns its keep in cold climates and on heavy engines where every crank amp matters.
Can You Fly With a Duralast Jump Starter?
Yes, but with limits. Per TSA rules, lithium batteries under 100 watt-hours can go in carry-on luggage. Larger packs between 100 and 160 watt-hours need airline approval.
Most Duralast jump starters fall under 100Wh and fly without issue.
Packs over 160Wh are banned entirely from commercial flights. If you travel internationally with a heavy-duty model, check the watt-hour rating on the label first. A portable jump starter in checked luggage risks damage and potential fire.
Always carry it on.
Real Scenarios: When the Standard Steps Change
Sometimes the textbook fails you. Here are three real-world variations that call for different judgment.
Scenario 1: Engine Cranks but Dies Immediately
The jump worked, the engine fired, then quit. Your car battery is holding zero charge. Likely cause is a bad alternator, not a bad battery.
Drive immediately to a service shop or keep the engine running until you arrive. The alternator isn't recharging the system.
Scenario 2: Nothing Happens When You Crank
No sound, no click, no dash lights. The issue is the starter motor or main fuse, not the battery. A jump starter can't fix a mechanical failure.
Call for a tow.
Scenario 3: Vehicle Has a Stop-Start System
Modern start-stop vehicles run dual batteries. The Duralast unit should connect to the main 12V battery under the hood, not the auxiliary battery. Check the owner's manual for the correct jump point.
Expert Tips From Aggregate User Feedback
Patterns across thousands of user reviews reveal a few habits that separate reliable use from constant frustration.
- Keep the unit in the cabin, not the trunk. Heat and cold both reduce lithium lifespan.
- Label the unit with the recharge date every time you top it off.
- Replace the unit every three to four years for frequent drivers. Capacities fade even with good care.
- Buy a unit rated 200A higher than your engine's minimum. Headroom matters in cold weather.
Final Recommendation
A Duralast jump starter is one of the cheapest insurance policies you can own. Match the model to your engine size, keep it charged, and follow the clamp order. You'll never wait for a stranger with cables again.
Frequently Asked Questions
How long does a Duralast jump starter hold its charge?
Lithium-ion Duralast units typically hold a charge for three to six months in storage. Cold temperatures shorten that window. Top up every one to three months for reliable readiness.
Can a Duralast jump starter start a completely dead battery?
Yes, with Boost or Override mode engaged. Standard mode may not recognize a battery below roughly two volts. Boost bypasses that check and pushes current directly.
Is it safe to jump start a car in the rain?
Light rain is fine. Avoid standing water around the clamps or battery. Water conducts current and increases the chance of a short or shock.
A covered garage or awning is the safest spot.
How many times can a Duralast jump starter start a car on one charge?
Manufacturer specs confirm roughly 10 to 20 starts per full charge depending on engine size and temperature. A small sedan in mild weather might hit the high end. A diesel truck in freezing temps might only manage three to four.
Can I use a Duralast jump starter on a motorcycle or lawn equipment?
Yes. The 12V output works on any lead-acid or AGM battery in that range. Use the lowest amp model that fits the engine to avoid over-currenting small electrical components.
What's the difference between Duralast Gold and standard Duralast jump starters?
Duralast Gold units typically carry higher peak amps, longer cycle life, and beefier clamps. Standard Duralast models cover most commuter needs at a lower price point. Pick Gold if you drive a larger engine or want a longer warranty.