How to start jump rope: Easy guide
Most people don't need a fancy rope or a coach to learn how to start jump rope. They need three things: the right rope length for their height, a forgiving surface, and a simple beginner routine they can actually stick to. Speed and tricks come later, after your wrists learn the rhythm and your calves stop screaming.
A standard PVC speed rope runs about $10 to $20 as of 2026, and ACE-funded research ranks rope skipping around 9 to 12 calories per minute for a 150-pound adult at a steady pace. That's the same neighborhood as running a 10-minute mile. Below, we'll get you from absolute zero to your first clean 100 jumps in about a week.
Quick Answer
To start jump rope, pick a PVC speed rope sized to your height, stand on a wood floor or jump rope mat, and practice a relaxed two-foot bounce. Start with 30-second sets, rest 60 seconds, repeat 5 to 8 times. Aim for 3 sessions your first week.
What Type of Rope Should You Start With?
Your first rope should be cheap, light, and adjustable. Not a weighted rope. Not a leather boxing rope.
Not a beaded rope your favorite CrossFit athlete swears by. Those all have a place, just not on day one.
A PVC speed rope with a thin 2.5 to 3.0 mm cord and ball-bearing handles is the right starting tool for most beginners. Here's why:
- Light handles (~80 to 120 g) keep your shoulders and forearms from gassing out before your legs do.
- Thin PVC cable swings fast, which forces clean form. A thick rope masks bad wrist action.
- Ball-bearing swivels stop the rope from twisting up mid-set, which is the #1 frustration beginners complain about in reviews.
- Adjustable length matters because the wrong length will sabotage your technique (more on that next section).
Rope Style Comparison at a Glance
| Rope Type | Best For | Cord Diameter | Typical Price (USD) |
|---|---|---|---|
| PVC speed rope | Beginners, HIIT, general cardio | 2.5 to 3.0 mm | $8 to $20 |
| Beaded rope | Kids, outdoor use, learning rhythm | 5 to 7 mm beads | $10 to $25 |
| Weighted rope (0.5 to 1 lb) | Strength-endurance, NOT beginners | 3.0 to 4.0 mm | $25 to $50 |
| Steel cable / competition rope | Double unders, advanced speed | 1.8 to 2.5 mm | $20 to $40 |
| Leather boxing rope | Boxers, footwork drills | 4 to 5 mm | $25 to $60 |
Quick decision logic:
- If your goal is general fitness or weight loss → PVC speed rope.
- If you're a boxer or martial artist training footwork → a slightly heavier beaded or thin leather rope.
- If you're chasing CrossFit double unders → wait until you can do 200 clean single bounces, then switch to a steel cable.
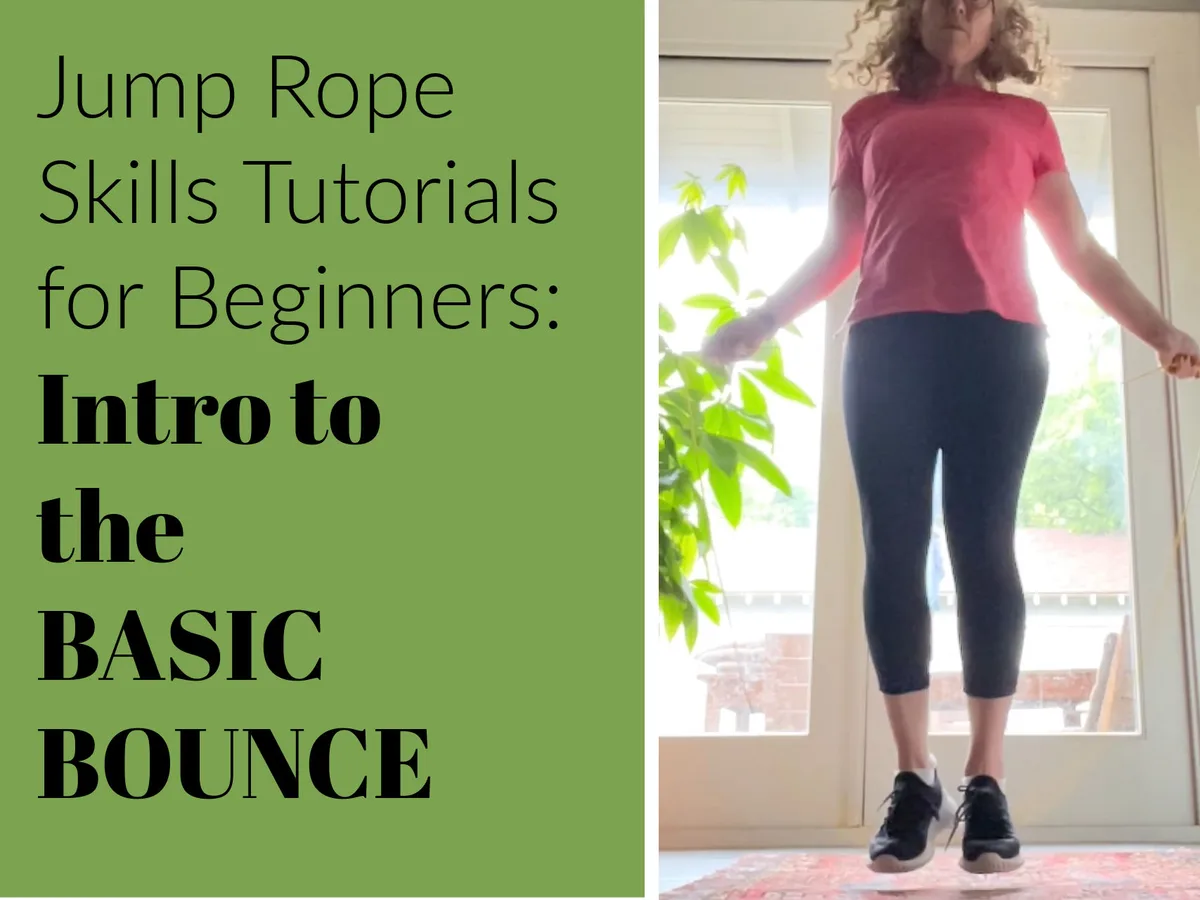
Picking the Correct Rope Length for Your Height
A rope that's too long drags on the ground and forces you to jump higher. A rope that's too short whips your shins and breaks your flow. Both will make you quit in week one.
There are two reliable ways to size a rope:
Method 1: The Armpit Test (Most Common)
- Stand with both feet on the middle of the rope.
- Pull the handles straight up toward your shoulders.
- The handles should reach your armpits, give or take one inch.
Method 2: The Chest Test (Slightly Tighter)
- Same setup, feet on the rope.
- Pull handles up to chest level (nipple line).
- This gives you a faster, tighter rope. Good for short jumpers under 5'4".
Quick Sizing Chart by Height
| Your Height | Recommended Rope Length (handles + cable) |
|---|---|
| 4'8" to 5'0" | ~7 ft (2.13 m) |
| 5'1" to 5'4" | ~7.5 ft (2.29 m) |
| 5'5" to 5'8" | ~8 ft (2.44 m) |
| 5'9" to 6'0" | ~8.5 ft (2.59 m) |
| 6'1" to 6'4" | ~9 ft (2.74 m) |
Most adjustable PVC ropes let you cut the cable and re-tighten the screw-in handle. Always measure before you cut. If your knees or lower back hurt while jumping, your rope is almost always too short.

Choosing a Rope Style Based on Your Goal (Speed, Weighted, Beaded, Boxing)
Once you can do 100 continuous bounces without tripping, your choice of rope shifts. The right tool depends on what you're training for.
If Your Goal Is Weight Loss or General Fitness
Stick with the PVC speed rope. Add a jump rope mat (6 to 10 mm thick) if you're on hardwood or tile. The American Council on Exercise notes rope skipping burns roughly 0.1 to 0.14 kcal per kg per minute at moderate pace, which puts a 70 kg person at 7 to 10 kcal per minute.
Sprint intervals push that higher.
If Your Goal Is Boxing or MMA Footwork
Boxers and MMA fighters traditionally use a slightly heavier rope, either thin leather or a thicker beaded nylon rope. The extra weight slows the swing slightly, which forces deliberate foot placement. Many gyms use 9-foot ropes for boxers in the 5'8" to 6'0" range, slightly longer than the fitness chart above.
If Your Goal Is CrossFit or Double Unders
You'll graduate to a thin steel cable rope (1.8 to 2.2 mm) with precision ball bearings. Steel cuts air, lets the rope spin twice per jump, and is unforgiving on bad form. Don't switch to steel until your single-bounce rhythm is locked in.
If Your Goal Is Ankle Rehab or Joint-Friendly Cardio
Use a thicker beaded rope. The beads add gentle resistance, slow the tempo, and give your ankles more time to react. It feels almost meditative compared to a speed rope.
Match the rope to the goal, not to the Instagram post that made you want to start jumping in the first place.
What to Wear and Where to Jump
Most beginners skip this section and then blame the rope when their shins hurt or their handles slip mid-set.
Footwear
Wear flat-soled cross-training shoes, not running shoes. Running shoes have a tall stack and a soft heel, which absorb the landing impact unevenly and can aggravate your Achilles. A flat, stable sole keeps your foot mechanics neutral.
Clothing
Anything athletic works. The bigger issue is sweat on the handles. If your hands sweat a lot, look for ropes that include a grippy silicone or knurled aluminum handle.
Bare plastic handles get slippery fast.
Surface
This matters more than people realize.
- Best: sprung wood gym floor, jump rope mat, or low-pile indoor turf.
- Okay: flat hardwood with a mat.
- Bad for joints: concrete, asphalt, tile without a mat.
- Bad for the rope: anything abrasive will shred a PVC cable in weeks.
You need roughly a 6 by 6 foot clear space. Check the ceiling height too. Loft apartments with low ceilings force you to shorten the cable, which then forces poor form.
When to Skip the Workout
If you have an active shin splint, Achilles tendon pain, or a recent ankle sprain, do not push through it. The American Academy of Orthopaedic Surgeons advises returning to impact loading only when pain-free walking is fully restored. For general cardiovascular readiness, the CDC's physical activity guidelines recommend a clinical clearance check if you've been sedentary and have known cardiovascular risk factors.
Warming Up Before Your First Session
Cold calves and stiff ankles are the two biggest reasons beginners hate their first jump rope session. A 5-minute warm-up fixes both.
Here's the sequence most boxing gyms use before rope work:
- Ankle circles, 10 each direction per foot.
- Calf raises, 2 sets of 15. Slow on the way down.
- Light jogging in place, 60 seconds. Keep it gentle.
- Toe raises, 2 sets of 15. Builds the front of the shin.
- Wrist circles, 10 each direction. Skip this and you'll feel it by set three.
Your warm-up should leave you slightly warm and breathing a bit harder, not tired. If you can't hold a conversation, you've gone too far. Save the heavy breathing for the actual rope work.
The Basic Bounce: Posture, Foot Position, and Arm Mechanics
Most beginners try to jump like they're skipping playground rope: big arm circles, high knees, whole body bouncing. That works for a 5-year-old. For an adult learning proper form, you want quiet feet and tiny wrist flicks.
Foot Position
- Toes pointed slightly forward, not splayed out.
- Knees soft, never locked.
- Heels barely leave the ground. You're aiming for 1 to 1.5 inches of clearance, not a basketball hop.
- Land on the balls of your feet, then let the heel kiss down.
Arm Mechanics
- Elbows pinned to your ribs. They should not flare out past 45 degrees.
- Forearms out at about 90 degrees from your upper arms.
- Wrists do the work. Small circles, like turning a door handle.
- Shoulders stay down and relaxed. If they're up by your ears, you're working too hard.
Posture Checklist
Stand tall, chest up, gaze forward (not at your feet). Slight forward lean from the ankles, not the waist. Your core should be lightly braced, like you're about to be poked in the stomach.
Common Form Errors
| What You See | What It Usually Means | Quick Fix |
|---|---|---|
| Rope slaps the ground in front of you | Rope is too long | Shorten by 2 to 4 inches |
| Whipping shins | Rope is too short, or hands too low | Lengthen rope, raise elbows |
| Giant arm circles | You're using shoulders instead of wrists | Slow down. Tiny circles. |
| Landing heavy on heels | Jumping too high | Aim for 1 inch off the ground |
| Tripping every 5 jumps | Rope and body out of sync | Pause, breathe, reset grip |
Your First Three Beginner Drills (Basic Bounce, Running Step, High Knees)
Don't try to learn five variations your first day. Pick one. Get bored with it.
Then move to the next.
Drill 1: The Basic Bounce (Two-Foot Bounce)
What it is: Both feet leave the ground together, land together.
Why start here: It's the simplest rhythm to internalize. One rotation, one bounce. Even count.
How to do it:
- Rope behind you.
- Wrists flick forward, rope passes over your head.
- Jump as it approaches your toes.
- Land softly, immediately jump again.
- Repeat.
Target for week 1: 30 seconds continuous without tripping.
Drill 2: The Alternating Foot Step (Running Step)
What it is: Like jogging in place, but the rope passes under once per foot strike.
Why it's useful: It mimics the footwork of running and boxing. It also reduces impact because each foot lands independently.
How to do it:
- Start with the rope behind you.
- Lift right foot as rope passes under.
- Then left foot, then right, then left.
- Knees drive up to about hip height.
Target for week 1: 20 seconds continuous. Don't worry about speed. Rhythm first, tempo later.
Drill 3: High Knees (Speed Step)
What it is: Like the running step, but the knees come up higher and the tempo increases.
Why it's useful: Builds anaerobic conditioning fast. Also great for athletes returning from running injuries because the impact stays low.
How to do it:
- Same setup as the running step.
- Drive knees up toward your chest with each rotation.
- Stay light on the toes.
- Keep core tight to protect the lower back.
Target for week 1: 10 to 15 seconds max. It's high-intensity. You'll know.
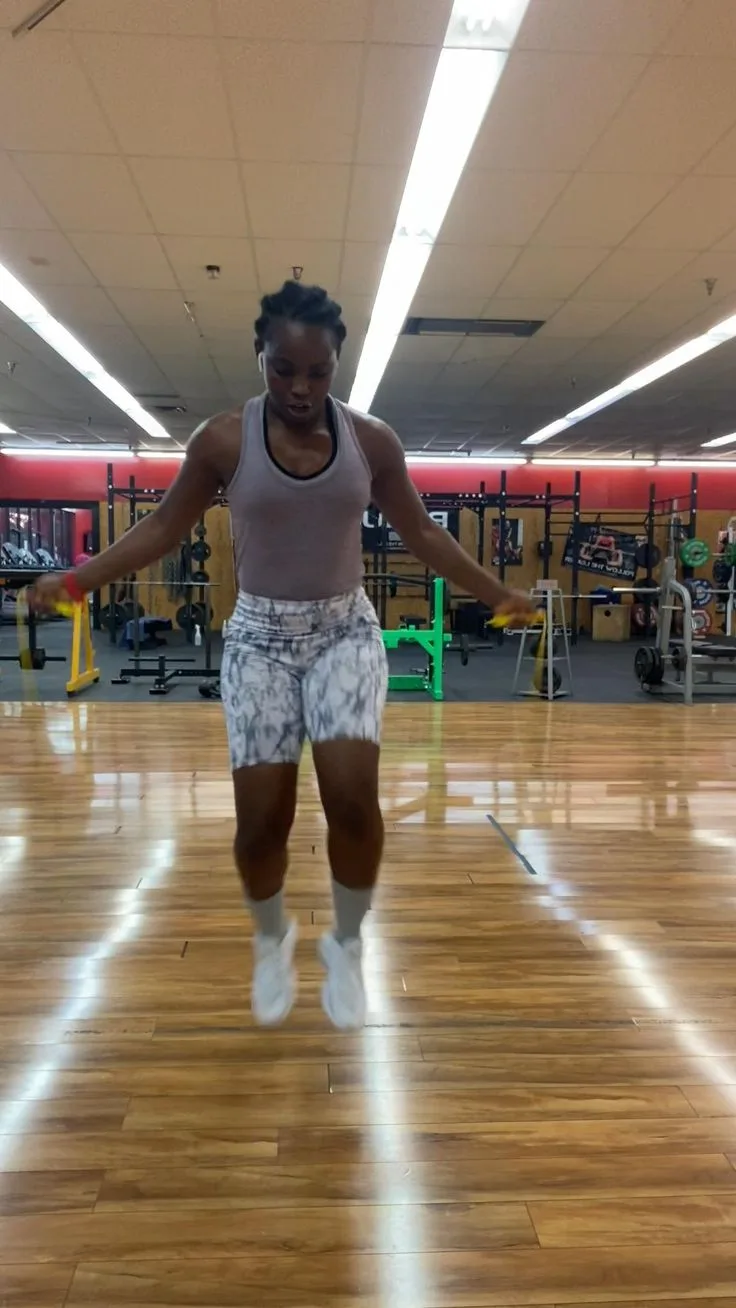
A Realistic First-Week Jump Rope Plan
Forget "15 minutes a day" advice. That's how you fry your shins and quit by day four.
Here's the structure most coaches use with new jumpers:
| Day | Session Length | Sets × Reps | Focus |
|---|---|---|---|
| Day 1 | 5 to 8 minutes | 5 × 30s on / 60s rest | Basic bounce, learn the rope |
| Day 2 | Rest | — | Recovery |
| Day 3 | 8 to 10 minutes | 6 × 30s on / 60s rest | Add alternating foot step |
| Day 4 | Rest | — | Recovery |
| Day 5 | 10 minutes | 5 × 45s on / 60s rest | Mix drills, longer sets |
| Day 6 | Optional | — | Light play, double unders off |
| Day 7 | Rest | — | Full recovery |
By the end of week one, you should hit 100 continuous basic bounces at least once. If you can, you're ahead of roughly 80% of beginners.
Common Beginner Mistakes and How to Fix Them
Most early frustration comes from the same six errors. Work through this list and you'll save yourself weeks of trial and error.
- Jumping too high. You're doing way more work than you need to. Aim for clearance so small a piece of paper would barely slide under your feet.
- Using your arms to swing the rope. Your shoulders will be toast by set three. Slow the rope down and let your wrists do the rotation.
- Skipping warm-up. Cold calves cramp. A 5-minute warm-up fixes it every time.
- Going too long too soon. Ten minutes sounds short. For a brand-new jumper, it's a brutal first session. Start with 30 seconds of work and build up.
- Wearing running shoes. The thick heel changes your biomechanics. Cross-training shoes or even flat-soled sneakers work better.
- Skipping the mat on hardwood. Your knees and downstairs neighbors will both complain.
Scaling Your Sessions: How Long, How Often, How Hard
Once you're hitting 100 continuous basic bounces, the question becomes: how do I keep progressing without burning out?
Three Progression Levers
- Volume (more jumps). Add one 30-second set per week until you're at 8 to 10 sets.
- Density (less rest). Drop rest from 60s to 45s to 30s across four weeks.
- Complexity (new moves). Add criss-cross, double bounce, or boxer step one at a time.
A Reasonable Long-Term Schedule
| Level | Continuous Bounce Goal | Session Length | Frequency |
|---|---|---|---|
| Beginner (weeks 1 to 2) | 100 jumps | 5 to 10 min | 3x / week |
| Intermediate (weeks 3 to 6) | 300 jumps | 10 to 15 min | 4x / week |
| Advanced (weeks 7+) | 500+ jumps | 15 to 25 min | 4 to 5x / week |
| Double under phase | 50 unbroken DU | 15 to 20 min | 3x / week |
Jump Rope vs. Other Cardio: When It Makes More Sense
Jump rope isn't always the best cardio tool. Here's how it stacks up honestly.
Jump Rope vs. Running
Rope skipping burns similar calories per minute to a 6 to 8 mph run, but the impact is concentrated in the calves and ankles rather than the knees. If your knees hate running, rope can be a smart swap. If your shins and calves are your weak link, stick with running.
Jump Rope vs. Rowing
Rowing is non-impact and works about 86% of your muscles. Jump rope is high-impact and mostly lower-body and conditioning. For pure calorie burn per minute, they're roughly equivalent.
For full-body muscular endurance, rowing wins.
Jump Rope vs. Burpees
Burpees win for full-body strength plus cardio. Jump rope wins for pure conditioning and footwork. Most HIIT programs mix both.
When Jump Rope Wins
- You're short on space.
- You travel a lot and need portable cardio.
- You want to improve footwork for boxing or basketball.
- You have 15 minutes and want maximum heart rate response.
When It Doesn't
- You're recovering from a lower-leg injury.
- You have a low ceiling and can't shorten the rope enough.
- You hate the learning curve (be honest with yourself).
Joint Pain, Shin Splints, and When to Stop
Sharp pain is a stop sign. Soreness is fine. Here's how to tell them apart.
- Shin splints: dull, aching pain along the front of your shin during or after jumping. Usually from too much volume too fast. Reduce session length by 50% for a week.
- Achilles pain: tight, burning at the back of the heel. Often from calf tightness. Add eccentric calf drops and shorten sessions.
- Knee pain: if it's on the inside of the kneecap, it's often patellar tendinitis from overwork. Ice, rest, reassess volume.
- Lower back tightness: usually core bracing is too soft. Engage your abs before each set.
- Foot or ankle sharp pain: stop immediately. That's a sign of stress or strain. Get it checked before returning.
If pain changes your landing pattern, you're done for the day.
Gear Upgrades Worth It After 30 Days
Once you're consistent for a month, a few upgrades actually matter. Skip them before then.
| Upgrade | Why It Matters | Typical Cost |
|---|---|---|
| Jump rope mat | Joint protection, noise reduction | $30 to $60 |
| Cross-training shoes | Better ankle stability | $60 to $120 |
| Precision ball-bearing handles | Faster rotation, fewer tangles | $20 to $40 |
| Steel cable rope | For double unders | $25 to $45 |
| Foam grip handles | For sweaty hands | $10 to $20 |
Buy the mat first if you're on hardwood. Buy better handles second if tangling frustrates you. Everything else can wait.
When to Buy a Mat (and When Not to Bother)
Buy a mat the moment you start jumping indoors more than three times a week. Skip it if you're strictly an outdoor jumper on grass or rubberized track.
A 6 to 10 mm thick jump rope mat absorbs landing shock, quiets the cable slap, and protects the rope from wearing down on hard floors. PVC cable on hardwood will fray in four to eight weeks of daily sessions.
If you live in an apartment, the mat also cuts the thudding impact on the ceiling below you. That's usually the moment neighbors stop complaining.
Caring for Your Rope So It Doesn't Snap Mid-Set
Most ropes die from neglect, not overuse. A few habits extend the life of any cable by months.
- Coil loosely after every workout. Tight wrapping kinks the cable.
- Wipe down handles with a dry towel. Sweat corrodes ball bearings over time.
- Store indoors. Cold garages make PVC brittle. Steel cables rust in damp spaces.
- Replace the cable when you see fraying at the handle screws. That's where 90% of breaks start.
- Rotate two cables if you're training daily. Letting one rest while using the other doubles its lifespan.
Adding Jump Rope to Your Current Workout
If you already lift, run, or do CrossFit, jump rope slots in cleanly without overloading your legs.
The smartest placements:
- Warm-up before lifting, 3 to 5 minutes of basic bounce. Primes the nervous system and warms the calves without burning glycogen you need for heavy sets.
- Active recovery on rest days, 10 minutes of easy alternating step. Keeps blood flowing without taxing joints.
- Finisher after a strength session, 5 rounds of 60 seconds on, 60 seconds off. Boosts conditioning without eating into recovery.
- Cardio swap on running days, if your knees or shins need a break. Same heart rate zone, lower impact per calorie.
Travel Workouts When You Can't Bring Your Mat
Hotel rooms, Airbnbs, and conference floors all have one thing in common: thin carpet or tile. Here's how to handle them.
Pick up a 9-foot travel rope that fits in a laptop bag. Bring a microfiber towel for your hands. Use the low-pile carpet as your landing zone.
Skip the beaded rope, since beads on carpet scuff fast.
A typical hotel session:
| Block | Drill | Time |
|---|---|---|
| Warm-up | Ankle mobility | 3 min |
| Main set | Basic bounce intervals | 8 min |
| Finisher | High knees sprint | 2 min |
| Cooldown | Calf stretch | 5 min |
Total: under 20 minutes. No mat, no excuses.
Your Next Step After 30 Days of Consistency
Once you've hit 30 days of three to four sessions a week, you've built the foundation. From here, your path forks.
If you love the cardio, push toward double unders or long-singles endurance (500+ unbroken bounces). If you love the feel, graduate to a steel cable and a precision handle setup. If you love the sport, jump into a freestyle or boxer-style flow with lateral movement and footwork patterns.
Whichever fork you take, the base you built in month one is the same: clean form, right-sized rope, smart volume. Keep that, and the rest of the journey is just fun.
Frequently Asked Questions
How long should a beginner jump rope?
Start with 5 to 8 minutes total, broken into 30-second sets with 60 seconds of rest. Build to 15 minutes within three to four weeks.
Is jump rope better than running?
For calorie burn per minute, they're similar. Jump rope adds coordination, footwork, and ankle strength. Running builds aerobic base more efficiently.
Both are good. Neither replaces the other.
How many calories does 10 minutes of jump rope burn?
Aggregate estimates from ACE-funded research put a 150-pound adult at roughly 100 to 140 calories in 10 minutes of moderate rope skipping. Sprint intervals push higher.
Can jump rope give you bigger calves?
It builds muscle endurance in the calves, which makes them look more defined. It won't add size like heavy weighted squats, but it will tone them visibly within six to eight weeks.
What if I keep tripping on the rope?
Nine times out of ten, your rope is the wrong length. Re-measure using the armpit test. The second most common cause is using your arms instead of your wrists.
Slow down and reset.
Is jumping rope bad for your knees?
Not in moderation on a forgiving surface. On concrete, in stiff shoes, with poor form, and with too much volume, yes, it can aggravate existing knee issues. Smart surface choice and gradual volume keep most people safe.
How often should a beginner jump rope?
Three days per week is the sweet spot for the first two weeks. After that, four days works for most people. Daily jumping is fine once your calves adapt, but start every other day to let tendons recover.
Do I need shoes for jump rope?
Yes, flat-soled cross-training shoes are best. Bare feet on hard floors risk bruising and impact injury. Running shoes work in a pinch but they shift your weight forward, which can irritate your Achilles.
Can jump rope help with weight loss?
Yes, when paired with a calorie deficit. Most people burn 100 to 160 calories per 10-minute session at moderate pace. The bigger win is that jump rope builds conditioning fast, so longer workouts feel easier over time.
How long until I can do double unders?
Most beginners hit their first double under somewhere between weeks three and eight. The fastest learners are usually people who already had strong rhythm from sports like tennis or boxing. Don't rush it.
Single-bounce consistency is the foundation.
Is jump rope safe for bad knees?
It depends on the injury. If your knees ache from running, switching to rope on a forgiving surface often helps. If you have a torn ligament or arthritis flare-ups, low-impact options like swimming or rowing are smarter.
Check with your physical therapist if you're unsure.