How to use a jump starter battery: Easy guide
A dead battery never warns you before it strikes. One morning your car cranks fine, the next it just clicks, and now you're stuck. Learning how to use a jump starter battery turns that moment from a 90-minute wait for roadside help into a 5-minute fix you handle yourself.
The process is simple, but the small choices matter. Connect the clamps in the wrong order and you risk frying your vehicle's ECU. Pick a unit with too few peak amps and it won't even crank a V8.
As of 2026, the UL 2743 standard governs portable jump starter safety, and most modern lithium units ship with spark-proof clamps and reverse-polarity alarms built in. We'll walk through exactly which type to use, when, and how.
Quick Answer
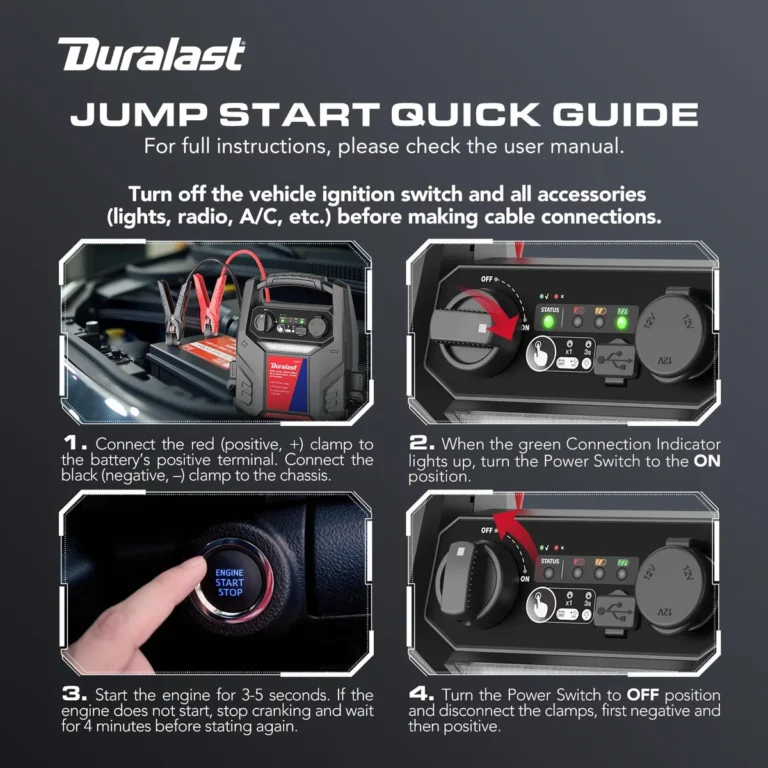
Power on the jump starter and confirm it's charged. Connect the red clamp to the dead battery's positive (+) terminal, then connect the black clamp to an unpainted metal ground on the engine block. Wait 30 seconds, crank the engine for 3 to 5 seconds, and disconnect in reverse order.
Why a Jump Starter Works (and Why It Sometimes Doesn't)
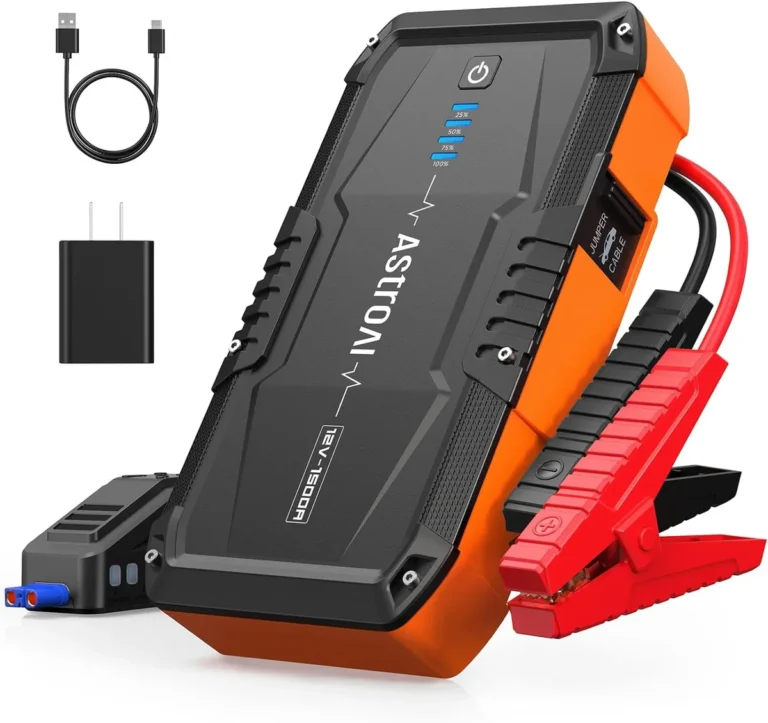
A portable jump starter is a compact lithium battery pack that delivers a short, high-amperage burst to crank a dead engine. Think of it as a charged reserve tank for your starter motor. When the unit pushes current through your battery cables, the starter spins, the engine turns over, and the alternator takes over to recharge everything.
But here's the catch: not every dead battery plays nice with a jump starter. If the battery voltage drops below roughly 3 volts, some smart units refuse to fire up because they can't confirm a safe circuit. That's a safety feature, not a defect.
Cold weather makes it worse, since lithium cells lose usable capacity below freezing, and engine oil thickens, demanding more cranking amps than the same engine needs on a summer day.
The fix is usually one of three things. Use a unit with a manual override or "Force Start" button. Warm the jump starter indoors before the attempt.
Or accept that some batteries are too far gone and need a full replacement.
What's Actually Inside a Modern Jump Starter
Open the case and you'll find three core components working together. A lithium-ion or LiFePO4 battery cell stores the energy. A control board manages output, monitors polarity, and shuts the unit down if something's wrong.
Smart clamps with built-in circuitry handle the connection to your vehicle.
The control board is the brain. It watches for reversed clamps, short circuits, and overheating. That's why cheaper units without certification can fry a car's computer, while a UL 2743-certified model cuts power the instant it senses a problem.

What You'll Need Before You Start
Walking up to a dead car without prepping first is how people cross their cables. A 90-second check before you touch a clamp saves you from sparking the terminals, draining your jump starter, or discovering you're underpowered for the engine size.
Reading Your Jump Starter's Specs
Three numbers matter most. Peak amps tells you the surge capacity, the muscle behind the initial crank. Cranking amps tells you the sustained output over 30 seconds, which matters more for diesel engines.
Battery capacity, measured in mAh or watt-hours, tells you how many jumps you get per charge.
For most passenger cars, 1000 peak amps is the floor. Trucks and SUVs with V6 or V8 engines want 1500 to 2000 peak amps. Diesel engines, especially the 6.0L Powerstroke or 3.0L EcoDiesel crowd, typically need 2000+ peak amps or a dedicated commercial booster.
Checking Your Vehicle's Battery Type
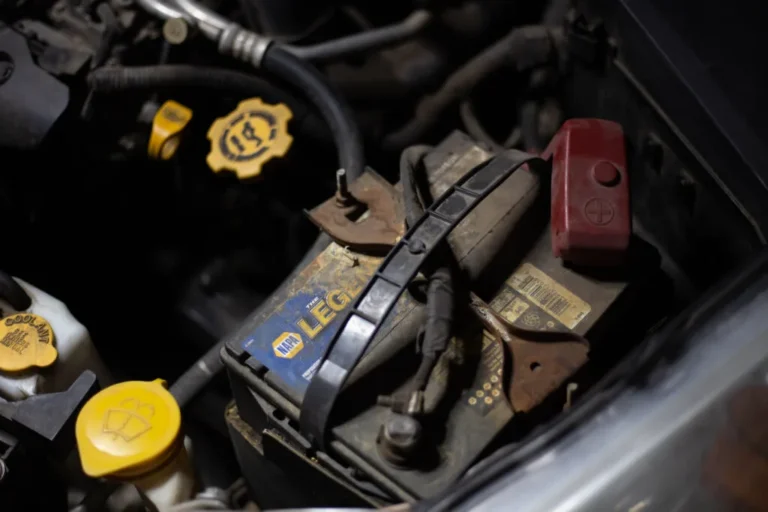
Pop the hood and look at the battery label. You'll see one of four common types: standard flooded lead-acid (the cheapest, most common), AGM (absorbed glass mat, common in start-stop vehicles), EFB (enhanced flooded battery), or gel cell (rare in modern cars).
Most jump starters handle all four without issue. The exception is deeply discharged AGM batteries below 10 volts, which some units refuse to engage. If your owner's manual flags a battery management system or voltage-sensitive ECU, look for a unit with a manual override or "Force Start" mode.
Quick Pre-Jump Checklist
- Confirm the jump starter shows at least 50% charge
- Inspect both clamps. No cracked insulation, no corrosion on the jaws
- Check the vehicle battery for cracks, leaks, or bulging. If you see any, stop and call for a tow
- Make sure the ignition is off, all accessories are off (lights, radio, climate), and the transmission is in Park (automatic) or Neutral (manual)
The Core Decision: Which Connection Method Fits Your Situation
Here's where the branching matters. The "right" way to connect depends on what you're dealing with. A healthy-but-discharged battery behaves differently from one that's been sitting dead for three months.
Corroded terminals change the ground point choice. Extreme cold changes which unit you should reach for.
Connecting to a Healthy but Discharged Battery
This is the textbook case. Your battery reads 11 to 12 volts on a multimeter. The terminals are clean.
You left the headlights on overnight.
Connect red to positive first, then black to an unpainted engine ground (a bracket, bolt head, or the engine block itself, away from the battery and fuel lines). Wait 30 seconds for the jump starter's BMS to handshake with the vehicle's electrical system. Crank for 3 to 5 seconds, no more.
Connecting to a Fully Dead Battery (Below Detection Threshold)
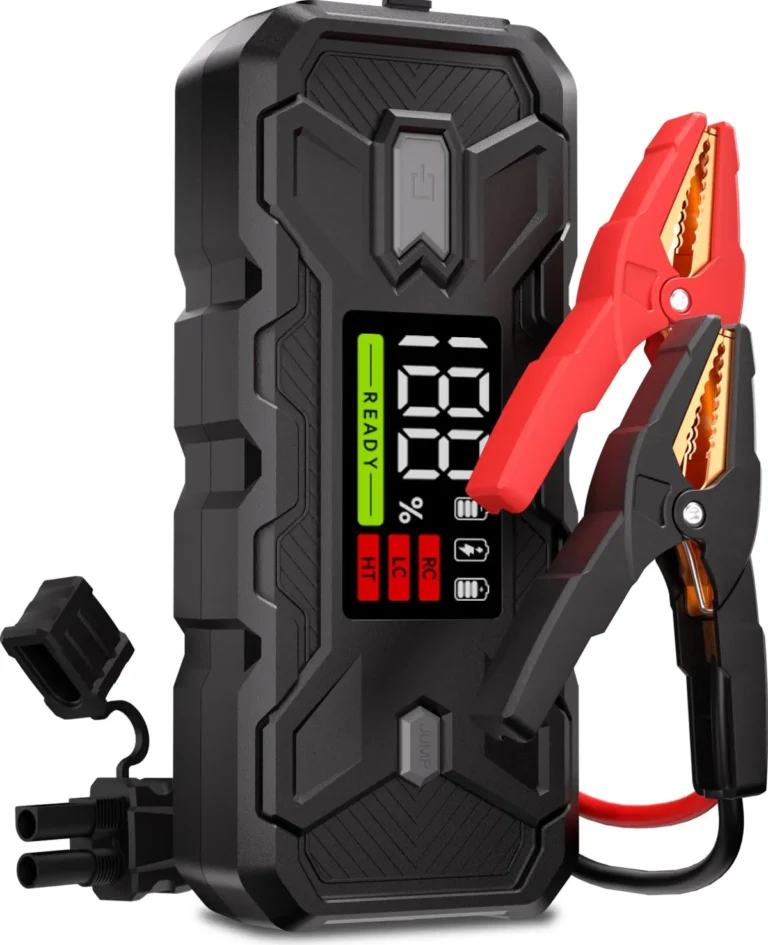
A battery sitting at 3 to 8 volts confuses smart jump starters. They can't confirm a safe circuit, so they refuse to fire. If your unit has a "Force Start" or "Override" button, press and hold it to bypass the safety check.
Most manufacturers warn that this disables reverse-polarity protection, so double-check your clamp order before pressing it.
Connecting When Terminals Are Inaccessible or Corroded
If the positive terminal is buried under a plastic cover or caked in green-white powder, clean it with a wire brush first. No brush? A pocketknife works in a pinch.
If the negative terminal is inaccessible, connect the black clamp to any unpainted metal on the chassis or engine block, at least 12 inches from the battery.
Jump Starting in Extreme Cold
Below 0°F (-18°C), lithium jump starters lose 20 to 30% of their usable capacity. Warm the unit indoors for 20 minutes before the attempt. Run the headlights for 60 seconds before cranking.
That wakes the battery slightly and reduces the load on the starter. If the engine doesn't catch after three attempts, stop. Continuous cranking overheats the starter motor and the jump starter's internal cells.
Step-by-Step: Using a Portable Jump Starter Safely
Now let's walk through the actual sequence. Six steps, about 5 minutes total if everything goes right, and just as important to follow when nothing goes wrong as when something does.
Step 1 — Inspect the Jump Starter and Battery
Open the jump starter case. Confirm the battery indicator shows enough charge (3 LEDs minimum on most units). Inspect the clamps for cracked insulation or loose hinges.
Look at the vehicle battery for cracks, leaks, swelling, or corrosion.
If the battery is cracked or leaking acid, do not jump it. A jump can ignite hydrogen gas leaking from a damaged cell, and the resulting explosion sprays sulfuric acid. Call for a tow instead.
Step 2 — Power On and Verify Charge Level
Press the power button. The LED indicator should light up and show remaining charge. If the unit doesn't power on, plug it in for 10 minutes before attempting a jump.
Some lithium packs need a minimum voltage to wake up after long storage.
Confirm the unit is set to "12V" mode if it has a voltage selector. A few models include 6V or 24V options for motorcycles and heavy trucks. Wrong setting can damage the vehicle's electronics.
Step 3 — Connect the Clamps in the Correct Order
This is the step where most beginners go wrong. The order matters because it minimizes sparking near the battery, where hydrogen gas may be present.
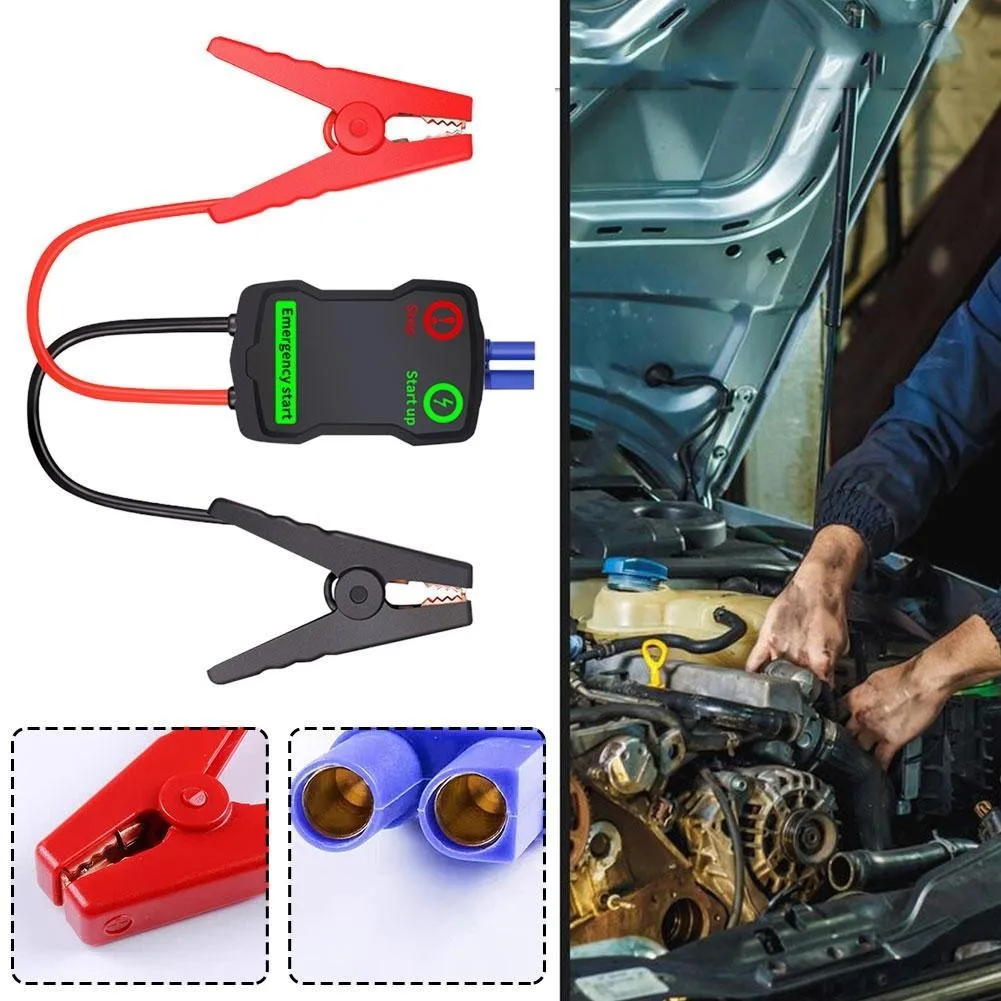
Connect the red (positive) clamp to the positive (+) terminal on the dead battery. Connect the black (negative) clamp to an unpainted metal ground on the engine block or chassis, at least 12 inches from the battery. Do not connect the black clamp to the negative terminal unless the manufacturer's manual specifically says to.
Wait 30 to 60 seconds. Some smart cables blink or beep to confirm a safe circuit. If you see sparks when you connect, disconnect immediately and recheck the polarity.
Step 4 — Crank the Engine with Proper Timing
Turn the ignition key (or press start). Crank for 3 to 5 seconds maximum. If the engine doesn't catch, wait 30 seconds before trying again.
Three attempts is the practical limit. After that, the starter motor overheats and the jump starter drains.
If the engine cranks slowly or just clicks, the jump starter is underpowered for the engine, the clamps aren't making solid contact, or the battery is completely dead. Re-seat the clamps and confirm a tight bite on bare metal.
Step 5 — Disconnect in Reverse Order
Once the engine is running, disconnect the black clamp first, then the red clamp. Keep them apart so they don't touch each other or any metal surface. A short between the clamps can fry the jump starter's control board.
Leave the engine running. Don't shut it off for at least 20 minutes, and ideally drive for 30 minutes, to let the alternator recharge the battery.
Step 6 — Idle, Drive, and Recharge the Alternator
Idling alone won't fully recharge a deeply discharged battery. The alternator needs RPMs and load to put out its rated current. Drive the car normally for 30 minutes, or at minimum 20 minutes of highway speeds.
Then either drive straight to an auto parts store for a battery test or park the car and let it sit idle for an hour before shutting down.
If the car won't restart after driving, the battery is shot and needs replacement, not just a jump.
Jump Starting Different Vehicles: Cars, Trucks, Motorcycles, and Diesels
The core steps stay the same, but engine size and battery type change the math. A motorcycle battery might be 8 to 20 amp-hours, while a diesel truck's battery banks can hold 80 amp-hours or more.
Gasoline Cars and Light Trucks
Most sedans, crossovers, and half-ton trucks fall into the easy category. A 1000A peak lithium unit handles them reliably. Expect a 3 to 5 second crank, immediate start, and you're done.
Diesel Engines
Diesel starters pull roughly 1.5x the current of a comparable gasoline engine. Glow plugs add another load on cold starts. Plan for at least 2000 peak amps, and double that for a 6.0L or larger V8 diesel.
In cold weather (below 20°F), cycle the ignition to "on" for 10 to 15 seconds before cranking. That lights the glow plugs and warms the cylinders, reducing the load on the starter.
Motorcycles, ATVs, and Lawn Equipment
Small engines use small batteries, often 12V but with much lower amp-hour ratings. Most jump starters handle them fine on a low-amp setting. Avoid cranking longer than 3 seconds, since small starters overheat fast.
Connect the same way: red to positive, black to a clean ground on the frame.
Mistakes That Damage Your Car, the Jump Starter, or Both
Most jump starter failures trace back to one of these mistakes. None of them are subtle. They all produce a clear symptom.
Reversed Polarity
Red on negative and black on positive. The result is a spike that can blow fuses, fry the alternator's voltage regulator, or destroy the ECU on modern vehicles. Smart cables beep or flash to warn you.
If your cables don't have that feature, double-check the terminal markings yourself. A "+" means positive.
Sparking Near the Battery
A small spark is normal. A big snap with visible arc means reversed polarity or a loose clamp. Batteries off-gas hydrogen during charging and discharging, and a spark can cause the cell to pop.
That's why the connection order matters: connecting the negative clamp last, away from the battery, keeps any spark away from the gas.
Skipping the Ground Point
Connecting both clamps to the battery creates a direct short path through the jump starter's BMS. The unit may shut down, or worse, overheat. An unpainted engine ground gives the current a safer return path.
Cranking Too Long or Too Often
Five-second max per attempt, 30-second rest between attempts, three attempts max. Anything longer cooks the starter motor and drains the jump starter's cells past their safe discharge limit. Aggregate user reviews consistently flag this as the top cause of failed DIY jumps.
Forgetting to Recharge the Jump Starter
A jump starter left at 0% charge for months can drop below its recovery voltage and become a brick. Recharge within 24 hours of use. Storage at 50 to 80% state of charge in a climate-controlled space keeps the cells healthy for 3 to 6 months between uses.
Safety Rules and Standards You Should Know
A jump starter isn't dangerous when you follow the rules, but the rules aren't optional. They're the difference between a 5-minute fix and a $2000 ECU replacement.
UL 2743 and Why Certification Matters
UL 2743 is the Underwriters Laboratories standard specifically for portable lithium jump starters. It covers electrical safety, reverse-polarity protection, short-circuit protection, and thermal cutoff. Any unit without a UL 2743 mark is a gamble.
Manufacturer documentation confirms that certified units include multiple redundant safety circuits that cut power within milliseconds of detecting a fault.
Hydrogen Gas and Battery Acid
Lead-acid batteries vent hydrogen gas during normal operation. A concentration above 4% in air becomes explosive. Jump starting can accelerate off-gassing on a deeply discharged battery.
Work in a ventilated area, avoid open flames, and wear safety glasses. If acid splashes on skin, flush with water for 15 minutes and seek medical attention.
Lithium Battery Handling and Transport
Lithium jump starters must meet UN38.3 transportation certification for shipping by air. Don't store them in a hot car (above 140°F), and don't puncture the casing. A swollen or punctured lithium cell is a thermal runaway risk.
Dispose of damaged units at a certified battery recycling center.
When a Jump Starter Isn't Enough: Troubleshooting Failed Starts
If you've followed the steps and the engine still won't start, the problem runs deeper than a discharged battery. Here's how to figure out what's going on.
Jump Starter Won't Detect the Battery
The unit powers on but refuses to output current. Smart cables flash a warning. This happens when battery voltage drops below the detection threshold, usually 2 to 3 volts.
Try the Force Start override if your unit has one. If that doesn't work, the battery is likely shorted internally and needs replacement.
Engine Cranks but Won't Start
Cranking speed is normal, but the engine doesn't catch. The issue isn't electrical, it's fuel or spark. Check for a clogged fuel filter, a faulty fuel pump, or a bad crankshaft position sensor.
A jump starter solves dead-battery problems. It won't fix a no-start condition caused by other systems.
Jump Starter Doesn't Hold a Charge
Lithium cells typically last 300 to 1000 charge cycles. After that, capacity drops noticeably. If a 3-year-old jump starter that used to hold 6 months of standby charge now dies in 3 weeks, the cells are degraded.
Time to replace it. Per manufacturer warranties, most units carry a 1 to 2 year coverage window, and some premium brands offer 3 years.
How to Maintain Your Jump Starter So It's Ready Next Time
A jump starter you forget in the trunk for a year won't help you when you need it. Five minutes of maintenance every 3 months keeps it ready.
Recharge to 50 to 80% before storage. Check the charge level once a quarter and top off if it's dropped below 50%. Inspect the clamps and cables for cracks, corrosion, or loose connections.
Update the firmware if your unit has a companion app. Test the flashlight and USB ports occasionally so you know they still work.
If you live in a climate that hits 0°F or below, store it in the house, not the garage. Cold storage permanently reduces lithium capacity. Per OSHA guidance on battery handling, controlled-temperature storage extends the service life of lithium cells significantly.
Jump Starter vs. Jumper Cables vs. Roadside Assistance
Each option has its place. The "best" choice depends on whether you have time, a second vehicle, or a service membership.
Jump Starter vs. Traditional Jumper Cables
Cables are cheap ($20 to $40) and never need recharging. They require a second vehicle with a healthy battery, and they're riskier because there's no smart circuit between the cars. A jump starter costs more up front ($80 to $300) but works solo, includes USB charging and a flashlight, and protects against reversed polarity.
Jump Starter vs. Roadside Assistance
AAA, OnStar, and most insurance add-on plans offer roadside battery service. Average wait time is 30 to 60 minutes. Membership costs $60 to $150 per year.
A jump starter pays for itself after two uses and gives you 24/7 self-sufficiency.
Choosing the Right Jump Starter for Your Vehicle
Buying the right unit comes down to matching specs to your engine and how you'll use it.
Matching Peak Amps to Engine Size
The table below is a starting point based on manufacturer recommendations and aggregate user feedback. Add 25% headroom for cold climates.
| Engine Type | Recommended Peak Amps |
|---|---|
| 4-cylinder gas (up to 2.4L) | 1000A |
| V6 gas (up to 4.0L) | 1500A |
| V8 gas (up to 6.2L) | 2000A |
| Diesel (up to 3.0L) | 2000A |
| Diesel (3.0L+ or heavy-duty) | 2500A+ |

Lithium-Ion vs. LiFePO4 vs. Lead-Acid
Lithium-ion (NMC chemistry) is the most common. It's compact and cheap. LiFePO4 is heavier and pricier but lasts 2 to 3x more cycles and handles heat better.
Traditional lead-acid jump boxes are bulky, weighing 15 to 30 pounds, but they're cheaper and very forgiving of cold storage.
For most users, a lithium-ion unit in the 1500 to 2000A range hits the sweet spot. Spend more for LiFePO4 if you live in a hot climate or want maximum service life.
Frequently Asked Questions
How long should you let a car run after a jump start?
At least 20 minutes of driving, ideally 30 minutes. Idling alone produces low alternator output, so highway speeds recharge a deeply discharged battery faster. After driving, the car should restart easily.
If it doesn't, the battery is too far gone and needs replacement.
Can a jump starter charge a completely dead battery?
No. A jump starter provides a short burst of high current to crank the engine. It doesn't trickle-charge a battery over hours like a battery charger does.
If a battery sits dead for weeks, sulfation builds up on the plates. A jump might get the car started, but the battery won't hold a charge for long.
How many times can you use a jump starter on one charge?
Most 15,000 to 20,000 mAh units handle 20 to 40 jump starts per full charge. Cold conditions and larger engines reduce that number. A lithium jump starter in a moderate climate typically delivers 30 starts before needing a recharge.
Is it safe to jump start a car in the rain?
Yes, with normal caution. Water doesn't conduct enough current at 12V to pose a shock risk. The main concern is keeping the jump starter itself dry.
Don't submerge the unit or leave it sitting in a puddle. Most units carry an IP64 rating, meaning splash-resistant but not waterproof.
Can you jump start a car with a battery sitting dead for months?
Sometimes, but it's risky. A battery discharged below 10 volts for more than a month develops sulfation that may not recover. You'll likely need a Force Start override to bypass the safety detection.
Once started, drive directly to a battery shop for a load test. If the battery fails the test, replace it.
Final Decision Guide: What to Do Based on Your Situation
If your battery is healthy but discharged, connect the jump starter using standard procedure. Red to positive, black to ground, wait 30 seconds, crank for 5 seconds max. Most healthy batteries start on the first or second try.
If the battery reads below 8 volts, use the Force Start override if your unit has one. Warm it indoors if temperatures are below freezing. Crank for no more than 3 seconds per attempt.
If the battery is cracked, leaking, or swollen, don't jump it. The hydrogen gas leak and acid exposure create real hazards. Call for a tow and replace the battery at a shop.
If the jump starter won't detect the battery even with override, the battery is likely internally shorted. Replace it.
If the engine cranks but doesn't start, the problem is fuel, spark, or sensors. A jump starter won't help. Diagnose the no-start condition separately.
A quality jump starter, used correctly, turns a dead battery from a crisis into a 5-minute inconvenience. Keep it charged, store it properly, and it will save you more times than you can count.