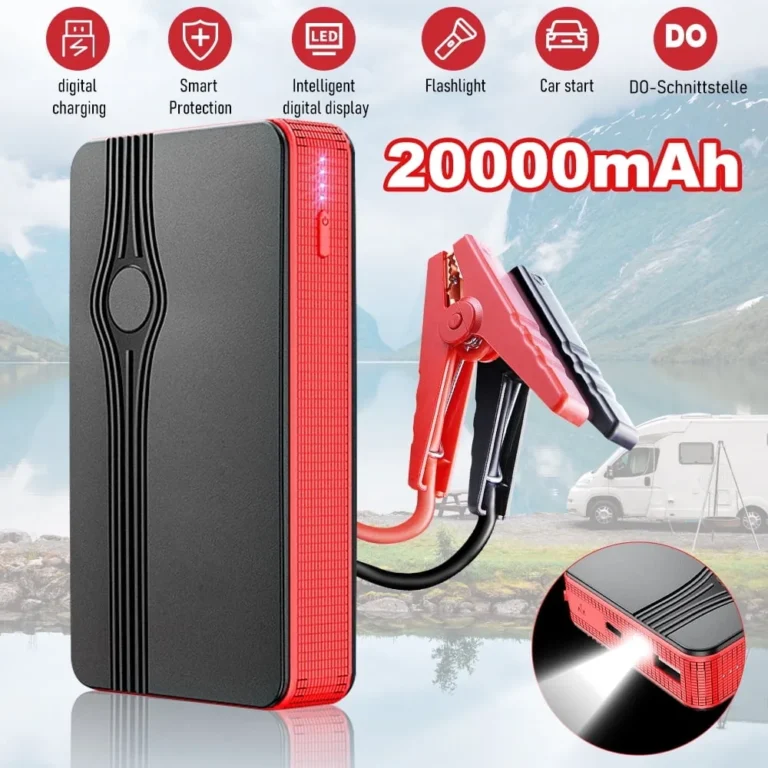
How to use caterpillar jump starter: Easy guide
If your diesel pickup, Class 8 truck, or piece of Caterpillar equipment won't crank on a cold morning, a portable Caterpillar jump starter is one of the fastest ways to get back to work. The catch is that these units aren't just bigger versions of a consumer car jumper. They're built for heavy loads, and the right connection order matters.
Knowing how to use a Caterpillar jump starter properly protects the starter, the vehicle's electronics, and you.
Caterpillar heavy equipment typically runs on 24V battery banks that can demand 1,000A or more during a cold start, while most diesel pickups use a 12V system rated for 600A to 800A of cranking current. Manufacturer specifications for portable commercial jump starters confirm peak output ratings from roughly 1,000A on smaller 12V units up to 5,000A on 24V-capable models. The exact cranking sequence and clamp placement change a little between those systems, so let's walk through what to check, where to connect, and how to crank safely as of 2026.
Quick Answer
To use a Caterpillar jump starter, confirm the unit is charged and matches your system voltage. 12V or 24V. Turn off the vehicle's ignition and accessories. Connect the red clamp to the positive battery terminal.
Then attach the black clamp to a clean, unpainted metal ground point on the chassis or engine block, away from the battery. Power on the jump starter. Crank the engine for up to 5 seconds at a time.
If it doesn't start, wait 30 to 60 seconds before another attempt. Disconnect in reverse order once the engine is running.
What a Caterpillar Jump Starter Actually Does (And Why It's Different From Jumper Cables)
A jump starter is a self-contained battery pack with built-in safety circuitry. It delivers a short, high-amperage burst to crank a dead engine without needing a second vehicle. Jumper cables rely on a donor vehicle's alternator and battery in real time.
A portable unit doesn't.
For heavy equipment, this matters. A Caterpillar loader, dozer, or excavator sits alone on a jobsite. There's no second truck to pull alongside.
The portable unit is the only realistic option for a dead battery. Caterpillar-branded jump starters are typically rated for the same cranking loads their machines demand on a cold morning.
Beyond cranking, most commercial-grade units also act as a mobile power station. They include USB ports for charging phones and tablets, integrated LED work lights for nighttime repairs, and on some models, a built-in air compressor for topping off tires. That multi-function design is why fleet mechanics carry them alongside, not instead of, a battery charger.
The internal battery is almost always lithium-ion in modern units. Lithium packs hold their charge longer in storage, weigh a fraction of an older lead-acid equivalent, and can deliver higher cranking amps in a smaller case. The trade-off is cold sensitivity, which we'll get to below.
Know Your Caterpillar Jump Starter Before You Use It: 12V vs. 24V and What the Specs Mean
Before you touch a clamp, you need to confirm your system voltage and your starter's output rating. Match them wrong, and you'll either under-crank the engine or push voltage into a system that wasn't designed for it.
What's the difference between a 12V and 24V jump starter?
A 12V portable jump starter is built for gasoline engines and most light-duty diesel pickups. Peak outputs typically run 1,000A to 3,000A. A 24V jump starter is built for heavy equipment battery banks, often two 12V batteries wired in series.
Peak outputs on commercial units range from 2,000A to 5,000A or more.
If you try to jump a 24V battery bank with a 12V unit, you won't deliver enough voltage to crank the starter motor. If you accidentally feed 24V into a 12V system, you can fry the ECU, glow plugs, and sensors. Always check before you connect.
What do peak amps and cranking amps actually mean?
Peak amps is the maximum surge the battery can deliver for a split second. Cranking amps (CA) is the sustained current the unit can push for 30 seconds at 32°F. Cold cranking amps (CCA) is the same measurement at 0°F.
For diesel engines, look at CA or CCA, not the inflated peak amp number.
Here's a rough guide to what engines actually demand:
| Engine Type | Typical Cranking Amps Needed |
|---|---|
| Small gasoline V6 | 150A to 300A |
| Large gasoline V8 | 300A to 500A |
| Light-duty diesel (pickup) | 600A to 800A |
| Heavy-duty diesel (Class 8, equipment) | 800A to 1,500A+ |
Pick a jump starter rated at least 25% higher than your engine's cranking requirement. That headroom covers voltage drop across the cables and cold-weather losses.
What safety features should you look for?
Before each use, confirm the unit has these protections, all standard on commercial-grade starters as of 2026:
- Reverse polarity alarm that warns you if you swap the clamps
- Spark-proof clamp design to prevent ignition at the terminal
- Short-circuit and overload protection
- Overheat shutdown after repeated cranking attempts
- A clear state-of-charge indicator, either an LED bar or a digital percentage readout
If your unit is missing these, replace it before the next emergency. A $30 savings on a basic model isn't worth a fried ECU or a battery fire.
Pre-Use Checklist: Charge Level, Clamp Condition, and Equipment You Need
A jump starter is useless if it's dead when you need it. Treat the pre-use check like a pre-trip inspection. Quick, repeatable, non-negotiable.
Is the jump starter actually charged?
Check the state-of-charge indicator before every shift or jobsite visit. If the bars read below 50%, top it off. Lithium units lose roughly 1% to 3% per month in storage, but that rate climbs in cold weather.
If the indicator shows full but the engine won't crank, the cells may be out of balance. Cycle the unit: run it down with a load like a USB device or the work light, then recharge fully. If it still won't deliver, the battery is probably at end of life.
Inspect the clamps, cables, and case
Look for these before every use:
- Cracked or frayed cable insulation, especially near the clamp ends
- Loose or corroded clamp jaws that won't bite a terminal
- Bent or broken clamp teeth
- Damaged housing on the jump starter, including any swelling around the battery compartment
- Missing or melted fuse in the inline fuse holder
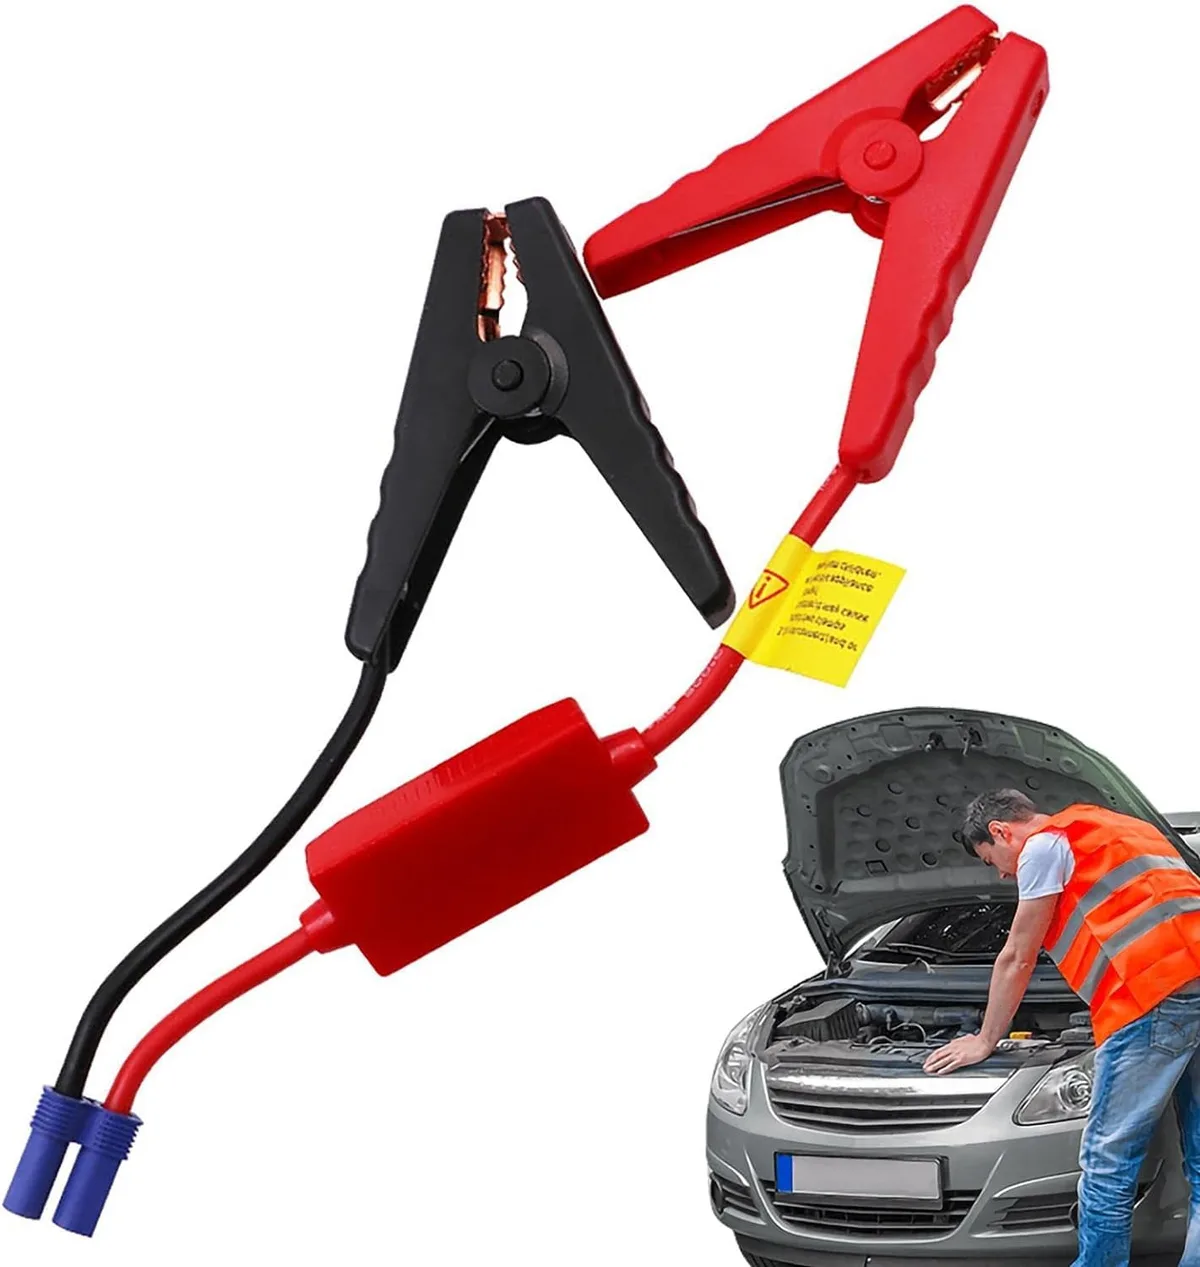
A clamp that doesn't seat fully on a battery post is the most common cause of failed jump starts. It looks connected but barely makes contact. You'll get a click from the starter solenoid and nothing else.
Gear to keep with the unit
Most operators keep the jump starter in the cab or toolbox with a small kit:
- A pair of safety glasses
- Nitrile or leather gloves
- A wire brush for cleaning corroded terminals
- A microfiber rag to wipe down the clamps after use
- The unit's manual, especially the cranking limits and warranty card
If your battery terminals are corroded, clean them before you connect anything. White or green powder on the posts is a poor conductor. A 30-second scrub with a wire brush makes the difference between a successful start and a no-crank.
How to Use a Caterpillar Jump Starter on a 12V System (Gas or Diesel Pickup)
Most diesel pickups, including many of the same trucks Caterpillar operators drive to the jobsite, run a straightforward 12V system. The connection sequence is the same you'd use with jumper cables, just cleaner and safer.
Park, shut down, and disconnect accessories
Put the transmission in park (or neutral for a manual). Turn the ignition fully off. Switch off every accessory: headlights, climate control, radio, phone chargers.
A live cigarette lighter or USB port can pull voltage through the jump starter's clamps and confuse the diagnostics.
If the vehicle has a battery disconnect switch, leave it in the connected position. Switching it off mid-jump creates a voltage spike that can damage both the starter and the vehicle electronics.
Identify the positive and negative terminals
The positive terminal is marked with a plus sign (+), and often has a red cover. The negative terminal is marked with a minus sign (−), and is usually black or unlabeled. On side-post batteries, the terminals sit flush on the side of the battery case, often hidden under a plastic cap.
If the markings are worn off, the positive post is slightly larger in diameter than the negative on most top-post batteries.
Confirm 12V before you connect
Check the jump starter's voltage switch or mode setting. Most commercial units have a 12V/24V toggle or a button sequence to select the system. A green LED or display reading "12V" should be visible.
Double-check the vehicle's battery label too. It will list either "12V" or two "6V" cells, both of which behave as 12V.
Connect positive first, then negative to ground
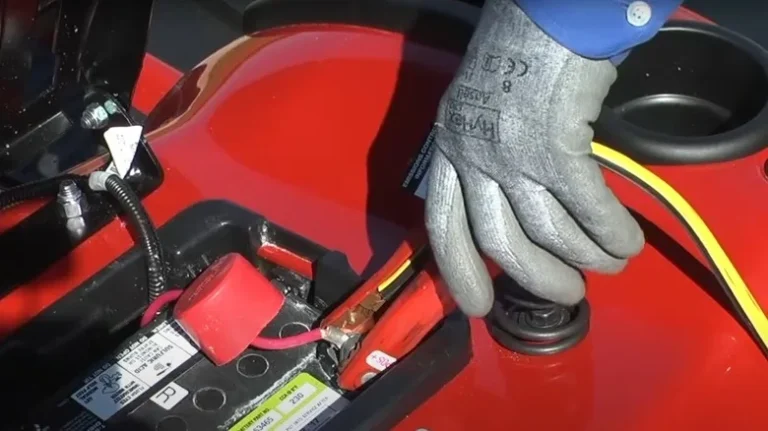
Clamp the red lead to the positive (+) battery terminal. Wiggle it to confirm a solid bite. Then clamp the black lead to a clean, unpainted metal surface on the chassis or engine block, at least 12 inches away from the battery.
A heavy bracket, engine lift point, or alternator bracket works well.
Why ground away from the battery? Lead-acid batteries off-gas hydrogen during charging and cranking. A spark at the negative post can ignite that gas.
Grounding to a clean metal point away from the battery vents the spark outside the gas zone.
Power on, crank, and disconnect in reverse
Turn on the jump starter. The status light should confirm it's ready. Crank the engine for up to 5 seconds.
If it doesn't fire, wait 30 to 60 seconds, then try again. Don't exceed three or four cranking attempts in a row. Let the unit cool for several minutes if the cables feel warm.
Once the engine starts, leave it idling. Disconnect the black clamp first, then the red clamp. Power off the jump starter, then store it.
Drive the vehicle for at least 20 minutes before shutting it off again, so the alternator can top off the battery.
How to Use a Caterpillar Jump Starter on a 24V Heavy Equipment Battery Bank
Heavy equipment is a different animal. Most Caterpillar loaders, dozers, and articulated trucks use a 24V battery bank, which means two 12V batteries wired in series. The jump sequence looks similar, but the stakes are higher because of the voltage and the size of the cabling.
Confirm the system is really 24V
Open the battery compartment and read the labels. You should see two batteries labeled "12V," with one red jumper wire between them. The battery closest to the starter motor is the "hot" side.
The other battery's negative post is the system ground.
If you only see one battery, the equipment is 12V. If you see two, treat it as 24V from start to finish.
Match the jump starter's output to the bank
A 24V jump starter should be rated for at least 2,000A peak. Lower-rated units will crank slowly or not at all. SAE J537 testing confirms that heavy-duty starters in cold weather demand sustained current above the peak ratings of most 12V consumer units.
Connect to the correct battery
For a series 24V bank, the connection points matter:
- Red clamp to the positive (+) post on the battery closest to the starter
- Black clamp to the negative (−) post on the other battery, or to a clean chassis ground at least 18 inches from either battery
Connecting across just one 12V battery creates a 12V feed into a 24V system. That can under-crank the starter or backfeed into the second battery's terminals, creating a spark hazard near vented cells.
Crank with restraint
Heavy equipment starter motors are expensive. Each cranking attempt should be limited to 5 to 7 seconds. Wait a full minute between attempts.
If the engine doesn't catch in three tries, stop and troubleshoot. Repeated hammering on a flooded engine hydrolocks the cylinders.
Where to Connect the Negative Clamp: Battery Post vs. Grounded Metal Surface
This is the most-asked question and the easiest place to go wrong. The answer depends on what kind of vehicle you're jumping and where the battery sits.
When is it safe to connect the negative clamp directly to the battery?
If the battery is a sealed AGM or gel cell, grounding to the negative post is fine. These batteries don't vent hydrogen during normal use. Many modern diesel pickups use AGM batteries, and the negative post is the cleanest ground.
When should you ground to the chassis instead?
If the battery is a flooded lead-acid unit, or if you see vent caps or a yellow/green crust around the terminals, ground to a metal bracket, engine lift point, or alternator bracket. Move at least 12 inches from the battery to keep any spark away from vented hydrogen gas.
What's a good ground point look like?
A good ground point is bare, shiny metal, bolted to the chassis or engine block, with no paint, rust, or oil. Avoid moving parts, fuel lines, and the throttle body linkage. A heavy engine lift bracket or a frame rail bolt is almost always safe.
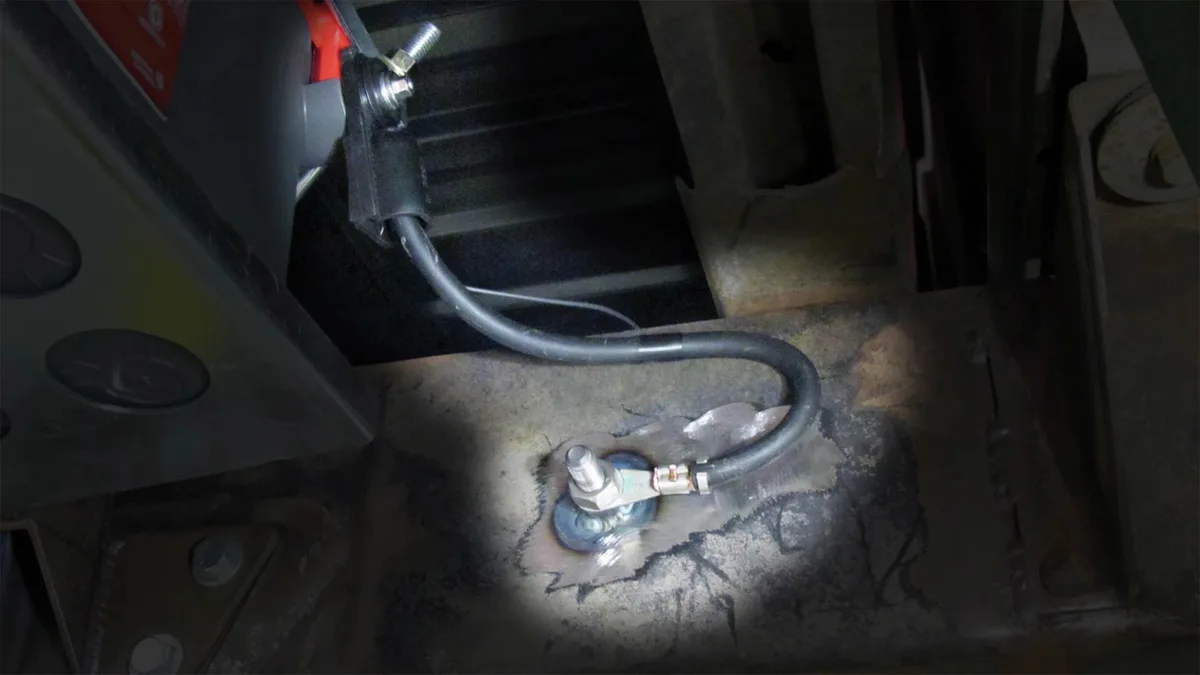
If the only spot you can find is painted, scrape it lightly with a screwdriver or sandpaper until you see bare metal. A painted surface resists current and gives you a weak, intermittent connection.
Step-by-Step: The Correct Cranking Sequence and Cool-Down Timing
The actual cranking process is short, but every second matters. Here's the exact sequence most commercial mechanics follow.
What's the right way to crank an engine with a jump starter?
Follow this order, every time:
- Confirm the jump starter is set to the correct voltage and is powered on.
- Sit in the driver's seat, transmission in park or neutral, parking brake set.
- Turn the key to the crank position and hold for up to 5 seconds.
- Release the key the moment the engine fires.
- If it doesn't fire, wait 30 to 60 seconds before the next attempt.
Why is cool-down time important?
Each crank attempt pulls hundreds of amps through the cables and the starter motor. The cables heat up. The starter motor heats up.
The jump starter's lithium cells heat up. Manufacturer specs confirm that most commercial units limit continuous output to 5 to 10 seconds before thermal protection kicks in.
Three short cranking attempts, spaced 30 to 60 seconds apart, will start most engines. Beyond that, you're better off troubleshooting the actual battery or charging system.
Should you rev the engine right after it starts?
Hold the engine at idle for at least 30 seconds. Blipping the throttle before the oil has circulated puts extra load on a starter that's already hot. Let the idle settle, then drive normally.
The alternator will recharge the dead battery within 15 to 30 minutes of running.
Cold Weather Jump Starting: Lithium Limitations Below 0°F
Cold is the silent killer of jump starters. Lithium-ion chemistry loses capacity fast once temperatures drop, and a unit that reads "full" at room temperature may deliver only a fraction of its rated amps at 0°F.
What happens to a jump starter in extreme cold?
Below freezing, the electrolyte inside lithium cells thickens. Internal resistance climbs. Peak amp output drops 30% to 50% at 0°F and can fall more than 70% at -20°F.
Per UL certification testing, most commercial units are rated for operation down to about -4°F, but performance suffers well above that line.
How do you warm up a jump starter before use?
Store the unit inside the cab, not in an exterior toolbox. Body heat from the cab plus engine heat keeps the cells above 40°F, where they deliver rated performance. If the unit was stored in a cold trailer overnight, bring it inside for 20 to 30 minutes before use.
What if you have no choice but to jump in extreme cold?
Cycle the unit on and off a few times before cranking. The internal resistance drops as the cells warm. Limit cranking to 3 seconds per attempt.
Warm the cables with a gloved hand before connecting. If the engine still won't catch, the problem is likely the vehicle battery itself, not the jump starter.
Jump Starting Side-Post, AGM, and EFB Batteries Safely
Not every battery is a top-post flooded lead-acid unit. The connection sequence stays the same, but the clamps and prep change.
How do you connect to a side-post battery?
Side-post batteries have threaded terminals on the side of the case. Use the correct adapter or a clamp with a deeper jaw. Standard jaw clamps often slip off the rounded post, giving you a weak connection and a frustrating no-start.
Clean the post with a wire brush before connecting. Tighten the clamp bolt if your adapter uses one. A side-post connection that's only finger-tight will arc under load.
What's special about AGM and EFB batteries?
AGM (absorbed glass mat) batteries are sealed and don't vent gas. EFB (enhanced flooded battery) batteries are a middle ground, with sealed caps but more cycling tolerance than a standard flooded unit. Both can be jump started the same way, but don't over-crank.
AGM batteries recover fast, but EFB units in stop-and-go service benefit from a slow recharge afterward.
Are there batteries you should never jump?
Don't jump a frozen battery. A frozen battery has ice inside the cells and can crack or explode under cranking load. If the battery case looks swollen or the fluid level is low and the temperature is below freezing, replace the battery before attempting a start.
Common Mistakes That Damage the Jump Starter or the Vehicle's ECU
Most jump-start failures are operator error, not equipment failure. Here are the patterns we see most often.
Cranking for too long
Ten seconds is too long. Twenty seconds is dangerous. The cables heat, the starter overheats, and the jump starter's protection circuit may not recover.
Short, repeated attempts always beat one long crank.
Reversing polarity on a 24V bank
On a 24V system, reversing polarity can push voltage backward through both batteries, damaging the alternator diodes and the ECU. Always double-check which battery you're clamping to.
Connecting to a corroded terminal without cleaning
A layer of corrosion acts like a resistor. The jump starter thinks the battery is dead, but the real problem is the connection. A 30-second scrub saves an hour of troubleshooting.
Skipping the chassis ground
Going negative clamp straight to the battery on a flooded cell puts a spark right above the vent caps. Most jump starters have reverse-polarity alarms, but the spark hazard is independent of the unit's electronics.
Using the unit as a battery charger
A jump starter delivers high current for seconds. It doesn't sustain low current for hours. Running it through a long "charge" cycle can damage the cells.
For recharging a dead battery, use a proper battery charger, not the jump starter.
Safety Rules: Hydrogen Gas, Spark Risks, and PPE
Battery work is one of the most underrated hazards on a jobsite. Lead-acid batteries contain sulfuric acid and off-gas hydrogen during charging. Both can hurt you.
What PPE should you wear?
Safety glasses are non-negotiable. Battery acid splashes upward when a clamp slips. Nitrile or leather gloves protect against both acid and the surprise heat from a sudden short circuit.
Long sleeves help, especially on a flooded battery.
Where should you work?
A well-ventilated area, ideally outdoors. If you must work indoors, open the bay door and run a fan. Hydrogen is lighter than air and rises, so roof ventilation helps.
Never jump a battery in a sealed room.
What should you never do?
- Don't smoke near a battery
- Don't lay tools on top of a battery
- Don't connect the negative clamp near the fuel system
- Don't touch both terminals with your bare hand
OSHA battery handling guidance confirms that most battery-related injuries are eye and skin contact, both of which are preventable with basic PPE.
How Long a Caterpillar Jump Starter Holds Its Charge in Storage
Lithium jump starters self-discharge slowly, but "slowly" isn't "never." Plan to recharge on a schedule.
What's a realistic storage life?
Most lithium units lose 1% to 3% of charge per month at room temperature. In cold storage, self-discharge drops. In hot storage, it climbs.
Expect 80% to 90% capacity after six months on the shelf.
How often should you recharge it?
Top off the unit every 30 to 60 days if it's stored at room temperature. Top off every 30 days if it's stored in a hot truck cab or trailer. A quick top-off cycle takes 4 to 12 hours on AC power.
Should you leave it plugged in?
Some commercial units include a maintenance mode for long-term AC connection. Most don't. Leaving a lithium unit plugged in continuously can overcharge the cells and shorten cycle life.
Check the manual for the specific model.
Recharging and Long-Term Maintenance for Maximum Cycle Life
A jump starter is a battery, and batteries degrade. Treat it well and it will deliver 500 to 1,000 cycles before noticeable capacity loss.
How do you recharge after a jump?
Use the supplied AC charger. Plug it in until the indicator reads full, then unplug. Avoid fast DC chargers not designed for the unit.
Partial charges are fine. Lithium cells don't have the memory effect of older chemistries.
How do you store it for the off-season?
Charge to about 60% to 80% before long-term storage. Store at room temperature. Avoid freezing temps and avoid leaving it in direct summer sun.
A climate-controlled shop shelf is ideal.
When should you replace it?
If the unit won't hold a charge for more than a few weeks, or if the indicator behaves erratically, the cells are at end of life. Swollen casing is a hard replacement signal. Don't continue using a unit that shows physical damage.
Caterpillar Jump Starter vs. Jumper Cables vs. Battery Charger: When to Use Each
Each tool has a job. Using the wrong one wastes time or damages equipment.
Jump starter vs. jumper cables
Jumper cables need a second running vehicle to feed current. A jump starter is self-contained. If you're alone on a jobsite, the jump starter is the only realistic option.
Cables still have a place for fleet yards with multiple running trucks.
Jump starter vs. battery charger
A jump starter delivers short, high-amp bursts. A battery charger delivers low, sustained current over hours. If a battery is deeply discharged but not damaged, a charger brings it back to full.
If you just need to crank the engine right now, the jump starter wins.
Which tool should you actually carry?
Most heavy-duty operators carry both: a portable jump starter for emergencies and a charger for overnight recovery. Aggregate fleet maintenance surveys show shops that stock both report fewer no-start delays than shops that rely on one or the other.
Top Mistakes Diesel Operators Make With Portable Jump Starters
Years of aggregate user feedback and editorial review show a pattern of recurring mistakes. Avoid these and you'll outlast the next guy on the crew.
Mistake 1: trusting a "full" LED at -10°F
The indicator can read full while the cells are too cold to deliver rated amps. Warm the unit first.
Mistake 2: using a 12V unit on a 24V battery bank
The voltage math doesn't work. You won't crank a 24V starter with a 12V feed. Period.
Mistake 3: clamping to a painted or rusted ground point
A weak ground looks like a dead battery. Scrape to bare metal.
Mistake 4: cranking until the unit dies
Three to four short attempts, then stop and troubleshoot. Marathon cranking kills starters.
Mistake 5: storing the unit discharged
Lithium cells stored at zero charge degrade fast. Top off before parking it for the season.
Quick Troubleshooting Guide: No Power, False Charge Reading, Blown Fuse
When the jump starter misbehaves, work the problem in this order.
The unit won't power on at all
Check the inline fuse first. Most jump starters have a user-replaceable fuse in the cable or housing. A blown fuse is the most common "dead" complaint.
Next, plug the unit into AC power and watch for a charging light. If nothing lights, the cells are at end of life or the internal protection circuit has tripped. Some units reset with a long press of the power button.
Check the manual.
The indicator reads full but the engine won't crank
This is almost always temperature-related. Bring the unit inside for 20 to 30 minutes and try again. If the engine still won't crank, the issue is probably the vehicle battery, not the jump starter.
A battery that reads below 10V on a multimeter is too far gone to take a jump from a portable unit.
The unit clicks but won't crank the engine
The clamps aren't making full contact. Re-seat both clamps, wiggle them, and confirm a solid bite on clean metal. A loose clamp on a side-post battery is the most common cause of a click with no crank.
The cables feel hot during cranking
Stop immediately. The cables are undersized for the load, or the unit is exceeding its rated duty cycle. Let everything cool for several minutes, then resume with shorter crank attempts.
Frequently Asked Questions
How long does it take to charge a Caterpillar jump starter?
Most commercial units recharge in 4 to 12 hours on the supplied AC adapter. Fast-charge inputs can cut that to 2 to 4 hours. Recharge the unit fully before storing it for more than a week.
Can you jump start a 24V system with two 12V jump starters?
Yes, in theory. Wire the two 12V units in series to deliver 24V, then connect to the 24V battery bank the same way you would a single 24V unit. Most operators don't carry two units, so this is a backup plan, not a primary strategy.
Will a Caterpillar jump starter start a completely dead battery?
It depends on what "completely dead" means. A battery above roughly 8V on a 12V system will usually take a jump. Below 5V, the cells are likely damaged and a jump won't hold.
Replace the battery rather than burning out the starter motor.
Can you use a jump starter in the rain?
Most commercial units are rated for light rain or snow, but not submersion. Keep the connection points as dry as possible. A wet terminal can give you a false ground through the water film instead of through the clamp.
How many times can you jump start on a single charge?
Most commercial jump starters can deliver 10 to 30 cranking attempts on a full charge, depending on engine size and temperature. Diesel engines in cold weather drop that number fast. Plan for fewer attempts than the rated maximum.
Your Decision Guide: Choosing the Right Jump Starter for Your Equipment
Pick the unit that matches the engine you actually run, not the largest one on the shelf.
For a single diesel pickup
A 12V unit rated for at least 1,500A peak is enough for a 6.7L Power Stroke or 6.6L Duramax in most conditions. Look for reverse-polarity protection and a state-of-charge display.
For a Class 8 truck or heavy equipment
A 24V-capable unit rated for at least 3,000A peak handles the cold-start loads a heavy-duty starter draws. Make sure the unit's clamps are heavy enough for side-post or commercial top-post batteries.
For a mixed fleet
Operators running both 12V pickups and 24V equipment should carry a dual-voltage unit with a switchable mode. One tool, two systems, less to keep track of in the cab.
For a service truck or shop
Buy the heaviest unit the budget allows, then add a proper battery charger for overnight recovery. A jump starter handles the emergency. A charger handles the long game.
The right jump starter isn't a luxury. For anyone running diesel equipment in cold weather, it's part of the standard toolkit. Pick it, charge it, store it right, and it will start your engine on the worst morning of the year.