How to use a dash cam: The Complete Guide
If you've just unboxed a dash cam, or you're thinking about buying one and wondering what the setup actually involves, you're in the right place. Learning how to use a dash cam isn't hard, but the small choices you make in the first hour (which card you buy, where you mount it, how you power it) decide whether it actually saves you when something goes wrong. Most drivers set theirs up once, forget it, and only find out it failed to record the one time they needed it.
The biggest reason dash cams fail isn't bad cameras. It's bad SD cards and bad wiring. Manufacturer specifications and aggregate reviews consistently show that an endurance-rated microSD card (rated for continuous write cycles) and a properly set G-sensor are what separate a useful camera from a paperweight.
Let's walk through it step by step, starting with the part most people skip.
Quick Answer
To use a dash cam, mount it on the passenger side of the windshield behind the rearview mirror. Insert an endurance-rated microSD card. Plug it into a 12V outlet or hardwire it to the fuse box.
Format the card in the camera's menu. Enable loop recording. Set the G-sensor to medium.
Review footage through the camera's Wi-Fi app.
Before You Start: Pick the Right Dash Cam for Your Setup
Before you drill a hole or stick anything to your glass, you need to know which kind of dash cam matches how you actually drive. The wrong choice doesn't just cost you money. It leaves you with blind spots or dead footage when you need it most.
What's the core difference between dash cam types?
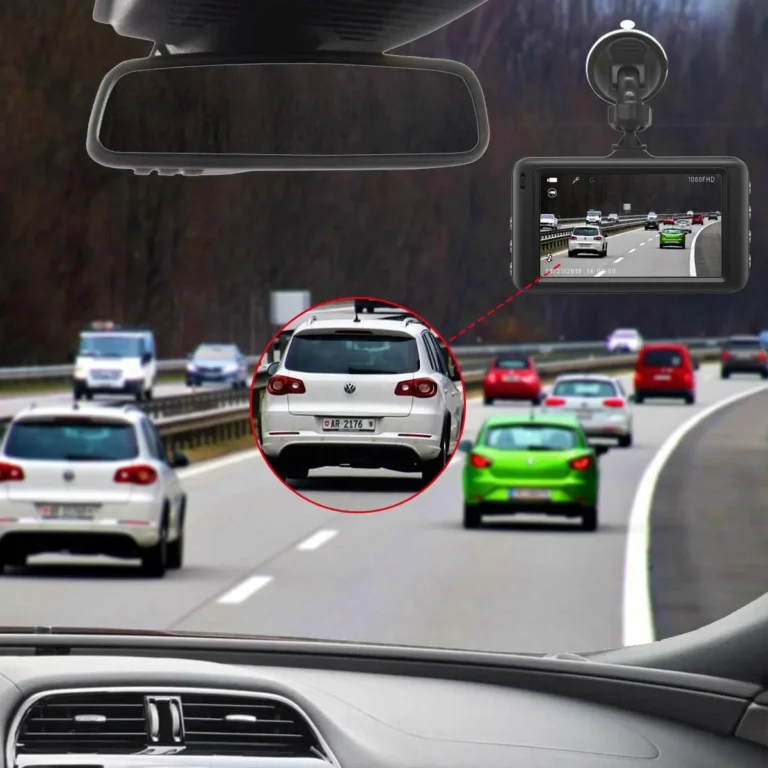
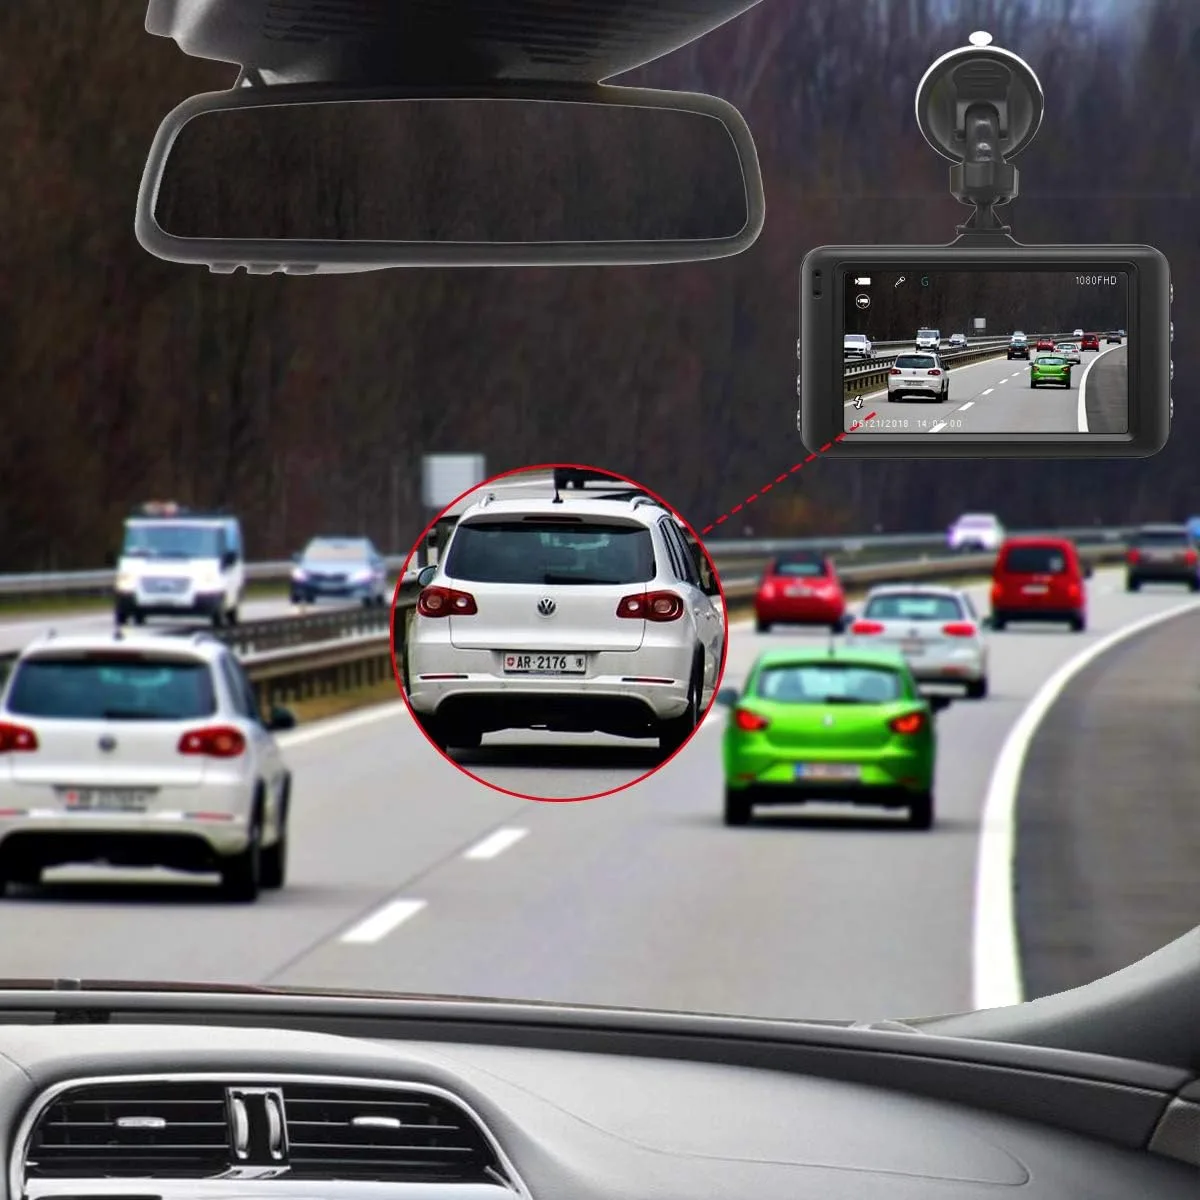
A dash cam is a small, windscreen-mounted camera that continuously records while you drive. Most modern units record in 1080p or higher, run off your car's 12V system, and save clips to a microSD card on a loop. The oldest footage gets overwritten when the card fills up.
The three main form factors are:
- 1-channel (front only): Records the road ahead. Cheapest, simplest, fits most commuters.
- 2-channel (front + rear): Adds a smaller camera for the rear window. Worth it for hit-and-runs in parking lots.
- 3-channel (front + rear + cabin): Adds an interior lens. Standard for rideshare and delivery drivers who need to document passengers.
What resolution and lens angle actually matter?
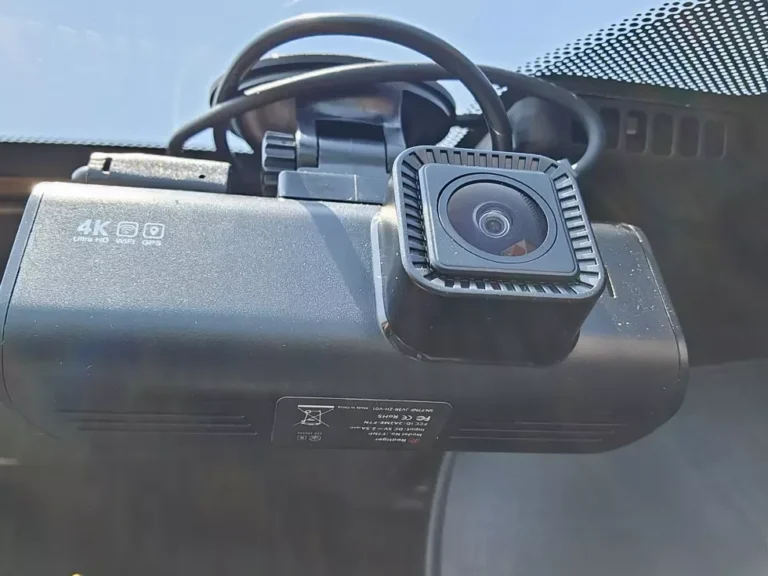
Manufacturer specs confirm that 1080p at 30fps is the practical floor for legible license plates within a few car lengths. If you want better detail, 1440p (2K) is the sweet spot in 2026. 4K models are widely available but demand more storage and run hotter.
Lens field of view sits between 130° and 170°. Anything past 160° introduces a fish-eye distortion that makes plates look stretched at the edges. A 140° lens captures three lanes without that warping.
Should you get one with a capacitor or a battery?
Capacitor models handle heat better. Most are rated for -20°C to 70°C operating ranges. They also last longer in parked cars.
Battery models are cheaper but swell in summer heat and die in deep cold. If you park outside, a supercapacitor is the safer bet.
The Core Decision Tree: Choosing Front, Front + Rear, or 3-Channel
The right setup depends on one question: what are you trying to capture? This is where most buyers go wrong. They buy the cheapest option and then wish they had a rear lens six months later.
If you commute solo on highways and surface streets
A 1-channel front cam is enough. You want forward evidence in case someone runs a red light and T-bones you, or rear-ends you and lies about how it happened.
If you street-park or use parking lots regularly
Go front + rear. Aggregate buyer reviews consistently show that the rear camera is what catches hit-and-run bumpers in parking garages. Front-only cams miss these entirely.
If you drive for Uber, Lyft, Amazon Flex, DoorDash, or any taxi-style work
3-channel is the minimum. Rideshare drivers face disputes from passengers, not just other cars. A cabin lens is often the only way to prove what actually happened inside the vehicle.
Many gig platforms now strongly recommend or require interior recording.
What's the cost difference?
| Setup | Typical 2026 price range | Best for |
|---|---|---|
| 1-channel | $50–$120 | Daily commuters |
| 2-channel | $100–$250 | Street parkers, urban drivers |
| 3-channel | $180–$350 | Rideshare, fleet, commercial |
The jump from 1-channel to 2-channel is small. The jump to 3-channel is worth it only if cabin footage matters to your work.
Picking the Right SD Card (and Why Cheap Cards Kill Footage)
This is the single most common reason dash cams "stop working." It's almost never the camera. It's the card.
Why can't you use any old microSD card?
Dash cams write to the card continuously. A regular card rated for "U1" or "Class 10" is built for short bursts, like photos and video clips. An endurance card is built for thousands of hours of sustained writing.
Skip the endurance rating and your card will corrupt within months, often without warning.
What's the right card spec?
Look for three things on the packaging:
- Endurance rated. Samsung, SanDisk, and Kingston all sell explicit "endurance" or "high endurance" lines.
- U3 or V30 speed class minimum, which guarantees at least 30 MB/s sustained write.
- 32 GB to 256 GB capacity. Larger isn't always better, since loop recording overwrites old files anyway.
How often should you replace the card?
Manufacturer specs and verified buyer feedback suggest replacing your microSD card every 12 to 24 months, even if it seems to work. Cards wear out silently. A dead card during an accident is the same as no camera at all.
How do you format it correctly?
Always format the card inside the camera's own menu, not on your computer. The camera writes a specific file structure, usually a DCIM folder plus a private partition, that desktop formatting won't replicate cleanly. Format it once a month for good measure.
Where to Mount It on Your Windshield (and the Laws That Decide)
Where you stick the camera isn't just a style choice. State laws and visibility concerns both have a say.
What's the legal mount zone?
Most US states follow a general rule: the dash cam can't obstruct the driver's view. In practice, that means mounting it in a small rectangle on the passenger side of the windshield, behind the rearview mirror, and within the area swept by the windshield wipers. That way rain doesn't ruin your footage.
A few states go further:
- California, Minnesota, New Jersey restrict mounts to a specific 5-square-inch zone in the lower corner or behind the mirror. Check your state DMV site before committing to a spot.
- Several other states prohibit anything mounted on the windshield at all, though a single small dash cam is usually tolerated.
What does the "behind the rearview mirror" placement actually do for you?
It hides the camera from the driver's eyeline, keeps it from catching sun glare, and makes the adhesive less likely to fail from direct summer heat. It's also where most police and traffic-court footage holds up best, because it shows a natural driving view, not a wide-angle fish-eye.
Suction mount or adhesive?
| Mount type | Pros | Cons |
|---|---|---|
| Suction cup | Removable, repositionable | Falls off in heat, vibrates on rough roads |
| 3M VHB adhesive | Permanent, vibration-free | Hard to remove, leaves residue |
For most drivers, the 3M VHB adhesive pad that ships in the box is the better long-term choice. Use the suction cup only if you swap vehicles often.
Clean the glass first
Wipe the mounting area with isopropyl alcohol. Let it dry for 60 seconds. Then press the mount firmly for 30 seconds.
Skipping this is why so many cams end up on the floor mat.
Power Option 1: 12V Cigarette Lighter Plug
This is the simplest power setup, and the one most people start with. It works, but it has tradeoffs.
How does the 12V plug setup work?
You plug the included cable into your car's 12V outlet (the old cigarette lighter socket). The camera turns on when you turn the ignition on, and turns off when you cut power. That's it.
No tools, no fuse box, no wiring.
What are the drawbacks?
- The 12V outlet is usually off when the car is parked, so you lose parking mode.
- The dangling cable across your dashboard looks ugly unless you route it.
- Some cars cut power to the 12V outlet the moment you turn the key, which can skip the last few seconds of footage.
When is the 12V plug the right choice?
If you only need driving footage, never park in risky spots, and don't want to touch your fuse box, the 12V plug is fine. It's a five-minute setup that gets you protected today.
Up next: the harder, better, permanent option. Hardwiring.
Power Option 2: Hardwiring Kit with Fuse Tap
This is where the real install begins. If you want parking mode without flattening your battery, hardwiring is the answer.
What's a hardwiring kit?
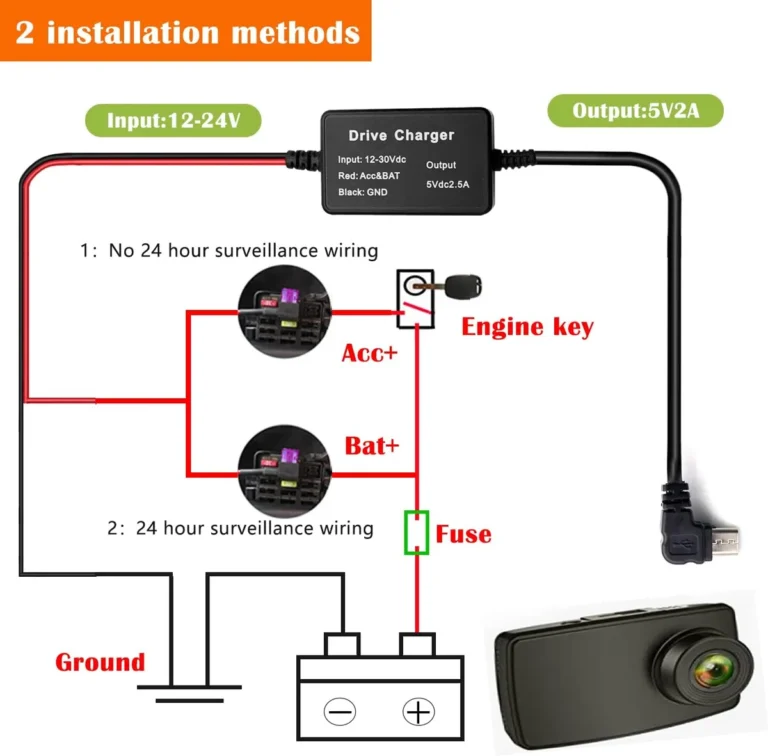
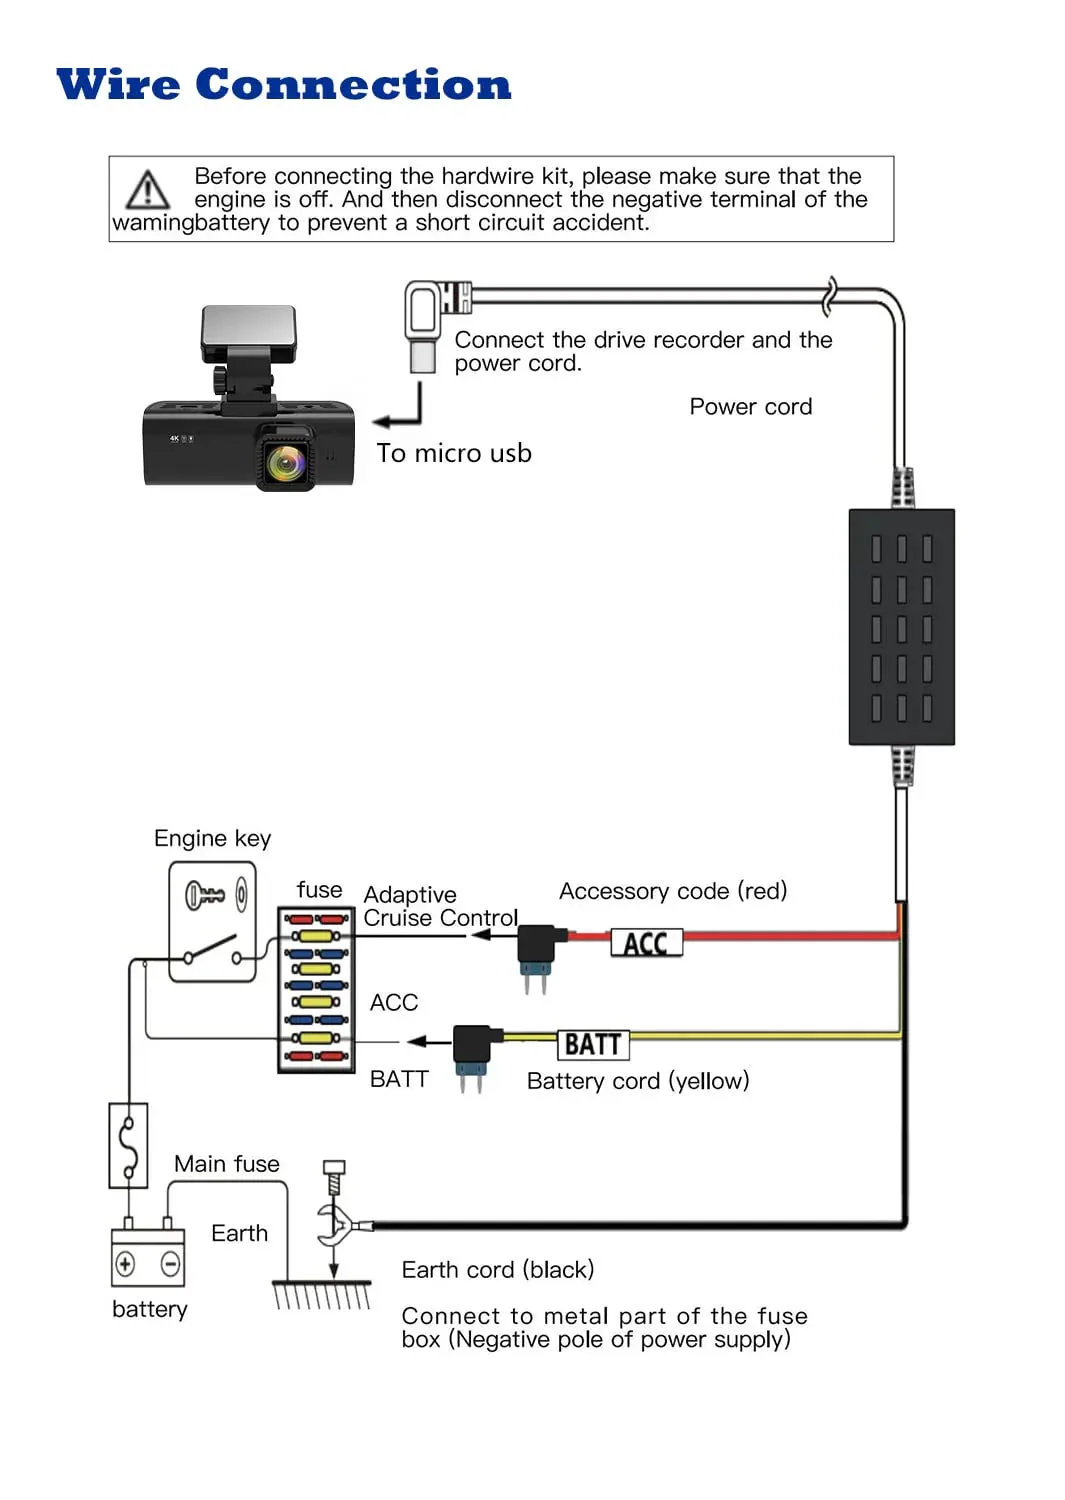
A small box with three wires: one to a constant (always-on) fuse, one to a switched (ignition-only) fuse, and one to a ground bolt on the chassis. It also contains a low-voltage cutoff that kills the camera before your car battery drops below a safe voltage, usually 11.8V or 12.0V.
What tools and parts do you need?
- A hardwiring kit matched to your dash cam (most brands sell one specifically)
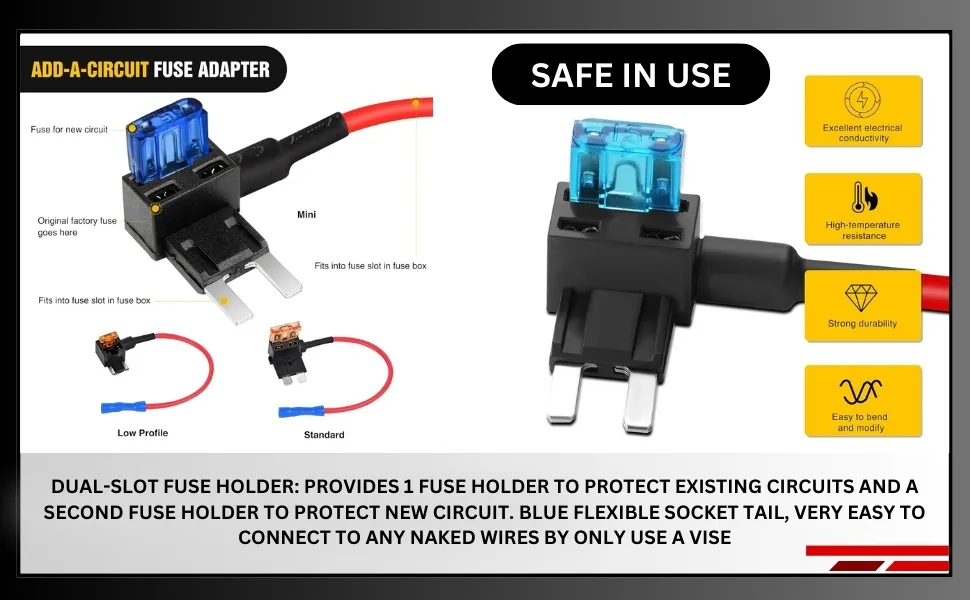
- An "add-a-fuse" tap sized to your fuse box (mini, micro, or standard, depending on the car)
- A fuse puller (usually included with the kit)
- A 10mm socket or wrench for the ground bolt
- A multimeter (optional but very useful for identifying fuse types)
How do you identify the right fuses?
With the car off, use a multimeter or fuse tester to find:
- A constant fuse: stays powered even when the car is off. Good for parking mode.
- A switched fuse: only powered when the ignition is on. Good for normal driving.
Common picks include the rear wiper fuse (constant) or the radio fuse (switched). Check your owner's manual for the fuse box map.
How do you actually install it?
- Turn the car off and remove the key.
- Pull the existing fuse from your chosen constant slot.
- Insert that fuse into the lower slot of the add-a-fuse tap.
- Insert a new fuse (same amperage) into the upper slot for the dash cam.
- Plug the tap into the fuse box.
- Repeat for the switched fuse.
- Crimp the ground wire under a nearby chassis bolt.
- Route the cable up to the camera.
What's the voltage cutoff actually doing?
It monitors your car battery and cuts power to the dash cam before your battery dies. Most kits let you set the cutoff (11.6V, 11.8V, 12.0V, 12.2V). The lower the number, the longer parking mode runs, but the harder it is on your battery.
For a healthy car battery, 12.0V is a safe daily setting. For an older battery, stay at 12.2V.
Power Option 3: OBD-II and Rearview Mirror Setups
If pulling fuses isn't your thing, two cleaner alternatives exist. Each has a real use case.
What is the OBD-II power option?
The OBD-II port sits under your dash on the driver's side. It's a constant 12V source that stays on even when the car is off. Plug-in OBD-II dash cam cables give you parking mode without touching the fuse box.
The tradeoff is theft. An OBD-II cable sticking out of the port is obvious and easy to yank. It also occupies a port some mechanics need for diagnostics.
When does a rearview mirror dash cam make sense?
Mirror-mounted cams replace or clip over your existing rearview mirror. They look factory, hide the wiring, and often include a rear camera that pops on with reverse. They're a smart pick for leased vehicles, since you don't stick anything to the glass.
Quick comparison
| Power method | Install time | Parking mode | Best for |
|---|---|---|---|
| 12V plug | 5 minutes | No | Casual drivers, renters |
| Hardwire kit | 30–60 minutes | Yes, with cutoff | Daily drivers, parking lots |
| OBD-II cable | 10 minutes | Yes, no cutoff | Lease cars, no-fuse-box comfort |
| Mirror cam | 20 minutes | Model-dependent | Lease cars, OEM look |
Routing the Cable Cleanly Along the Headliner and A-Pillar
This is the cosmetic step. Done well, your dash cam looks factory-installed. Done badly, you get a cable dangling across your A-pillar and into the outlet.
Where should the cable run?
Start at the camera, tuck the cable into the headliner gap above the windshield, run it along the passenger-side A-pillar, then down behind the glove box. From there, route it to either the 12V outlet or the fuse box.
What's the right way to tuck the cable?
Use a plastic trim tool (often included with dash cam kits). Press the cable into the headliner gap with the tool, never a metal screwdriver. Metal scratches paint and cracks plastic clips.
Why does the A-pillar matter?
The A-pillar has an airbag behind it on most cars. Never route the cable across the airbag path. Tuck it behind the trim panel so it sits between the trim and the metal, not on top of it.
The cable should run parallel to the pillar, never across it.
What about the door seal?
The rubber weatherstrip along the door frame hides cables beautifully. Pull it back slightly, tuck the cable behind it, and press the seal back down. This works for both A-pillar and rear hatch routing.
How long does the cable routing take?
For a first-timer, plan 30 to 45 minutes. A practiced installer can do it in 10. The trick is patience at the trim clips.
First-Time Settings: Resolution, Loop Recording, and G-Sensor
Mounting and power are half the job. The camera's settings decide what footage actually survives an incident.
What's the right resolution and frame rate?
Set your dash cam to the highest resolution that matches your card size. 1080p at 30fps uses roughly 8 GB per hour. 1440p uses about 12 GB per hour. 4K doubles that.
Frame rate matters more than most buyers realize. 60fps captures motion cleanly, which makes plates readable in fast-moving highway hits. 30fps is the standard.
What is loop recording and how long should clips be?
Loop recording overwrites the oldest file once it's full. Clip length matters less than you think. 1-minute, 3-minute, and 5-minute clips all work. Shorter clips are easier to find and share after an incident.
How sensitive should the G-sensor be?
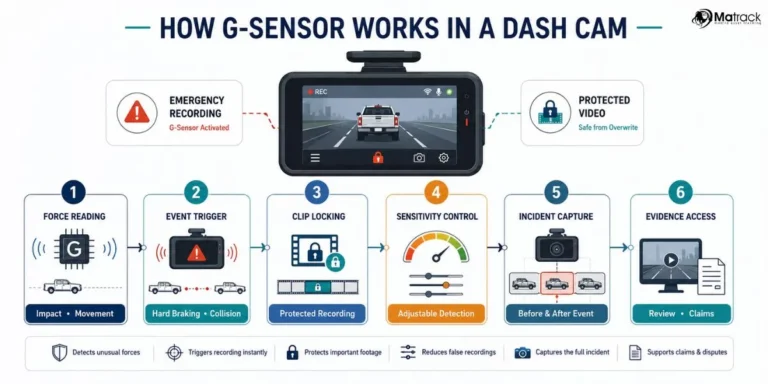
The G-sensor (impact sensor) locks the current clip so loop recording won't overwrite it. Setting it too high locks files every time you hit a pothole, filling your card with junk.
The sweet spot for daily driving is "Medium" or sensitivity level 2 out of 3. Lower it further if you drive on rough roads, raise it for highway commuting.
What other settings should you turn on?
- Date and time stamp: always on. Police and insurance need it.
- GPS logging: on if your cam has it. Speeds up insurance claims.
- Audio recording: see the legal section below before turning it on.
- Exposure compensation: nudge down 1/3 step if daytime footage is too bright.
Setting Up Parking Mode Without Draining Your Battery
Parking mode is what makes a dash cam pay for itself. Most drivers never use it because their setup kills the battery. Here's how to do it right.
What are the two main types of parking mode?
Buffered parking mode records continuously at a low bitrate and saves full-quality footage a few seconds before and after any impact. It uses more power but captures the lead-up to a hit-and-run.
Time-lapse parking mode records at 1 to 5 fps around the clock. It uses far less power but skips detail between frames.
What voltage cutoff should you use?
Most hardwiring kits offer 11.6V, 11.8V, 12.0V, or 12.2V cutoffs. The lower the number, the longer parking mode runs before the kit kills power. For a healthy car battery, 12.0V is the standard 2026 recommendation.
For older batteries, stay above 12.2V to avoid a no-start morning.
How long does parking mode last?
With a 12.0V cutoff and a standard 50Ah car battery, expect 8 to 24 hours of buffered parking mode, depending on how often the G-sensor triggers. Time-lapse mode stretches that to several days.
Can a dash cam drain a healthy battery?
In our research, hardwired kits with proper voltage cutoff are safe for everyday drivers. The risk shows up when batteries are old, when temperatures are extreme, or when drivers leave the car parked for weeks. If your car sits for long stretches, set the cutoff to 12.2V or unplug the cam.
What about cars with start-stop systems?
Start-stop can confuse basic hardwiring kits, which mistake the engine restart for an ignition cycle. Look for a kit with start-stop compatibility, or use an OBD-II cable.
Connecting to Your Phone Over Wi-Fi (or LTE)
Most modern dash cams have a companion app. Setup takes two minutes and saves you hours of squinting at a tiny screen.
How does the Wi-Fi app work?
The camera broadcasts its own Wi-Fi network. You connect your phone to it, open the app, and you can preview the live view, change settings, and download clips. No internet is needed.
The downside is you must be in or near the car. You can't check footage from across town.
What does LTE add?
LTE dash cams (with a built-in SIM or hotspot connection) push footage to the cloud in real time. You get theft alerts, remote live view, and instant clip backup. Aggregate reviews indicate LTE is most popular with fleet managers and rideshare drivers who want off-site footage.
How do you pair the app the first time?
- Download the manufacturer's app.
- Turn on the camera's Wi-Fi (usually a button or menu setting).
- Connect your phone to the camera's Wi-Fi network.
- Open the app. It should auto-detect the camera.
- Set a new Wi-Fi password while you're in there.
What if the pairing keeps dropping?
Update the camera firmware first. Then forget the network on your phone and re-pair. If it still fails, format the SD card in the camera, since a corrupt card can break the Wi-Fi module.
Recording Audio: The Legal Line You Can't Cross
Audio is where the legality question trips people up. The video side is almost always legal in the US. Audio depends on where you live.
Is dash cam video legal in the US?
Yes, in all 50 states. Recording public roads from your own vehicle has no consent requirement. You can post footage online and use it in court.
What about audio recording?
Audio falls under wiretapping law. Eleven US states require all-party consent for recording conversations, including inside a vehicle. The big ones are California, Florida, Illinois, Maryland, Massachusetts, New Hampshire, Pennsylvania, and Washington.
If you drive for rideshare in a two-party state, turn audio off unless you have a visible notice that recording is in progress.
Daily Use: Locking Clips, Reviewing Footage, and Exporting Fast
After the install, daily use is simple. The habits below save you time when something happens.
How do you lock an important clip fast?
Press the emergency-lock button on the camera. Most have a dedicated button marked with a shield or lock icon. The clip saves to a locked folder that loop recording won't overwrite.
How do you pull footage off the card?
Three options: remove the SD card and read it on a computer, use the Wi-Fi app to download directly, or plug the camera into a computer with the included USB cable. The app is fastest for single clips.
How often should you check that it's recording?
Once a week. A quick glance at the LED indicator (steady blue or green usually means recording). Cams fail silently, so a 10-second check saves a missing-incident headache.
Common Dash Cam Problems and How to Fix Them
Most dash cam issues trace back to the SD card, the power source, or settings that drifted.
Why does my dash cam keep saying "card error"?
Format the card in the camera. If it returns within a week, replace the card with an endurance-rated model. If a new card still errors, check the camera's supported capacity (most cap at 256 GB).
Why does footage look blurry at night?
Dirt on the lens is the usual culprit. Wipe it with a microfiber cloth. If it's clean, your camera's aperture may be too small.
Look for f/1.6 or f/1.8 lenses for better low-light capture.
Why does the camera reset the date every time?
Internal battery or capacitor has died. On capacitor cams this is rare before 3 years. On battery cams it's common after 1 to 2 summers in hot climates.
Why won't it turn on in parking mode?
The hardwiring kit's voltage cutoff may have tripped. Start the car to recharge, then check the kit's cutoff setting in the app or menu.
Long-Term Care: Firmware Updates and SD Card Replacement
A dash cam is a set-and-forget device, until it isn't. Two small habits keep it reliable for years.
How often should you update firmware?
Check the manufacturer's app or support page every 6 months. Firmware updates fix bugs, improve parking mode, and occasionally add new features. The update process runs over the SD card.
When should you swap the SD card?
Every 12 to 24 months, regardless of how it seems to be working. Endurance cards silently wear out. Set a calendar reminder so it doesn't slip.
Frequently Asked Questions
How long does it take to install a dash cam?
A 12V plug install takes about 5 minutes. A hardwired install takes 30 to 60 minutes for a first-timer, including cable routing.
Can a dash cam drain my car battery?
Yes, if it's hardwired without a voltage cutoff, or if the cutoff is set too low. A proper kit with a 12.0V cutoff protects a healthy battery.
Do dash cams record when the car is off?
Only if the cam supports parking mode and is wired to a constant power source. A basic 12V plug setup turns off with the ignition.
Is a dash cam legal in the US?
Video recording is legal in all 50 states. Audio recording requires all-party consent in about 11 states. Check your state law before turning audio on.
Will a dash cam lower my insurance?
Some carriers offer 5% to 15% discounts for vehicles with a dash cam, though most major US insurers don't yet have a formal program. Ask your provider.
What's the best dash cam for hot climates?
A capacitor-based cam rated for at least 70°C operating temperature. Battery cams swell and fail faster in extreme heat.