How to install rove r2-4k dual dash cam: The complete guide
Most folks searching how to install rove r2-4k dual dash cam want the same thing: a tidy install that looks like the camera grew out of the windshield, no loose wires catching the eye, and a rear camera that actually pulls clear footage at night. The good news is this kit is genuinely DIY-friendly, even if you've never opened a fuse box. The slightly fiddly part is routing the rear cable through the headliner without leaving visible slack across the headliner or blocking an airbag in the A-pillar.
Manufacturer specs confirm the rear camera records at 1080p, the front records at 4K UHD, and both run on a supercapacitor rated for roughly -4°F to 149°F. With the right tools on hand (most of which you probably already own), a basic install runs about 30 to 60 minutes, and a full hardwire for parking mode takes around 1.5 to 2 hours. Let's get the camera powered, mounted, and aimed before you lose another day of coverage.
Quick Answer
To install the Rove R2-4K dual dash cam, mount the front unit behind the rearview mirror. Route the power cable into the headliner and down the A-pillar to a 12V outlet. Run the rear camera cable through the headliner to the back glass.
Insert a U3 MicroSD card. Pair the dash cam with the Rove app over Wi-Fi. Format the card in the camera menu before driving.
What You're Working With: Rove R2-4K Dual Dash Cam Overview
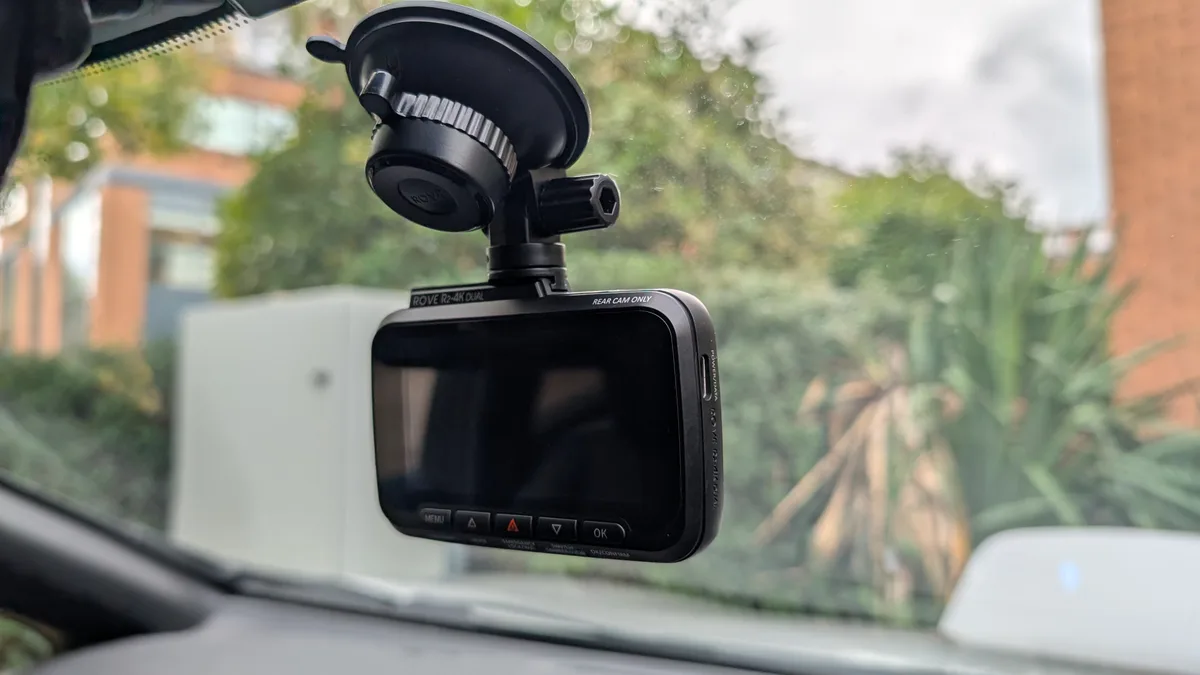
The Rove R2-4K Dual is a two-channel dash cam sold in a single box. The front unit is the small rectangular block with a 4K UHD sensor and an f/1.6 aperture lens, plus a built-in GPS module and 2.4 GHz Wi-Fi. The rear camera is a smaller matching cube that records at 1080p with a roughly 140° field of view.
They connect with a long mini-USB extension cable, and power comes from a 12V car charger or an optional hardwire kit.
A few things in the spec sheet actually matter for installation, so let's call them out before you start pulling trim.
- Front resolution: 2160p (4K UHD) at 30 fps
- Rear resolution: 1080p at 30 fps
- Front lens: f/1.6 aperture, roughly 150° viewing angle
- Power source: Supercapacitor (not a lithium battery), which makes heat tolerance much better
- Storage: MicroSD slot, officially supporting up to 256 GB, with community reports of 512 GB working in newer firmware as of 2026
- Parking mode: Requires the optional hardwire kit; the cigarette lighter alone won't run it
Aggregate reviews report the supercapacitor as the biggest day-one quality-of-life upgrade over older lithium-cell dash cams. If you've ever smelled a swollen battery after a summer parked in a lot, you already understand why that detail isn't marketing fluff.
Key Term: What a Supercapacitor Actually Does
A supercapacitor stores just enough energy to safely shut the camera down and save the last file when you cut ignition. It does not run the camera while the car is off. That's why parking mode needs the hardwire kit, not just patience.
Unboxing the Rove R2-4K Dual: What's in the Box
Before you stick anything to your windshield, lay everything out and confirm you've got every piece. Aggregate buyer feedback consistently flags missing parts as the number-one reason installs go sideways on day one, usually a missing 3M adhesive pad or a short rear camera cable on bigger SUVs.
Here's what should be in the box, and what each one does during the install.
| Component | What it does during install |
|---|---|
| Front camera unit (with screen) | The main recorder; mounts to the windshield |
| Rear camera unit | Mounts to the rear glass with adhesive pad |
| Suction cup mount | Temporary or removable front mount option |
| 3M adhesive mount | Permanent front mount option; more secure in heat |
| Rear camera extension cable | Connects front unit to rear camera (roughly 20 ft) |
| 12V car charger | Plugs into cigarette lighter for basic power |
| GPS antenna / module | Often built-in on newer units; check your serial |
| Trim pry tool | For tucking the cable into headliner and A-pillar |
| Cable clips (adhesive) | Hold the cable against trim in spots the pry tool can't reach |
| User manual and quick-start guide | Wiring diagram for hardwire users |
Quick Sanity Check Before You Start
If anything is missing, stop and contact Rove before installing. Halfway through routing a cable only to find the rear camera is absent is the kind of afternoon you don't get back. A two-minute inventory check saves an hour of re-work.
Why Visuals Matter for This Install (And Where Most DIYers Get Stuck)
The physical steps of this install aren't complex. What's tricky is the spatial judgment: where exactly behind the mirror, how much slack to leave at the headliner bend, which way the cable naturally falls when the door closes. Aggregate install videos show that the difference between a "professional" install and a "my first dash cam" install is almost always about 10 small visual decisions.
Three places consistently trip people up:
- Mount placement relative to the mirror. Too high and the camera catches the mirror's edge in the frame. Too low and the screen blocks your view.
- The A-pillar cable drop. Most people route the cable over the airbag, which is both ugly and technically wrong. It should go behind the airbag, with the cable tucked into the channel closest to the windshield.
- Rear cable routing across the headliner. The cable is long, but on a minivan or long-bed truck, you can run out. You don't want to discover that after you've already tucked 15 feet of it.
Photos and diagrams fix these problems faster than text. Look at any clean install online and you'll see the same three patterns: camera just under the mirror, cable disappearing into the headliner within 2 inches of the A-pillar, and rear cable following the natural curve of the headliner all the way back without crossing any airbag modules.
If You Drive One of These, Read This Section Twice
- SUVs and minivans with long rooflines (cable length matters)
- Vehicles where the 12V outlet is in the center console, not the dash (longer cable route)
- Trucks with rear windows that slope sharply (rear camera angle is harder)
Tools and Accessories You'll Need Before You Start
Most of this stuff is in your garage already. A few items you'll want to pick up before you start so you're not stuck mid-install with the trim popped open and no way to push the cable back in.
Tools and Materials
| Item | Why you need it | Have it? |
|---|---|---|
| Trim removal tool (plastic) | Pops A-pillar and headliner trim without scratching | Most cars ship with one in the trunk tool kit |
| Microfiber cloth | Cleans glass before the 3M pad sticks | Yes |
| Isopropyl alcohol (70%+) | Final glass prep before adhesive mount | Yes |
| MicroSD card, U3 or V30 rated | Required for 4K recording; cheaper cards fail | Buy separately |
| Add-a-fuse tap (for hardwire) | Pulls switched or constant power from fuse box | Auto parts store |
| 10mm socket or pliers | Removing fuse box cover and ground bolt | Garage |
| Cable clips (adhesive) | Holds slack at the back glass | Auto parts store |
| Smartphone with Rove app | Initial Wi-Fi pairing and settings | Yes |
Which MicroSD Card to Buy (Briefly)
The Rove R2-4K writes very large 4K files. A Class 10 card technically works, but aggregate buyer reports show constant "Card Error" messages on cheap no-name cards after a few weeks. The two cards that show up most often in verified long-term reviews are the Samsung PRO Endurance and the SanDisk High Endurance, both in 128 GB or 256 GB sizes.
Buy the card new. A used card from an old GoPro is a known failure source.
Preparing Your MicroSD Card (Don't Skip This Step)
Here's where most first-time installers quietly break their setup. They pop in the SD card, mount the camera, drive off, and three days later find that none of their footage actually saved.
The reason: dash cams write continuously, which uses a filesystem feature most computers don't. The card needs to be formatted inside the dash cam, not in your laptop. Windows and Mac both default to a format that can cause loop recording to choke after a few hours.
Formatting Checklist
- Power on the camera with the card inserted (no need to mount it yet).
- Open the camera menu (the icon on the bottom-right of the screen).
- Find "Format SD Card" and run it.
- Wait for the on-screen confirmation before removing power.
- Set your loop recording length to 3 minutes as a starting point.
Set this once now and you'll never think about it again. Skip it and you'll be the person posting in forums about "corrupted files" within a month.
How to Test the Card Before You Mount Anything
After formatting, record a 2-minute clip, then play it back on the camera itself. If it plays smoothly with no stutter or "file error" message, the card is good. If you see stutter, the card is too slow, and you need a U3-rated card instead of whatever came in the package.
Where to Mount the Front Camera on Your Windshield
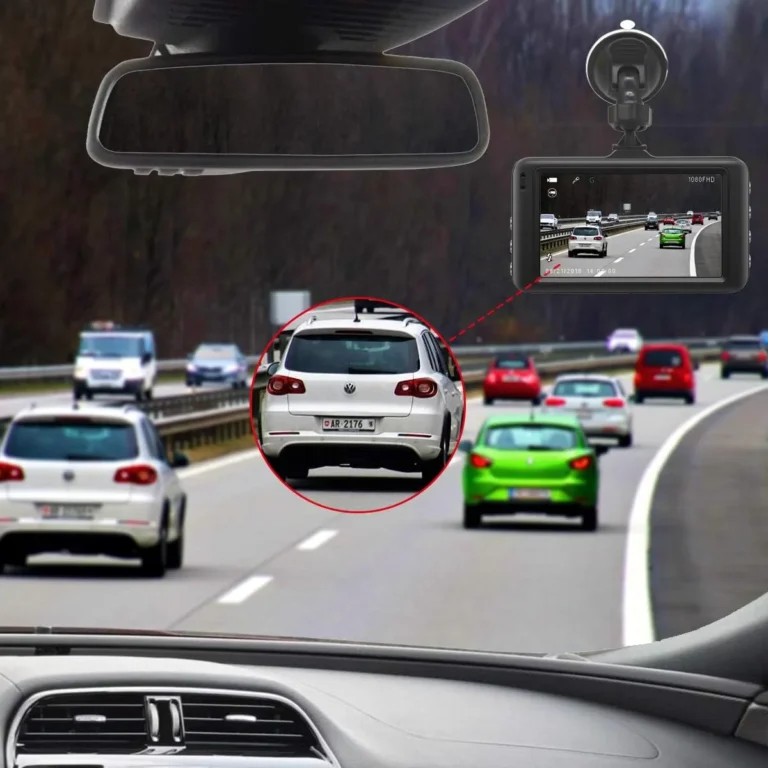
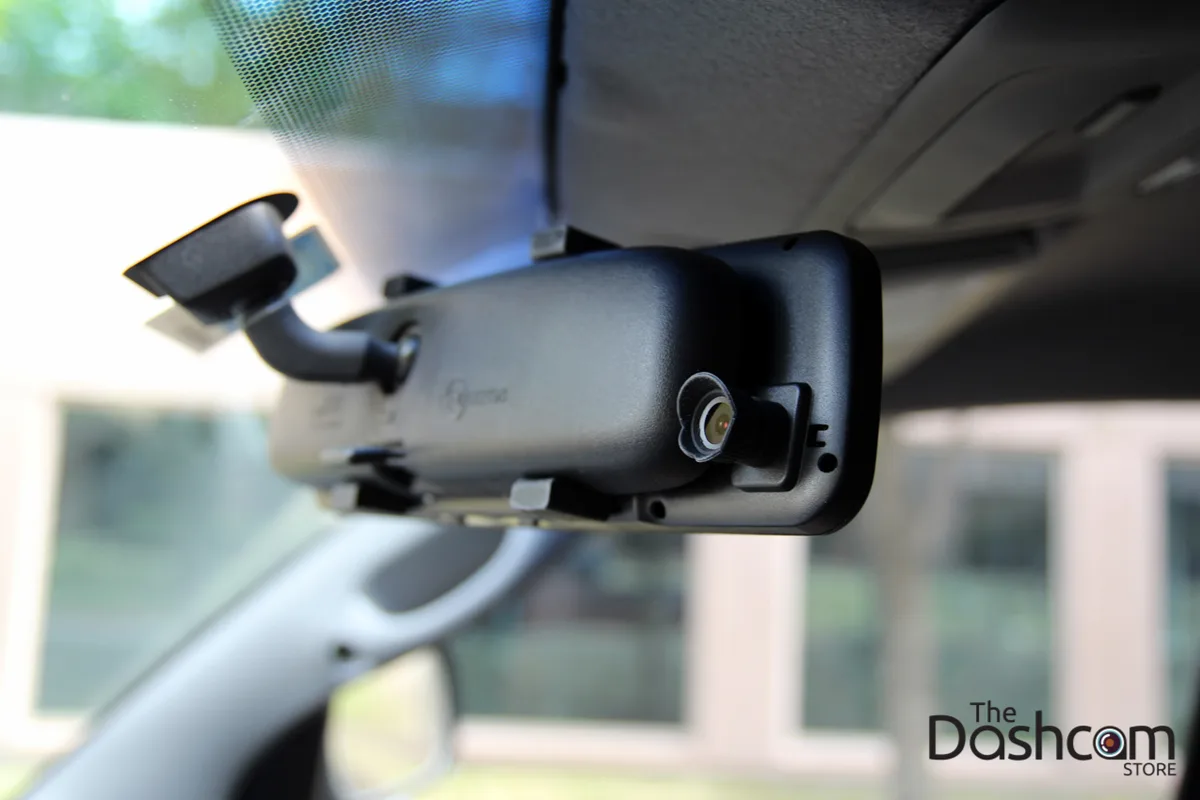
The best spot is just below or directly behind the rearview mirror, slightly off-center toward the passenger side. That position keeps the camera out of your sightline and gives you the cleanest forward view. Aggregate install photos show that anything more than 4 inches below the mirror starts catching the dashboard horizon, which wastes the upper half of the frame.
Use the included suction cup or 3M adhesive mount to test-fit the position first. Power the camera on with a temporary cable run, then sit in your normal driving posture and check the screen. The horizon line should sit roughly in the middle of the frame, and your hood should only show about an inch at the bottom.
What the Mounted Position Should Look Like
- Camera lens fully visible below or beside the mirror housing
- No part of the camera blocking the driver's forward view
- At least 1 inch of clearance from the windshield dot matrix (the black ceramic border) so the adhesive bonds to solid glass
Should You Place It on the Driver or Passenger Side?
Most states follow NHTSA's general guidance that mounting should not obstruct the driver's clear view. Behind the mirror is universally safe. Off to the passenger side is fine in nearly every state as long as it stays within the windshield wiper sweep.
Driver-side mounting is riskier and can fail inspection in stricter jurisdictions like California and Minnesota.
Mounting the Front Unit: Suction Cup vs. 3M Adhesive
Both mounts are in the box, and you only need to pick one. The choice comes down to climate and how long you plan to keep the camera.
The suction cup is removable, leaves no residue, and is easy to reposition if your first angle is off. Aggregate reviews consistently report that suction cups lose grip in direct summer sun, especially on dashboards that bake above 140°F. If you live in Arizona, Texas, Florida, or anywhere with hot summers, the suction cup will likely fail within a season.
The 3M adhesive pad is permanent, but it holds through heat, cold, vibration, and car washes without complaint. The trade-off is that removal leaves a small sticky patch on the glass. A bit of isopropyl alcohol and a razor scraper take it off cleanly without scratching.
When to Choose Each
| Mount type | Best for | Weakness |
|---|---|---|
| Suction cup | Renters, leased cars, anyone repositioning often | Heat failure in summer |
| 3M adhesive | Permanent install, hot climates, rough roads | Leaves residue if removed |
Prep the Glass Before You Stick It
Wipe the chosen spot with a microfiber cloth, then follow up with isopropyl alcohol. Let it dry for 60 seconds before applying the adhesive pad. Skipping the alcohol step is the number-one reason mounts fall off early.
Body oils from your fingers prevent the adhesive from bonding fully.
Routing the Power Cable Across the Headliner
Once the front camera is mounted, run the power cable up and into the headliner. Start at the camera, then work backward toward the 12V outlet. Don't push the cable into the headliner first and then plug the camera in last, because you'll have no slack if you misjudge length.
The cable follows the headliner edge naturally. Tuck about 6 inches at a time using your fingers or a plastic trim tool. The headliner material on most vehicles is foam-backed fabric, so it grips the cable and holds it without clips.
You typically need zero cable clips along the roof.
Where the Cable Usually Gets Stuck
The bend at the top of the windshield is the most common snag point. The cable wants to pop back out at that corner. Push it firmly into the corner gap with the trim tool, then hold pressure for a few seconds.
The fabric will relax around it. If it still won't stay, a single small adhesive clip at the corner fixes it permanently.
Leave roughly 4 to 6 inches of slack at the camera end. This little loop lets you pull the camera off the mount without unplugging, and it makes removal and reinstallation painless.
Tucking the Cable Into the A-Pillar the Right Way
The A-pillar is the trim piece running from your dashboard up to the roof on each side of the windshield. This is where most installs go wrong, because the airbag is right behind it.
Rove and the NHTSA both strongly recommend routing the cable behind the airbag, not over it. The airbag deployment path runs along the pillar surface, and any cable in that path can catch or redirect the airbag during deployment. The correct channel is the one closest to the windshield, where the trim meets the glass.
The Right Way
- Pull the A-pillar trim gently outward at the top. It pops loose with firm hand pressure on most cars.
- Tuck the cable into the channel behind the trim, against the windshield.
- Re-seat the trim by pressing it back into place. You should hear a few soft clicks.
- Route the cable down the pillar toward the kick panel or dashboard edge.
If the Pillar Won't Pop Off
Some vehicles use one-time plastic clips that break on removal. If the pillar won't budge without serious force, don't pry harder. Just tuck the cable into the outer edge of the pillar with a trim tool.
It'll look almost identical from the driver's seat and avoids breaking clips you can't replace.
Running the Rear Camera Cable to the Back of Your Vehicle
Now the long run. The rear camera cable typically comes in around 20 feet, which fits most sedans and small SUVs comfortably. Larger three-row SUVs, vans, and trucks can run short, in which case you'll need a longer aftermarket version.
The route follows the headliner all the way back, then drops down the rear pillar or hatch frame. The same headliner-tucking method applies. Push 6 inches at a time along the headliner edge, then down the back pillar to the rear glass.
What If You Run Out of Cable
If the cable comes up short before reaching the rear glass, don't stretch it. Stretching the cable can damage the internal wires and create intermittent power issues later. Instead, route the rear camera slightly forward of its ideal spot, like on the upper third of the rear glass rather than the very top.
The footage angle is still excellent, and you avoid a stressed cable.
Quick Visual Test Before You Finalize
Plug the rear camera in temporarily and power the whole system. View the live feed in the Rove app. Confirm the camera is centered and not catching too much of the headliner or too much of the rear bumper.
Adjust the angle now, before the adhesive cures, not after.
Mounting and Aiming the Rear Camera
The rear camera sticks to the upper third of the rear glass with a 3M adhesive pad. Center it horizontally for symmetric coverage, or bias it slightly toward the driver side if your rear wiper sweep is uneven. Clean the glass with isopropyl alcohol first.
Hold pressure for 30 seconds after pressing it down.
The lens angle should capture equal parts sky and ground. Too high and you lose license plates. Too low and the rear bumper fills the frame.
Use the live view in the Rove app to dial in the exact tilt before the adhesive fully bonds.
Basic Power Setup: Using the 12V Cigarette Lighter
Plug the included 12V adapter into the cigarette lighter and route the cable to the front camera. This powers the camera while the car is on. Parking mode won't work on this setup alone, since most cigarette lighter sockets cut power with the ignition.
If your vehicle has the 12V outlet in the center console instead of the dash, plan for a longer cable run down the A-pillar and across the kick panel. The cigarette lighter approach is the right call if you don't need parking mode and want zero wire modifications.
Hardwiring the Rove R2-4K for Parking Mode (Fuse Box + Add-a-Fuse)
Parking mode needs constant 12V power even when the ignition is off, which the cigarette lighter cannot provide safely. The hardwire kit plugs into your fuse box using an add-a-fuse tap, then routes constant and switched power through a small voltage cutoff module.
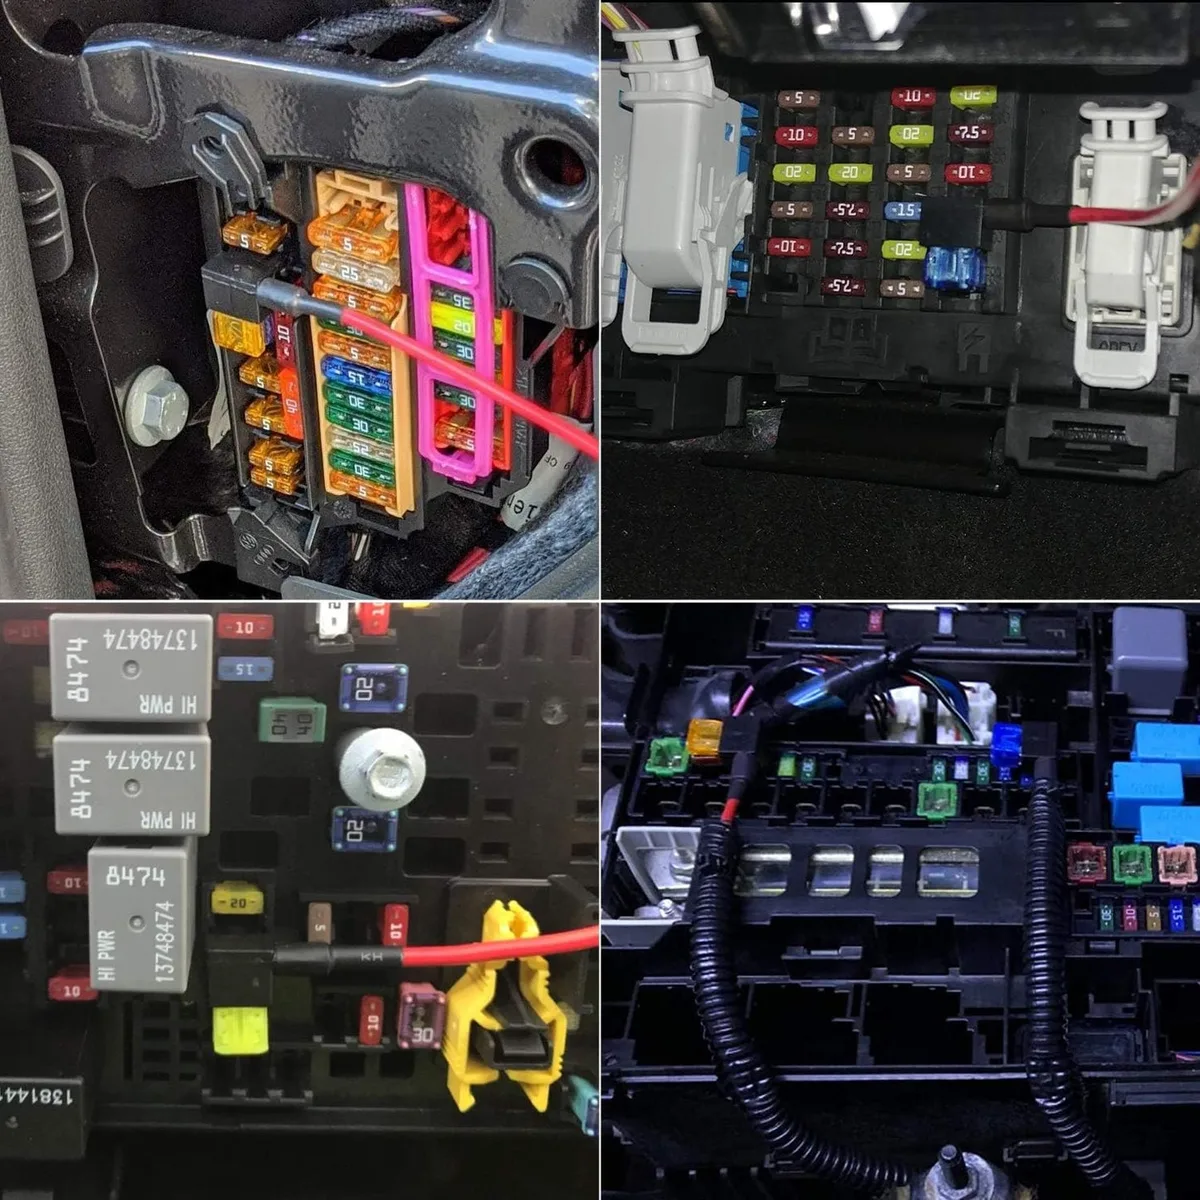
Pick a constant fuse (always hot) like the hazard lights or horn, and a switched fuse (on with key) like the radio. The voltage cutoff protects your battery from draining below roughly 11.8V. The whole job adds about an hour to a basic install.
Pairing the Dash Cam With the Rove App Over Wi-Fi
Press the Wi-Fi button on the camera to broadcast its network. On your phone, open Wi-Fi settings and connect to the SSID shown on the dash cam screen, then open the Rove app to view live footage and pull clips. First-time pairing usually takes under a minute if the firmware is current.
If the app won't find the camera, reboot both devices and make sure your phone isn't still tethered to your home network or a mobile hotspot. The app needs a direct connection to the dash cam's SSID, not your regular internet.
Dialing In Your Settings: Resolution, Loop Recording, G-Sensor, GPS
Set resolution to 4K + 1080p dual, loop length to 3 minutes, G-sensor to medium, and GPS to on. Format the SD card again after major firmware updates to prevent file table drift.
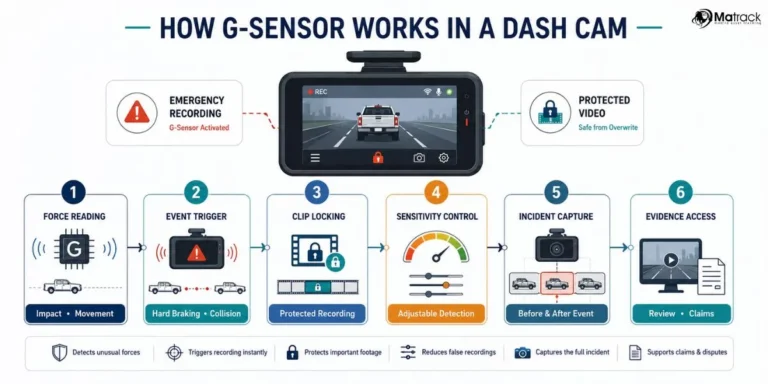
The G-sensor sensitivity setting matters more than most people realize. On "high," every speed bump locks a file and fills your card with junk. On "low," a real fender-bender might not register.
"Medium" is the right default for daily driving on normal roads.
Visual Mistakes That Ruin a Clean Install (And How to Avoid Them)
The three repeat offenders: cable routed over the airbag, mount placed too low so the dashboard fills the frame, and rear camera stuck on with insufficient glass prep. Each looks minor on day one and obvious in the saved clips later.
Slow down at the A-pillar and the rear glass. A clean install starts before you stick anything down.
Common Install Problems and Quick Fixes
Wi-Fi won't connect: reboot the camera and forget the network on your phone. Suction falls off: switch to the 3M adhesive. Card error: reformat in-camera.
Parking mode dead: confirm constant fuse slot, not switched. Nine times out of ten, the fix is one of those four.
If the rear camera shows a blank or snowy feed, reseat the extension cable at both ends. A loose mini-USB connection is the most common cause, and it almost never means the rear unit itself is bad.
Dash Cam Placement Laws and Windshield Obstruction Rules by State
Most US states follow the general NHTSA guideline that anything mounted on the windshield must stay within specific zones, usually the upper 5 to 7 inches of glass or behind the rearview mirror. California, Minnesota, New Jersey, and Pennsylvania are stricter and explicitly prohibit mounting within the driver's swept sightline, which is why behind-the-mirror placement is the safest universal choice.
When in doubt, check your specific state's motor vehicle code before drilling into a permanent mount. A quick five-minute lookup now saves a potential fix-it ticket later.
Rove R2-4K vs. Hardwire vs. OBD-II Power: Which Setup Is Right for You?
Choose the cigarette lighter if you want the simplest install and don't need parking mode. Choose hardwire if parking surveillance matters. Choose OBD-II only if your vehicle stays in warranty and you swap cars often, since it leaves no permanent wiring.
| Power method | Install time | Parking mode | Best for |
|---|---|---|---|
| 12V cigarette lighter | 30 to 60 min | No | Daily commuters, leased vehicles |
| Hardwire kit (add-a-fuse) | 1.5 to 2 hrs | Yes | Street parking, fleet use, rideshare |
| OBD-II adapter | 15 to 30 min | Yes (limited) | Warranty concerns, frequent vehicle swaps |
Best MicroSD Cards for the Rove R2-4K (With Specs)
The two cards most often cited in long-term verified reviews are the Samsung PRO Endurance 128 GB or 256 GB, and the SanDisk High Endurance 128 GB or 256 GB. Both are U3 and V30 rated, both handle the 4K write speed, and both are designed for continuous rewriting. Avoid anything not labeled High Endurance or Max Endurance, since standard cards wear out within weeks under dashcam use.
Maintenance and Long-Term Optimization
Reformat the SD card once a month to keep the file table clean. Wipe the lens with a microfiber cloth every few weeks. Check the adhesive mount after the first hot day of summer.
Update firmware through the Rove app when prompted.
A simple quarterly check covers almost everything: card health, lens clarity, mount bond, and firmware currency. Set a calendar reminder and the camera runs quietly for years.
Final Recommendation and Decision Guide
For most drivers, the basic cigarette-lighter setup covers daily commute needs. If you park on the street or in a busy lot, the hardwire kit pays for itself the first time it catches a hit-and-run. The install itself is a single Saturday afternoon project, and the camera runs quietly in the background from that point forward.
Pick the 3M adhesive mount if you live anywhere with hot summers. Pick the suction cup if you lease the car or expect to move the camera between vehicles. Skip the rear camera cable extensions unless your vehicle truly needs one, since longer cables can introduce signal noise over distance.
Frequently Asked Questions
How long does the basic Rove R2-4K install take?
A basic cigarette-lighter install takes 30 to 60 minutes for most sedans and small SUVs. Larger vehicles with longer cable runs push that to about 75 minutes.
Do I need to hardwire for parking mode?
Yes. Parking mode requires constant 12V power, which the cigarette lighter cannot provide without draining your battery. The hardwire kit costs around $12 to $20 and adds about an hour to the install.
Is the rear camera cable long enough for an SUV?
The included rear cable is roughly 20 feet, which fits most SUVs comfortably but can come up short on three-row SUVs, vans, and trucks. If you run out, mount the rear camera slightly forward on the rear glass instead of stretching the cable.
Will the dash cam drain my car battery in parking mode?
No, not if the hardwire kit is installed correctly. The voltage cutoff module shuts the camera off when the battery drops to roughly 11.8V, which leaves enough cranking power to start the car.
Why won't the Rove app connect to the dash cam?
The most common cause is a phone still connected to your home or car Wi-Fi network. Forget other networks, connect directly to the dash cam's SSID shown on the screen, then re-enter the default password printed in the manual.
Can I mount the R2-4K outside the vehicle for better rear coverage?
Rove rates the rear camera for interior glass mounting only. Exterior mounting voids the warranty and exposes the cable connector to water intrusion.
Do I need to remove the dash cam in extreme cold?
No. The supercapacitor is rated down to roughly -4°F, and the camera handles cold starts better than lithium-battery models. If you park outside in places like Minnesota or Alaska, expect the first boot to take an extra second or two in deep cold.
Is the Rove R2-4K compatible with my older car?
Yes. The camera works on any vehicle with a 12V system, which covers virtually every gasoline car or truck sold in the US since the 1990s. Diesel vehicles with 24V systems require a step-down converter, but those are rare in passenger vehicles.
How do I download footage to my phone?
Open the Rove app while connected to the dash cam's Wi-Fi. Tap the file you want in the gallery, then hit download. The file saves to your phone's local storage and you can share or back it up from there.
Does the Rove R2-4K record audio inside the cabin?
Yes, by default. The built-in microphone picks up conversations and road noise. You can disable it in the camera menu if you drive passengers who prefer privacy, which matters for rideshare drivers.